 Buy Now →
 Mini Egg Blondies with White Chocolate Ganache

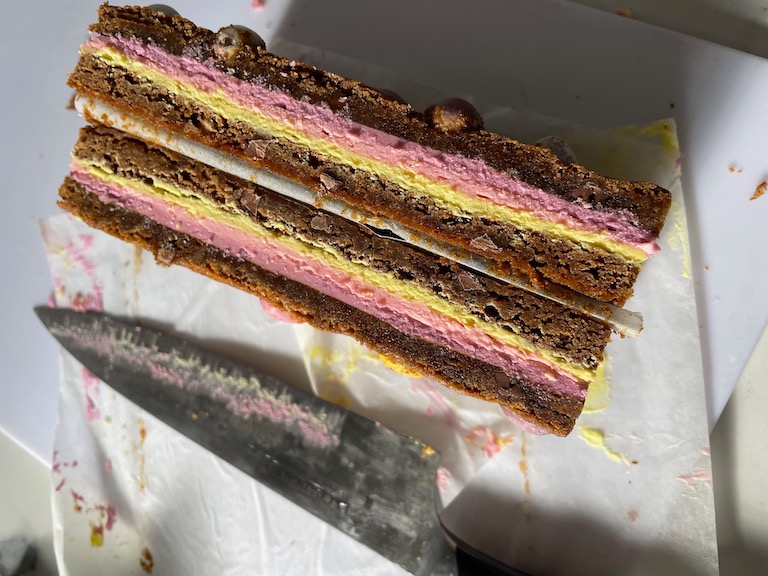
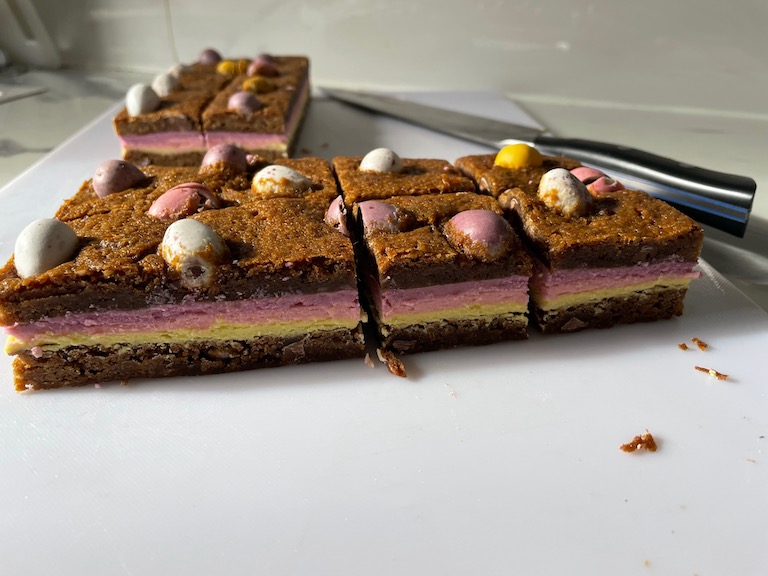
These sweet and simple blondies feature crushed mini eggs in a blondie base, with colorful layers of white chocolate ganache sandwiched in between. The perfect Easter treat!
- Prep Time: 1 hour, 20 minutes
- Chilling Time: 1 hour, 20 minutes
- Cook Time: 20 minutes
- Total Time: 3 hours (including chilling time)
- Yield: 16 4 cm / 1.5 in blondies 1x
- Category: Brownies and Traybakes
- Method: Oven + stovetop
- Cuisine: Desserts
Ingredients
Blondies:
113 grams unsalted butter, softened (1/2 cup / 1 stick)
1 egg
200 grams dark brown sugar (1 cup, packed)
2 tablespoons (40 grams) molasses, or black treacle
2 tablespoons milk
1/2 teaspoon vanilla bean paste
1/2 teaspoon salt
145 grams all purpose flour (1 1/8 cups)
1/2 teaspoon baking powder
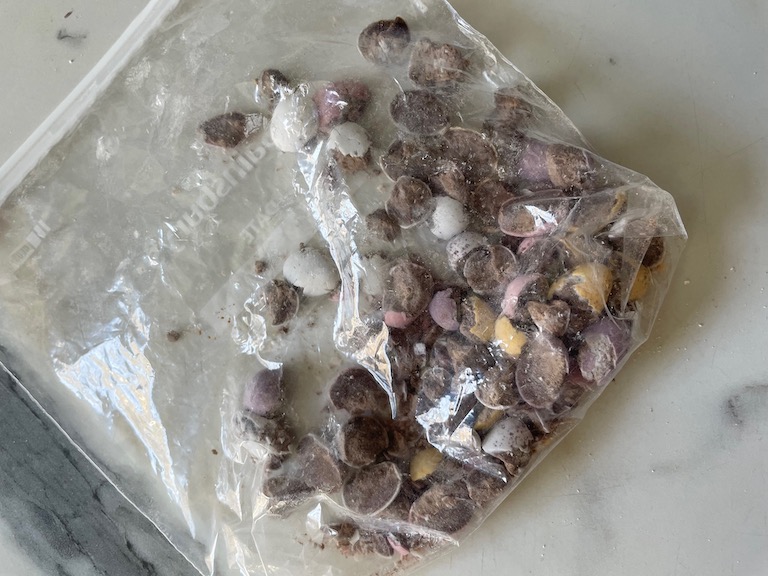
80 grams mini eggs (1/2 cup), crushed, plus more whole eggs for decorating
White Chocolate Ganache:
250 grams white chocolate callets (1 1/2 cups)
105 milliliters whipping cream (1/2 cup)
Gel food coloring (pink, yellow, and purple)
Instructions
Blondies:
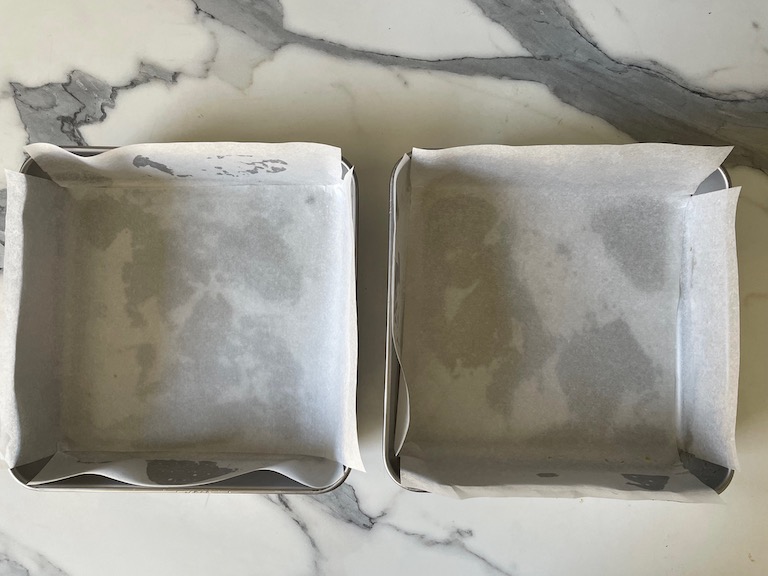
Preheat oven to 350° F / 175° C. Line two 8×8-inch / 20×20-centimeter square baking tins with parchment, allowing the parchment to hang 1″ past the edges of the tin. Spray lightly with cooking spray, and set aside.
Put mini eggs in a ziploc bag and use a kitchen mallet to crush. (Be sure to place a folded towel underneath the bag; you don’t want to damage the countertop!) Set aside.
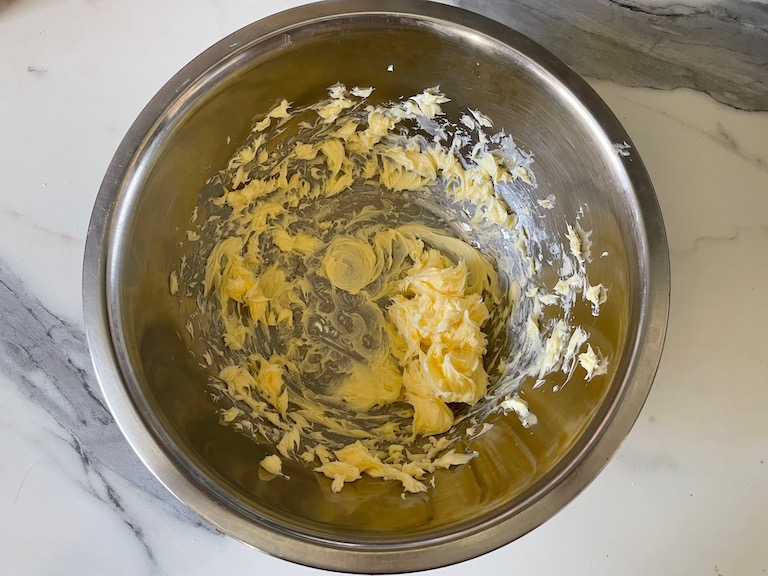
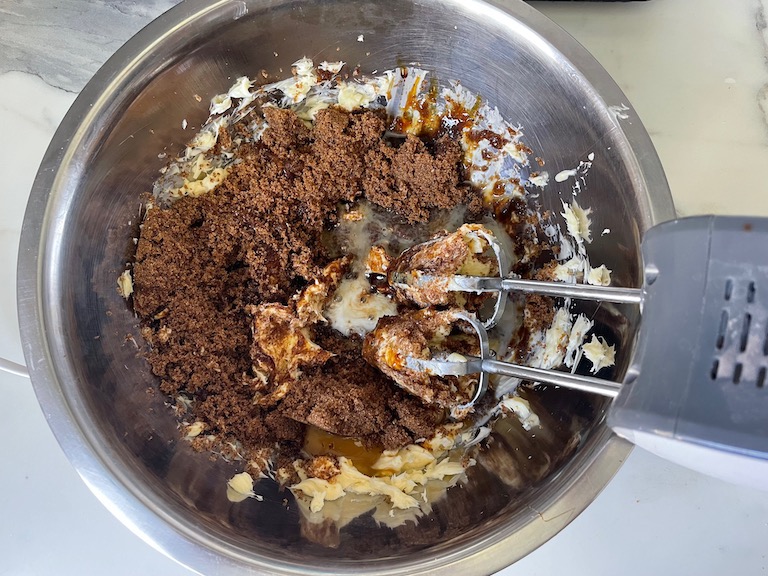
In a large mixing bowl or the bowl of a stand mixer, beat softened butter on medium-high speed until light and fluffy.
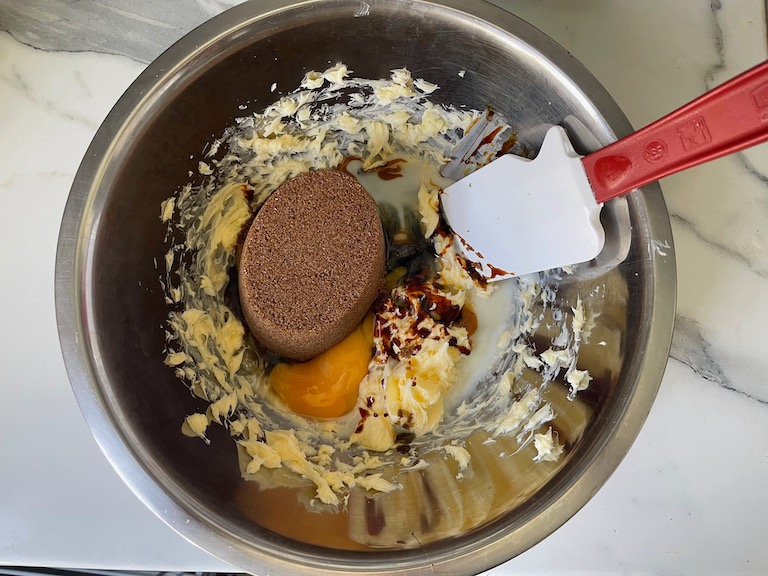
Beat in the egg, brown sugar, molasses, milk, vanilla bean paste, and salt, mixing until well combined.

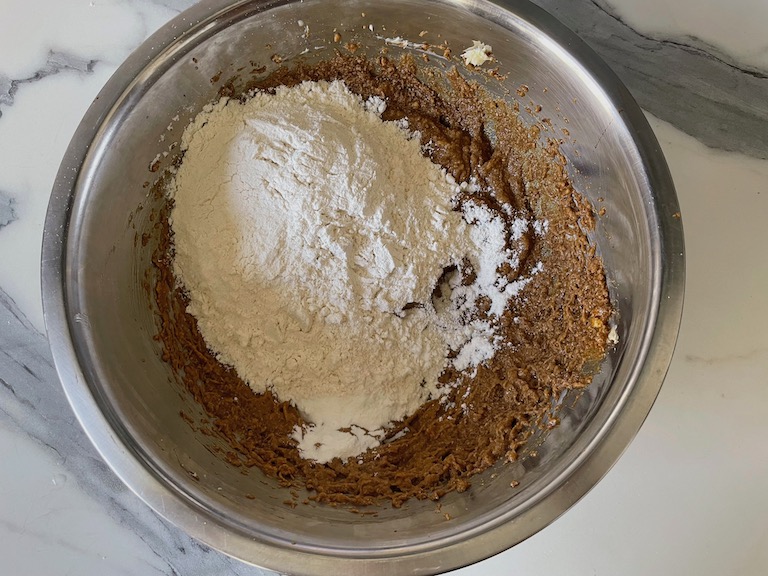
Add flour and baking powder to butter mixture, and mix until just combined.
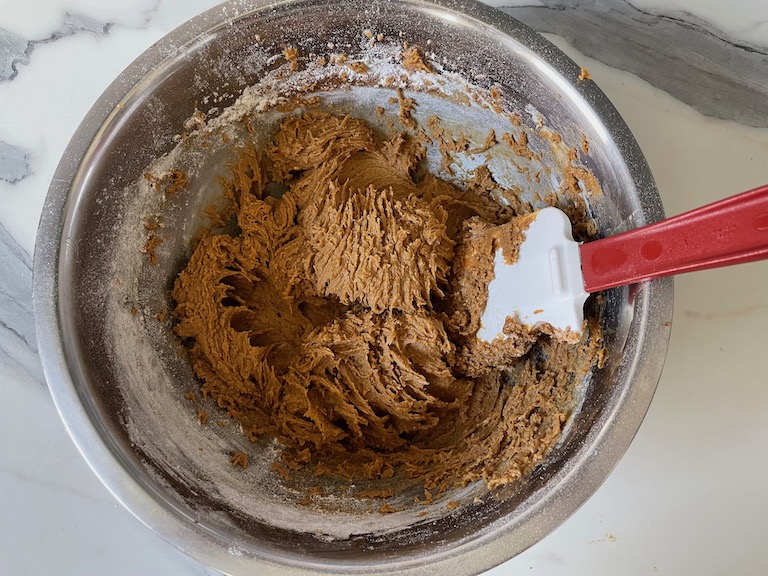
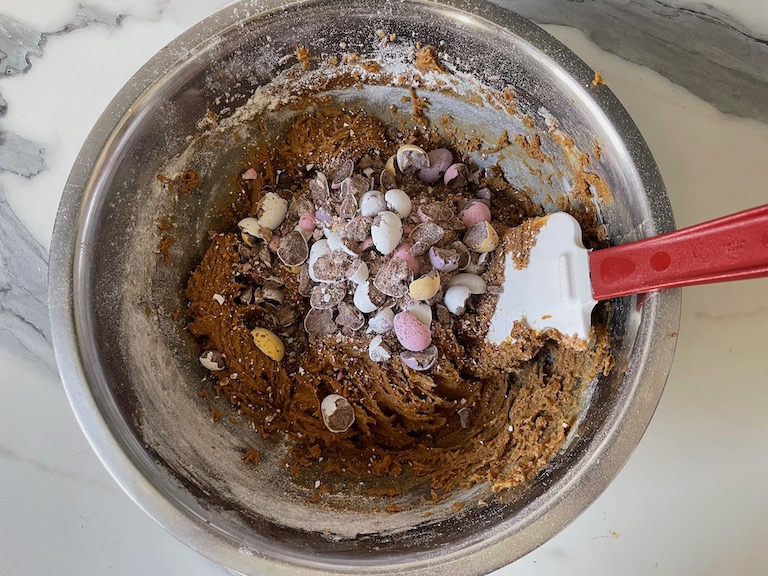
Stir in crushed mini eggs.
Weigh blondie batter into prepared tins, dividing equally between the two. Use a spatula or damp fingers to spread the mixture so it covers the bottom of each tin. (Batter will be somewhat thick.)
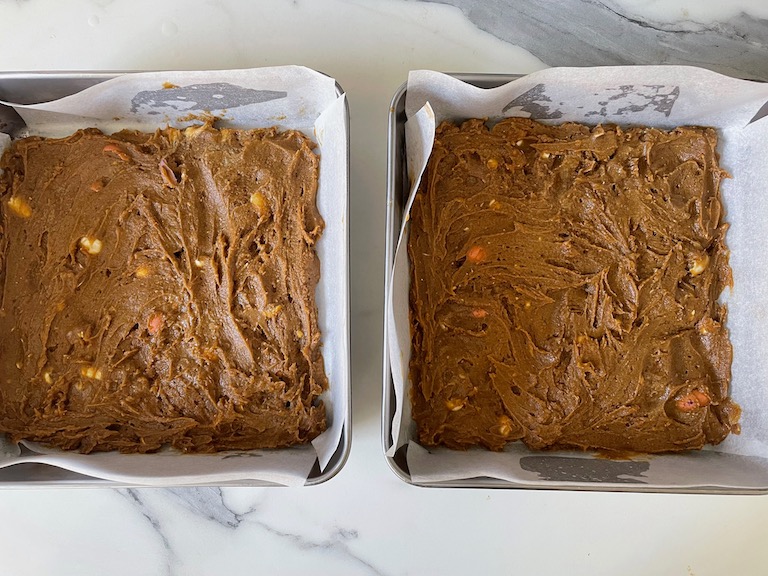
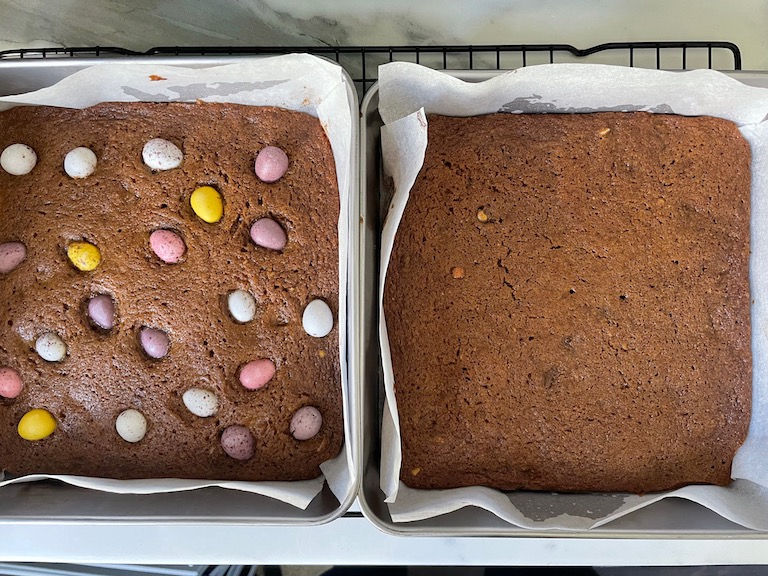
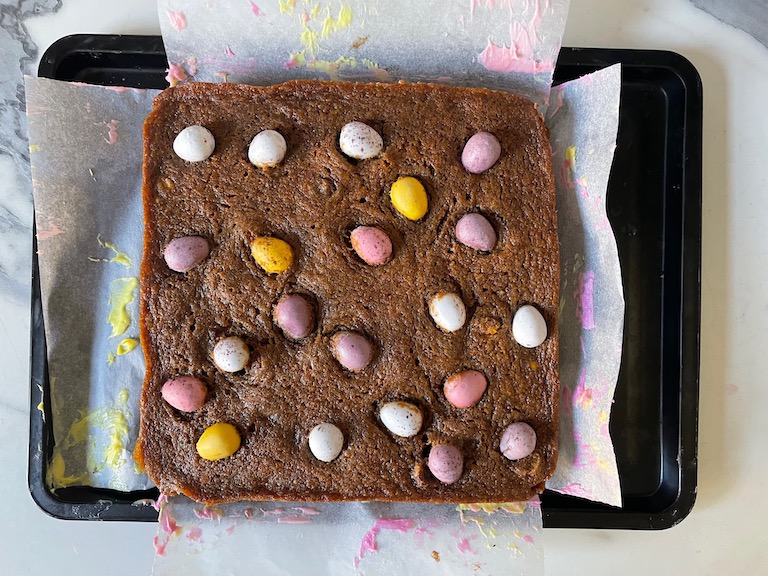
Press a few extra mini eggs into the top** of one tin only. (This will be the top portion of your blondie slab.) Bake for 20 minutes, or until a cake tester inserted in the center comes out clean. Remove tins from the oven and transfer to a wire rack to cool completely.
White Chocolate Ganache:
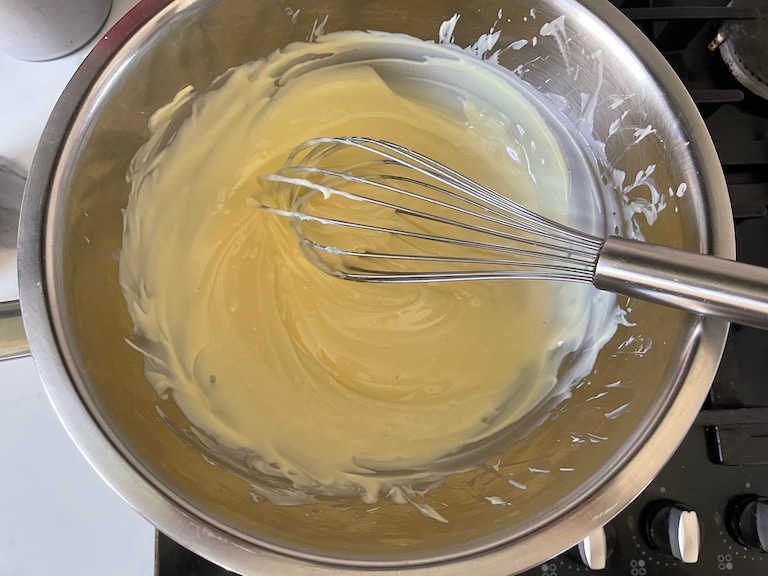
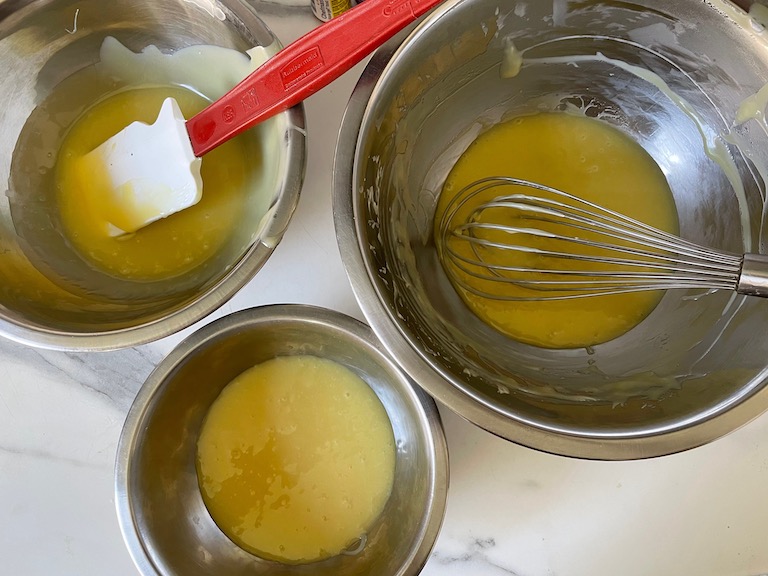
Melt white chocolate over a bain marie or double boiler. In a separate pan (I like to use a tiny saucepan), gently warm the cream. (Do not boil.) Whisk warmed cream into melted chocolate. Remove from heat.
Weigh mixture into three separate bowls, dividing equally between the three.
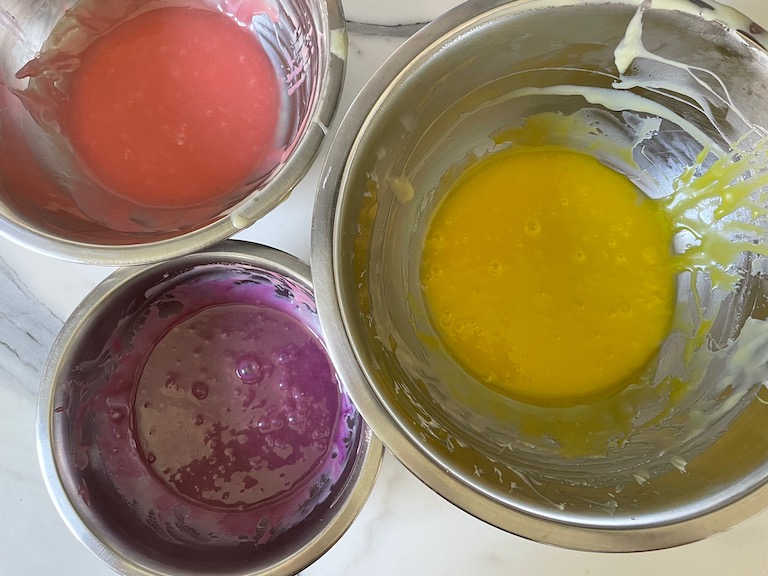
Add a drop of food coloring (yellow, pink, purple) to each, and stir gently until just combined.
Assembly:
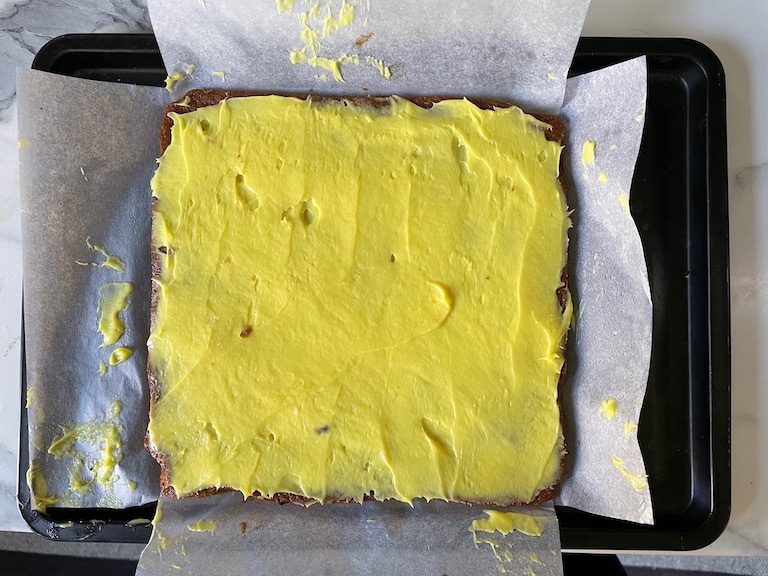
Carefully transfer the bottom blondie to a tray, using the edges of the parchment to lift it from the tin.
Beginning with the yellow chocolate, whisk vigorously* until the mixture thickens. It should be fluffy and spreadable, like cake frosting.

Use a spatula or small palette knife to spread the yellow ganache over the bottom blondie layer, making sure it is evenly distributed and covering the entire surface. Transfer tray to the refrigerator and chill until the ganache is firm. (This will not take very long, about 10 minutes.)

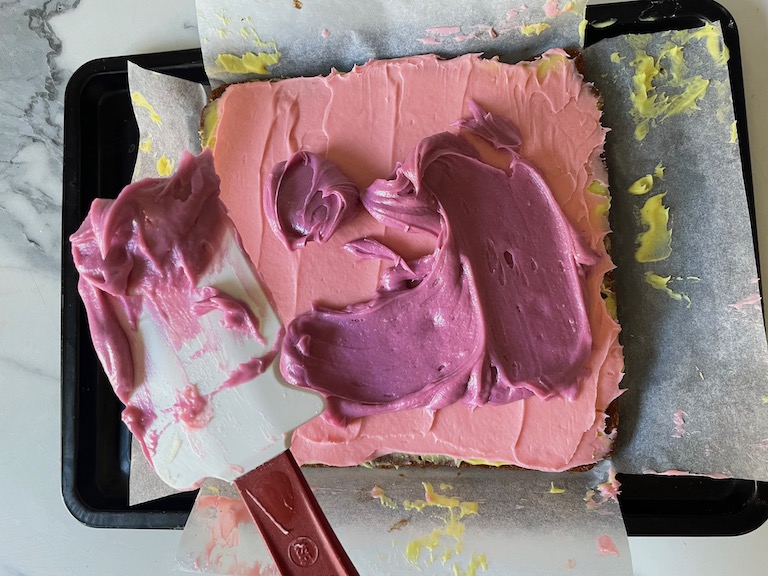
Once ganache is firm, remove tray from refrigerator. Repeat process with the pink ganache.
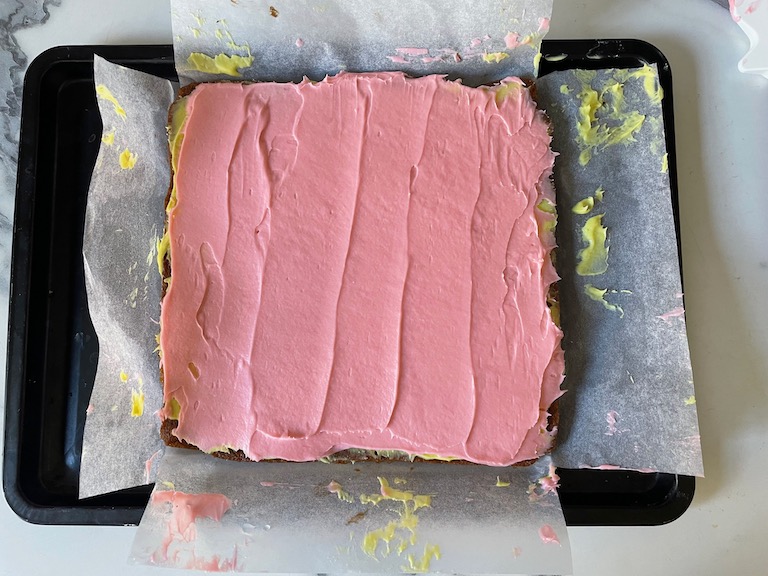
Once ganache is firm, remove tray from refrigerator. Repeat process with the purple ganache.

This time, instead of chilling, carefully remove the top blondie slab from its tin and place on top of the purple ganache. Very gently press down on the top of the blondie to secure it. Cover with clingfilm/plastic wrap and transfer to the refrigerator to chill, at least one hour or overnight.
Once thoroughly chilled, remove from refrigerator and transfer to a cutting board. With a very sharp chef’s knife, trim the edges so you have an even square. Cut in half and half again, cleaning your knife with a damp rag between each slice.
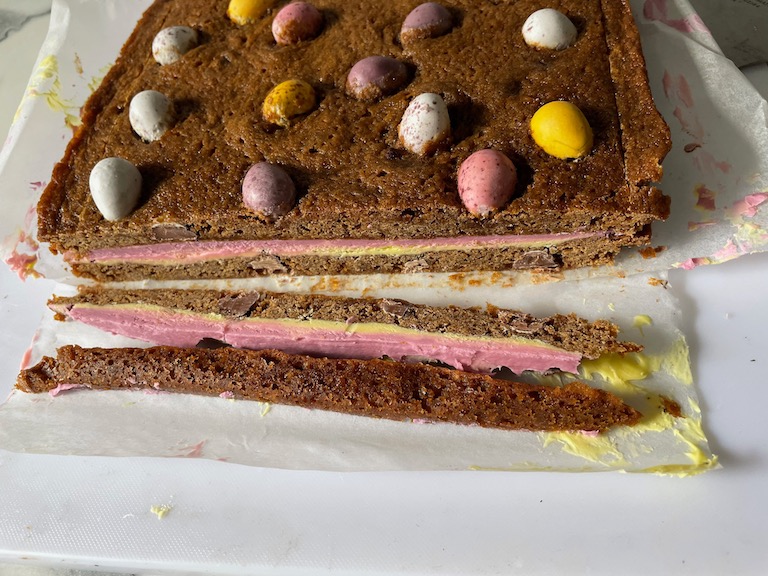
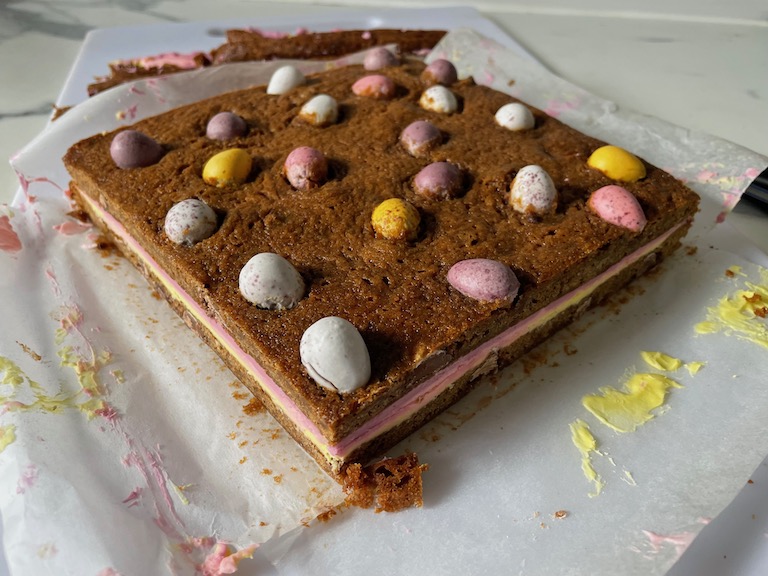
Once finished, you should have a total of sixteen 4-centimeter / 1 1/1-inch blondie squares.
Store blondies in an airtight container in the refrigerator for up to five days.


Notes
*Whisk the chocolate ganaches one at a time, just prior to use. Do not whisk until immediately before use or the ganache will thicken in the bowl.
**When placing the decorative mini eggs on top of the batter, allow a border of about 1″ around the edges. This will make trimming the slab easier.