Buy Now →
Homemade Ice Cream Cone Recipe
- Total TimeAbout 1 1/2 hours
- Yield6-8 7-inch cones 1x
An easy homemade ice cream cone recipe made with simple ingredients and a standard kitchen skillet.
Ingredients
Batter:
60 grams egg whites (whites of about 2 large eggs)
100 grams granulated sugar (1/2 cup)
120 milliliters whole milk (1/2 cup), plus more to adjust consistency
1/2 teaspoon vanilla bean paste
1/8 teaspoon fine sea salt
96 grams all purpose flour (3/4 cup)
45 grams unsalted butter (3 tablespoons), melted and cooled
Decoration:
60 grams milk, dark, or semisweet chocolate (2 ounces; 1/3 cup)
Rainbow sprinkles, rainbow nonpareils, chocolate sprinkles, or other toppings as desired
Instructions
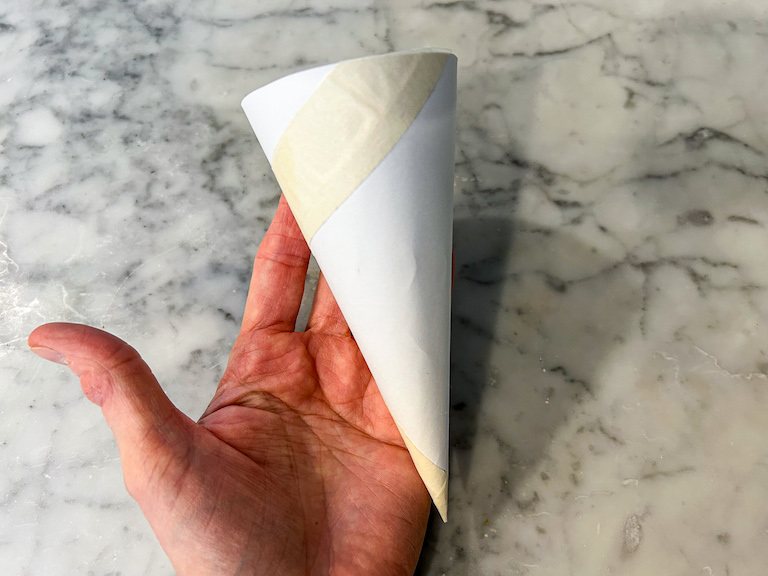
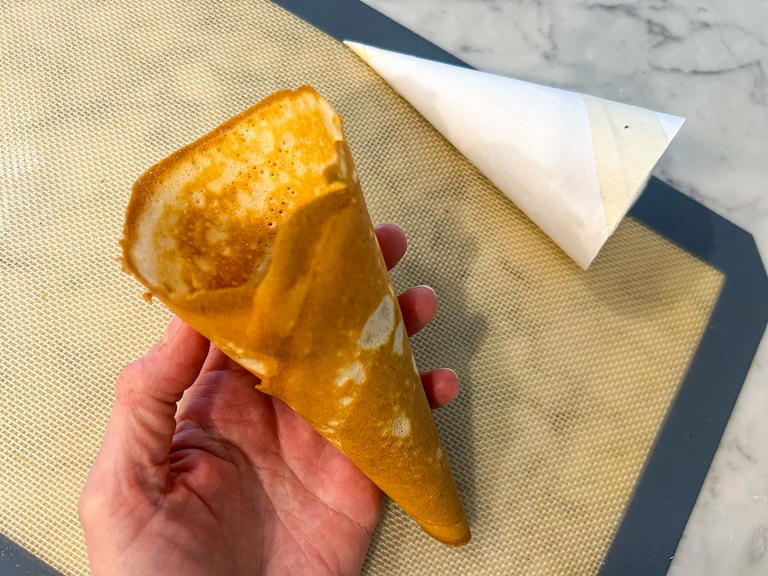
Create a cone template* out of lightweight cardboard or cardstock, or shape a cone from aluminum foil. Template should measure approximately 5-6 inches tall and about 2-2 1/2 inches wide. Set aside.
Cover countertop with a large silicone baking mat.
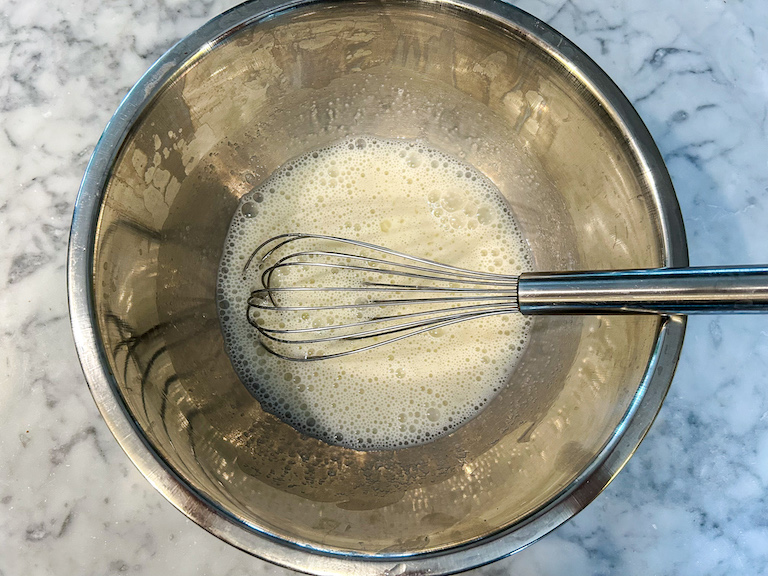
In a medium bowl, whisk together egg whites, granulated sugar, whole milk, vanilla bean paste, and fine sea salt until white and frothy.
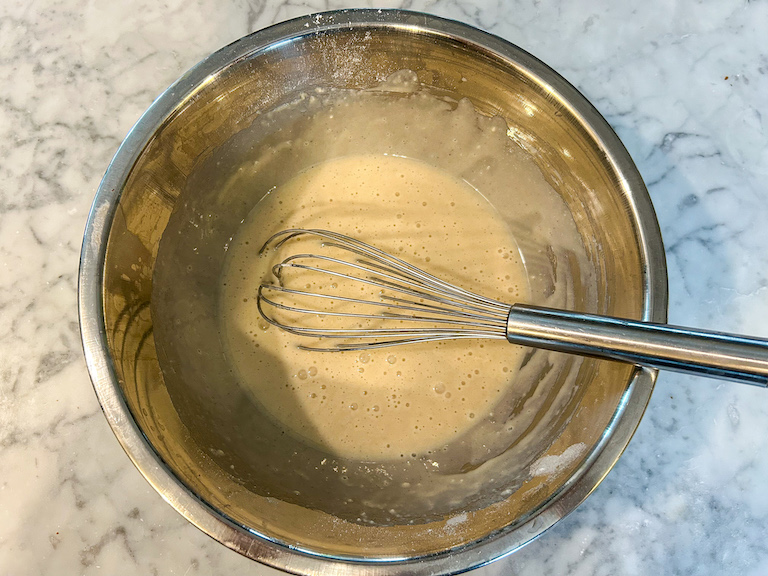
Add the all purpose flour and whisk until smooth and pastelike, with no dry spots or lumps remaining.
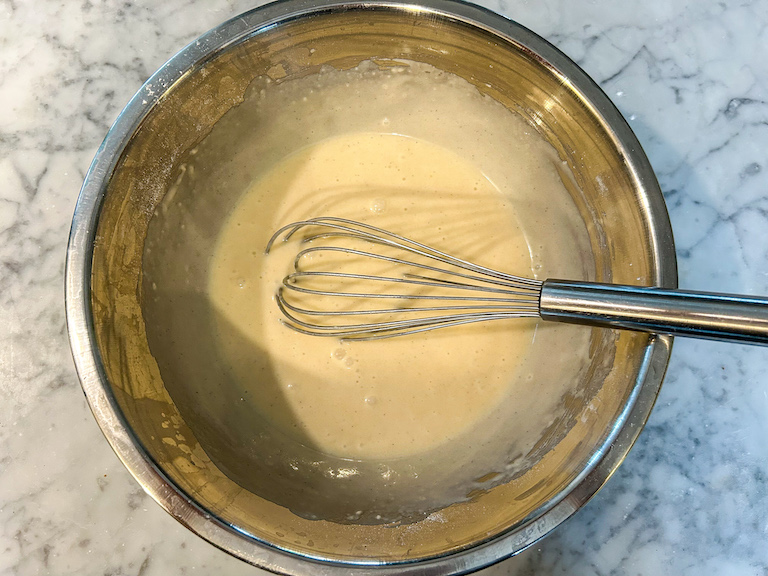
Drizzle in the melted butter and whisk until smooth. If necessary, add a bit more milk to adjust consistency. Batter should be thin enough to flow easily from the spoon or whisk.
Heat a 9- or 10-inch nonstick frying pan or skillet over medium-low heat. Add 3-4 tablespoons of batter, then use the pan’s handle to quickly “swirl” the batter into a disc, about 7-8 inches in diameter. (Avoid making the edges too thin, or they will burn.)
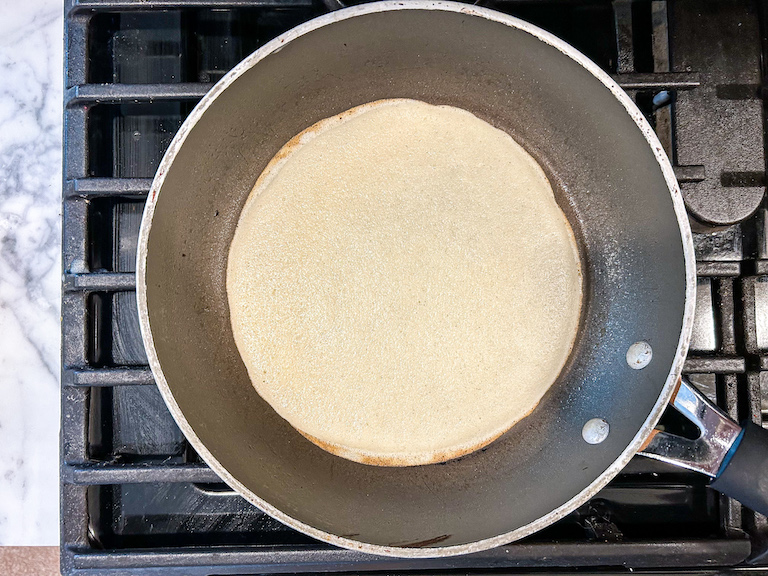
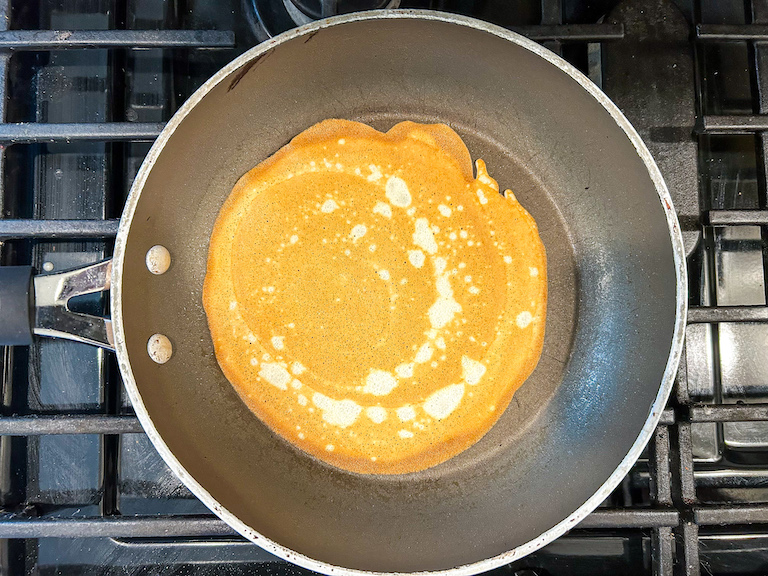
Cook for 3-4 minutes, or until underside turns golden brown and tiny bubbles form on the top. With a flat spatula, flip and cook until the other side is equally golden, about 1-2 minutes more. The disc will shrink slightly as it cooks.
With a flat spatula, lift disc from the griddle and transfer to prepared silicone mat. Working quickly, use your hands to shape the disc around the cone template. (Note: See post above for detailed, step-by-step instructions on shaping homemade cones.)
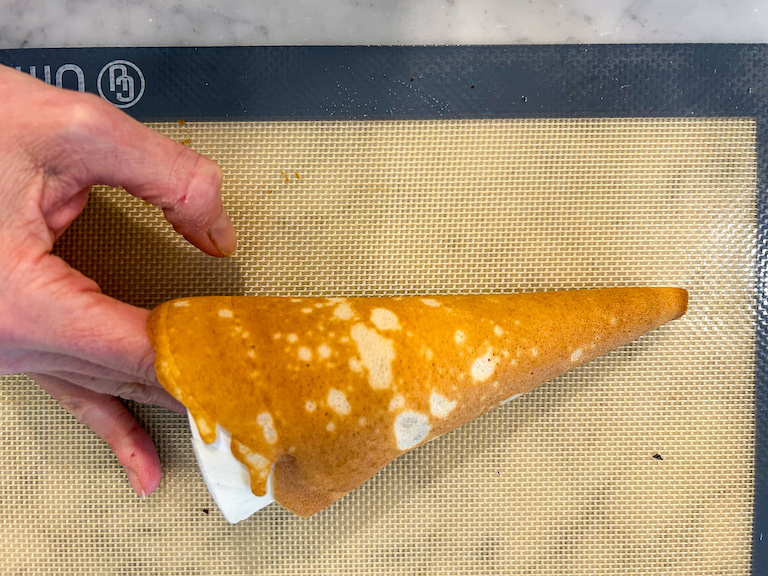
Pinch end to seal. Hold until set, about 15-30 seconds, then remove the template.
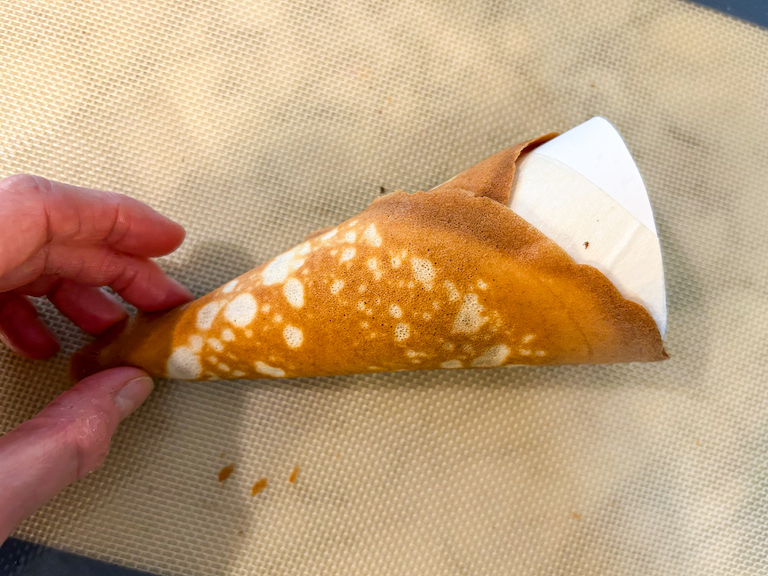
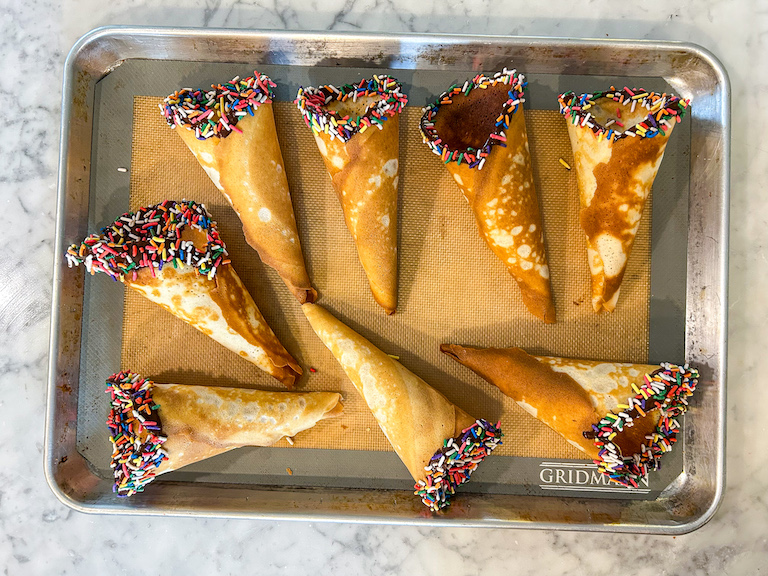
Place on a wire rack to cool. Repeat with remaining batter.

Decoration:
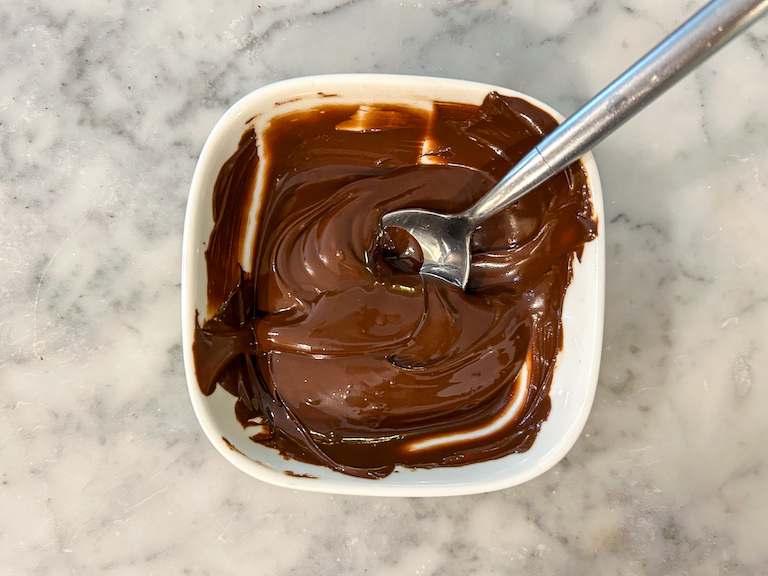
Place the chocolate in a microwave-safe bowl. Melt in 30-second increments, stirring occasionally, until completely melted.
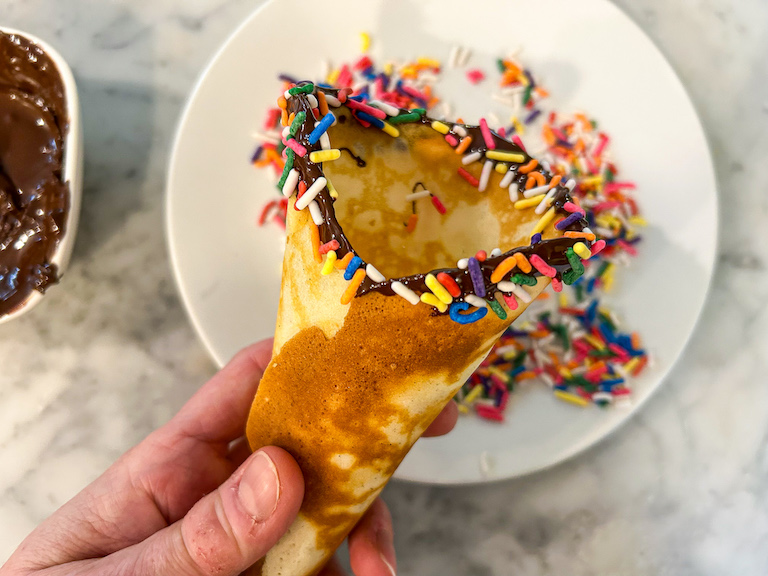
Dip the top edge of each cone in the melted chocolate. Dip or sprinkle with rainbow sprinkles.

Use immediately. Store leftover ice cream cones in an airtight container at room temperature for up to 3 days.


Notes
*See post above to learn more about making the cone template.
- Category: Miscellaneous
- Method: Stovetop
Find it online: https://bastecutfold.com/homemade-ice-cream-cone-recipe/