 Buy Now →
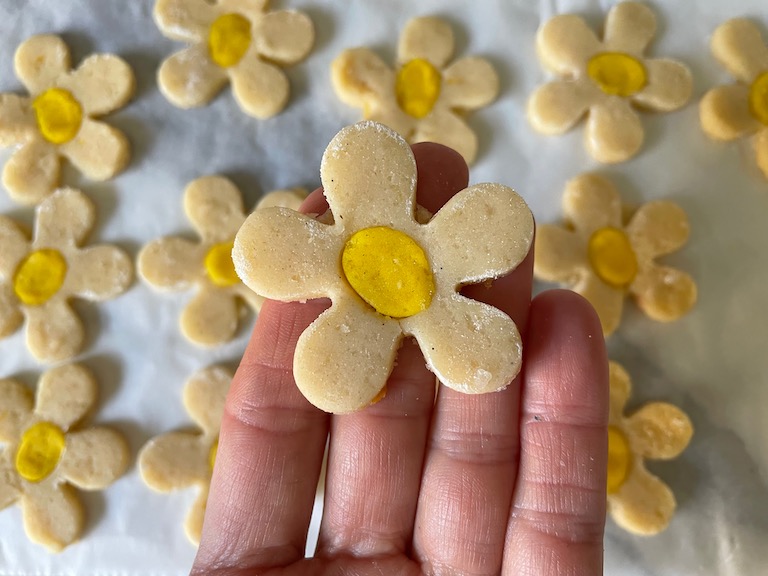
Lemon Daisy Slice and Bake Cookies
- Total Time4 hours, 40 minutes (including chilling time)
- Yield16-18 (7 cm / 2.75-inch) cookies 1x
These cheerful lemon daisy slice and bake cookies feature a sunny yellow sugar cookie dough, plus a fun daisy surprise in the middle!
Ingredients
230 grams all purpose flour (1 3/4 cup), plus one additional tablespoon, reserved
1/2 teaspoon baking powder
1/4 teaspoon salt
113 grams unsalted butter, softened (1/2 cup / 1 stick)
120 grams caster sugar (2/3 cup)
1 egg
Zest of one lemon
15 grams (1 tablespoon) lemon juice
1/2 teaspoon vanilla bean paste
1/4 teaspoon lemon oil
Yellow gel food coloring
Demerara sugar, for rolling
Instructions
Line a half-sheet rimmed tray with a silicone baking mat. Line a second baking sheet, or a large plate, with baking parchment. Set both aside until ready to use.
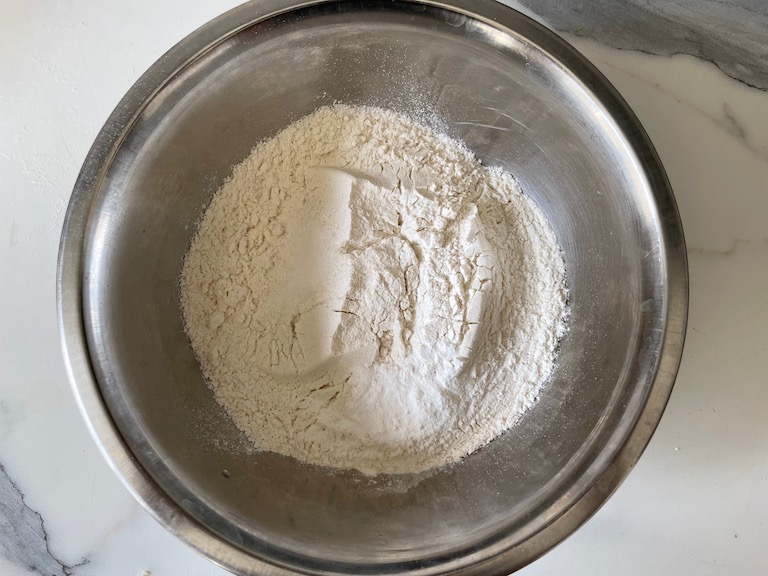
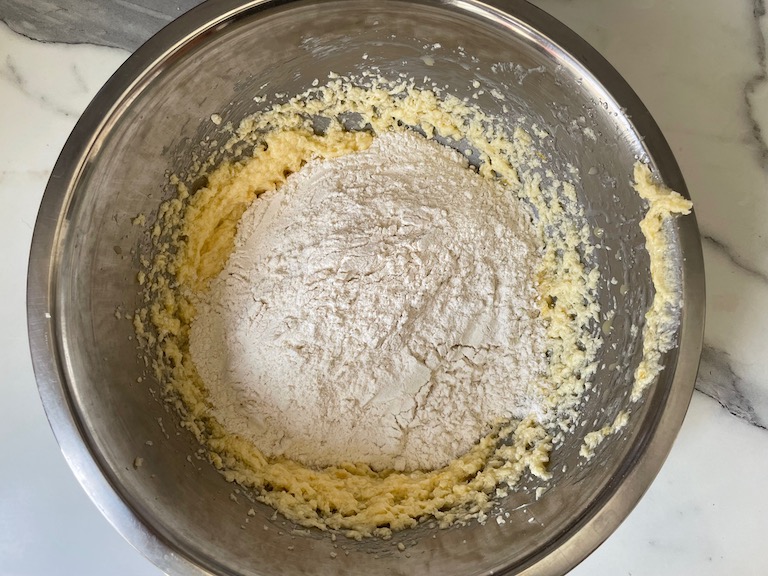
In a large mixing bowl, whisk flour, baking powder, and salt. Set aside.
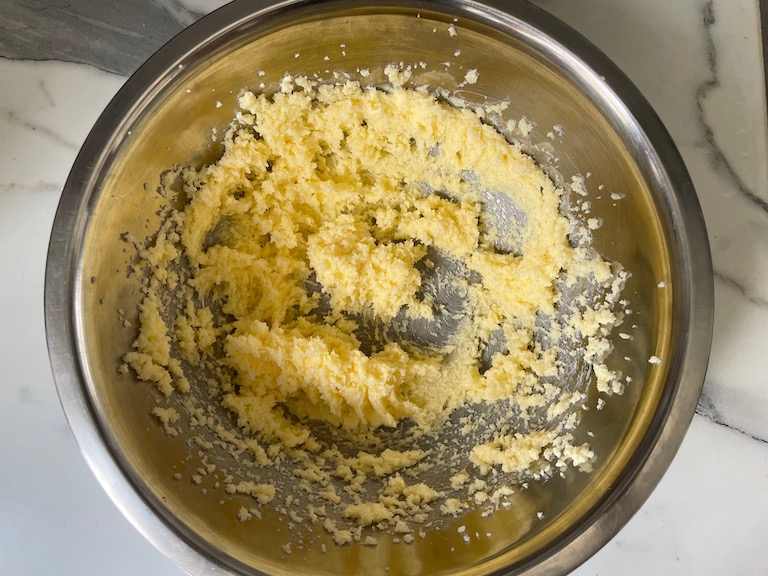
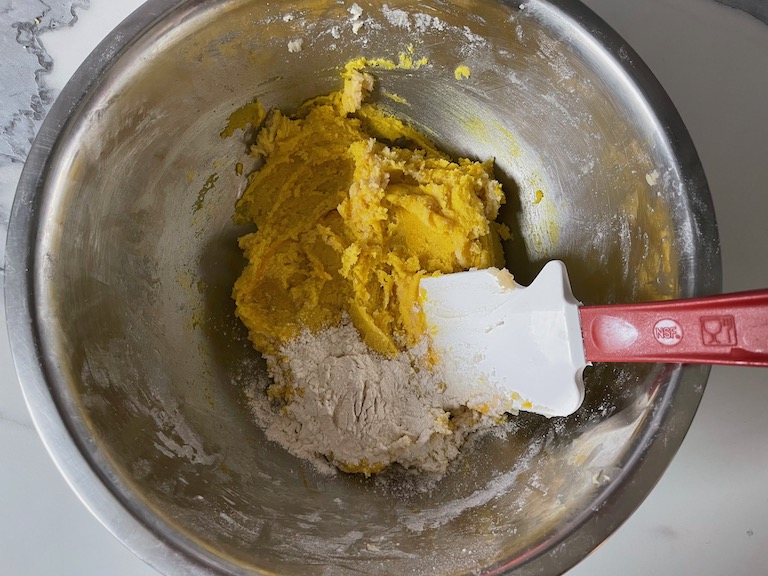
In a separate bowl or the bowl of a stand mixer, add butter and sugar and whip on high speed until light and fluffy.
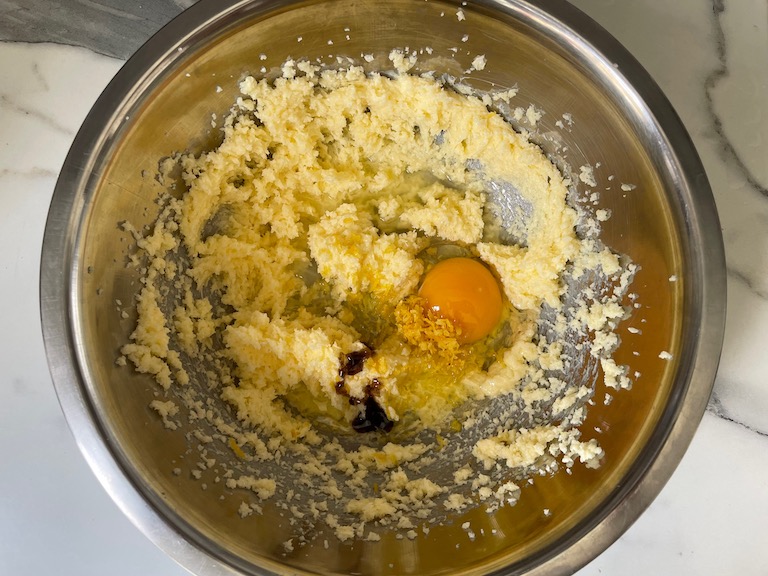
Beat in the egg, followed by the lemon zest, lemon juice, vanilla bean paste, and lemon oil.
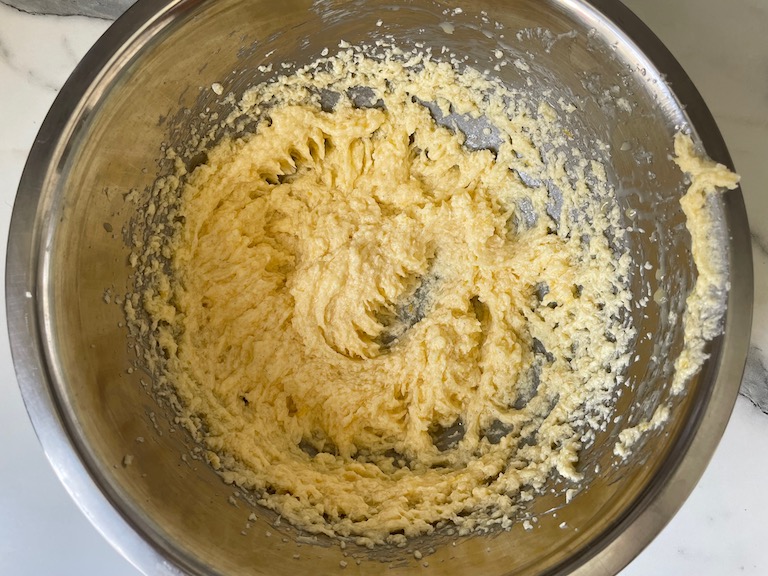
Add dry ingredients and mix until just barely combined. Do not overmix.
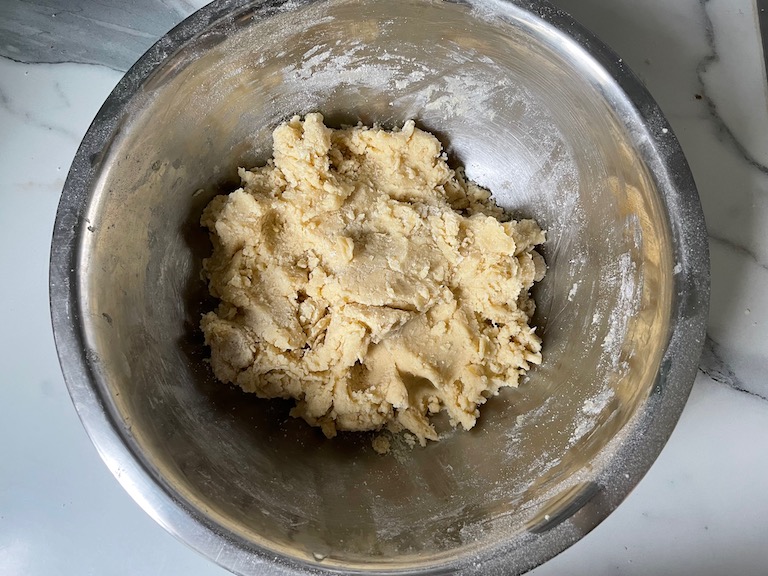
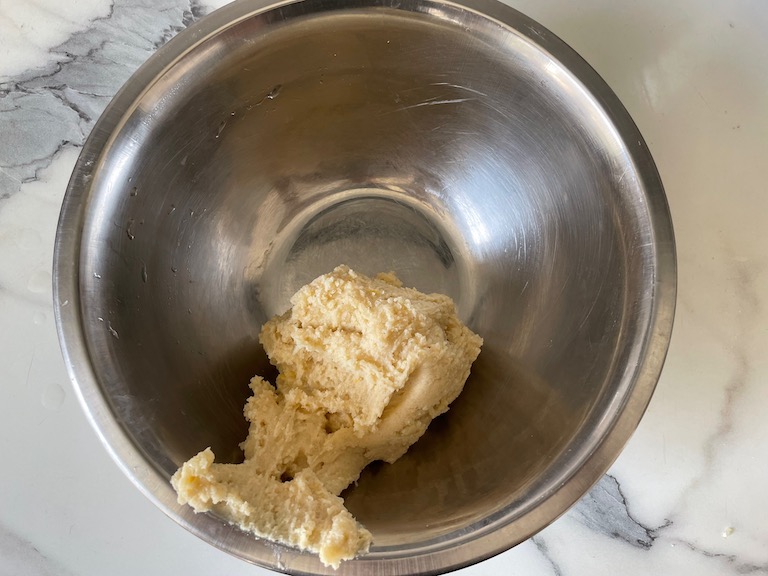
Remove about one-third of the dough. Set aside.
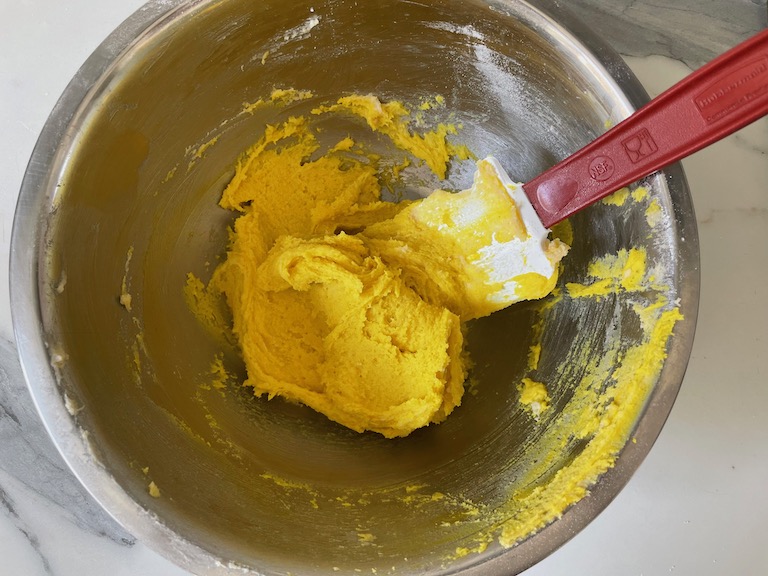
Add yellow gel food coloring to the remaining dough, continuing to add 1-2 drops at a time until you reach the desired shade. If the mixture seems sticky, add the reserved tablespoon of flour to the dough.
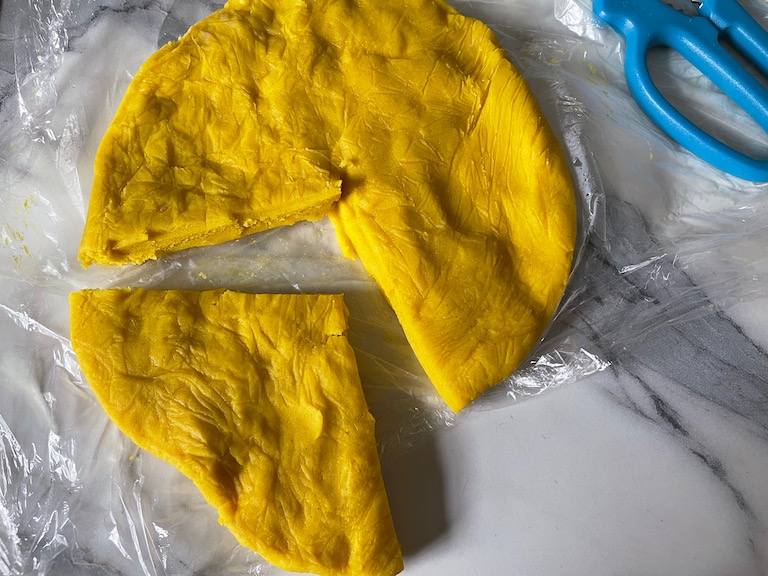
Flatten each dough into a disc. Wrap in clingfilm/plastic wrap and refrigerate for at least one hour, or until firm.

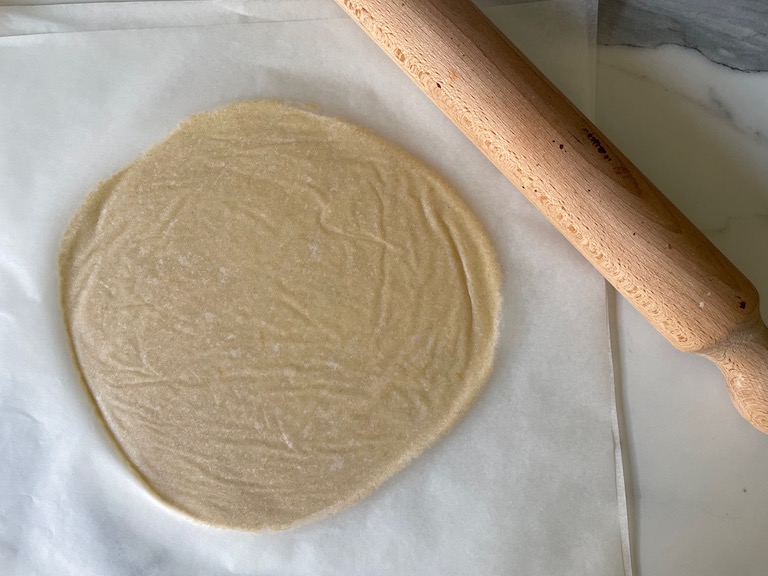
Remove the white dough from the refrigerator. Unwrap and place between two sheets of parchment. Roll to 1/4-inch thickness.* Refrigerate while you roll the yellow dough.
Remove about a quarter of the yellow dough. Re-wrap the rest in clingfilm/plastic wrap and return it to the fridge.
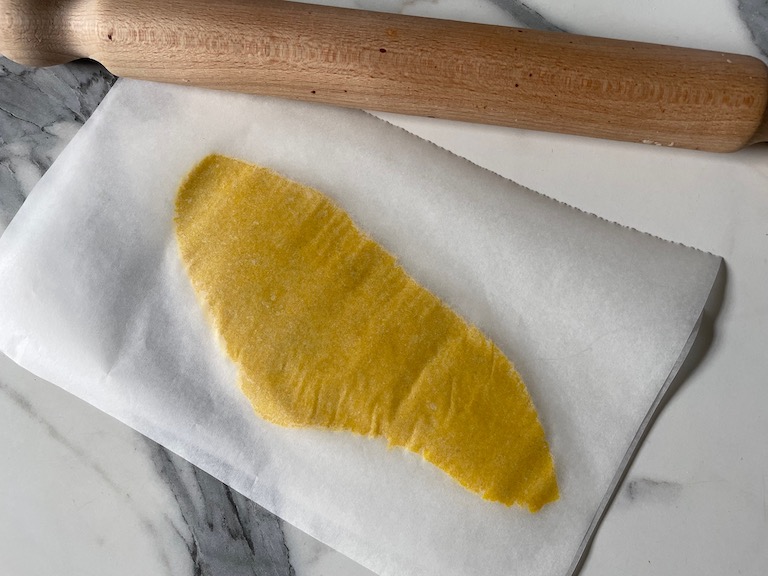
Roll the quarter of yellow dough between sheets of parchment to 1/4-inch thickness. Carefully lift the parchment and return the rolled dough to the refrigerator for at least 15 minutes, or until firm. (To speed up the process, you can pop the rolled dough in the freezer for 5 minutes instead.)
Remove white dough from the refrigerator. Peel away the top sheet of parchment and use a flower cutter (see post above for cutter shap and size suggestions) to cut the dough into flowers. Place flowers on prepared plate and refrigerate until ready to use.
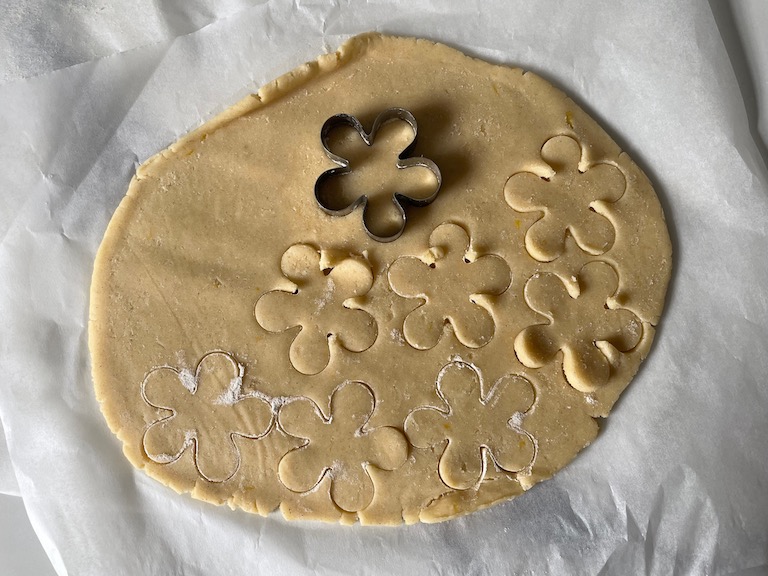
Re-roll the scraps of white dough between fresh sheets of parchment, and cut additional flower pieces. Continue this process until you have used all of the white dough, chilling periodically if the dough becomes too soft.** Refrigerate flowers until ready to use.

Remove the rolled portion of yellow dough from the refrigerator and cut discs with the smaller cutter. These will be the centers of your daisies. You’ll need the same number of yellow circles as you have flowers (I had 25). Return any leftover yellow dough to the refrigerator.
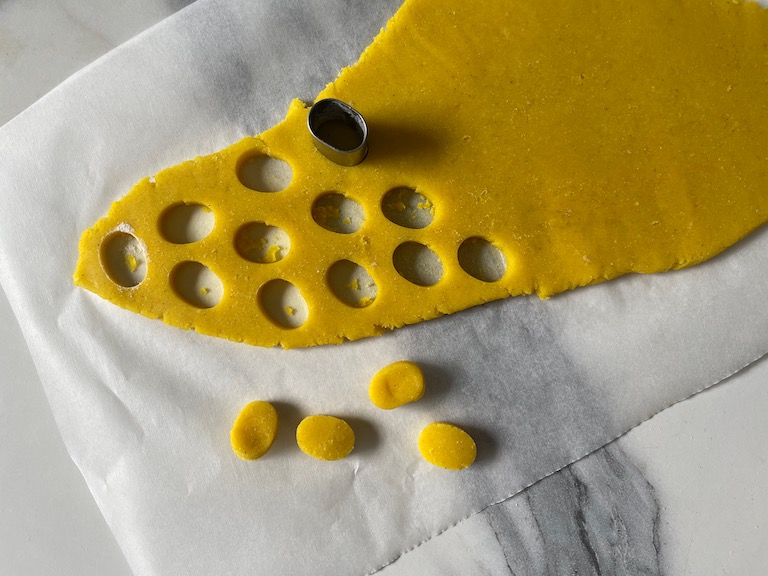
Add yellow discs to the parchment-lined plate and refrigerate 10 minutes, or until firm to the touch. Once all pieces are cold and firm (they should not bend when you pick them up) you are ready to assemble the flowers.
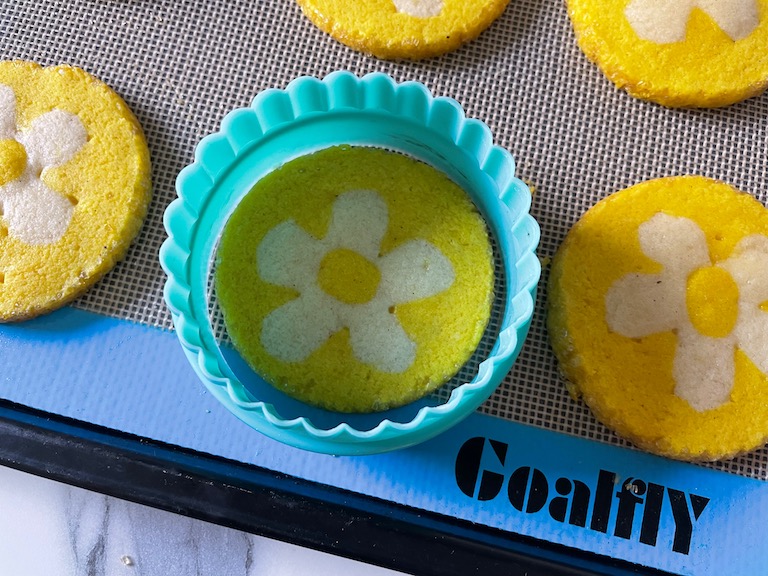
To start, use the small round cutter to cut a circle in the middle of each flower, then place a yellow disc in each hole.
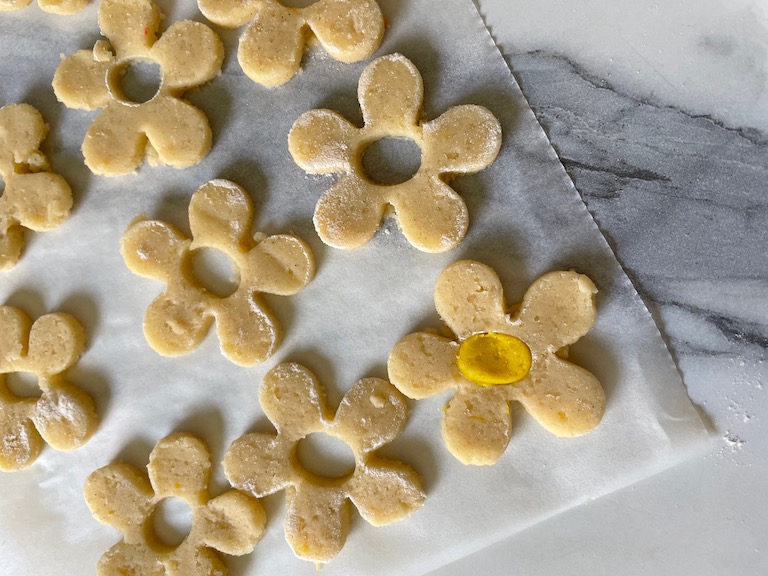
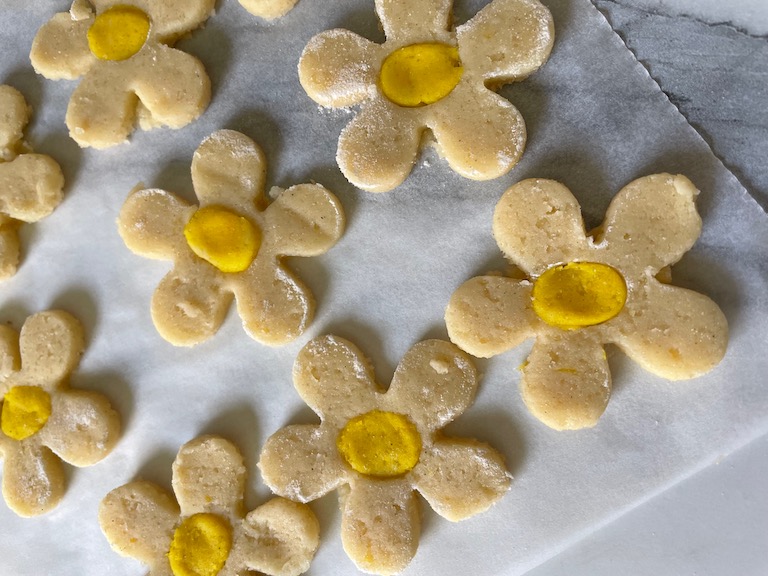
Next, stack the assembled flowers on top of each other, making sure the petals line up. Press down gently on the top of the stack. (You want to press firmly enough to adhere the pieces to one another, but not so firmly that they squish or lose their shape.)
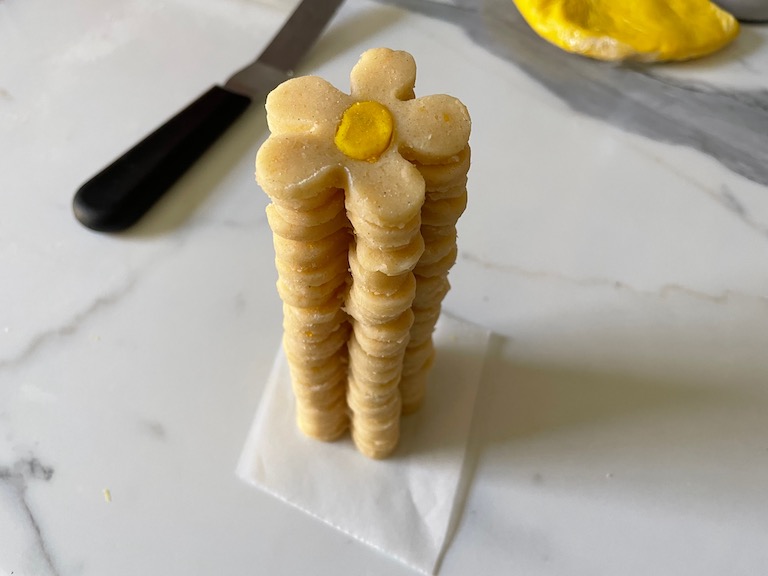
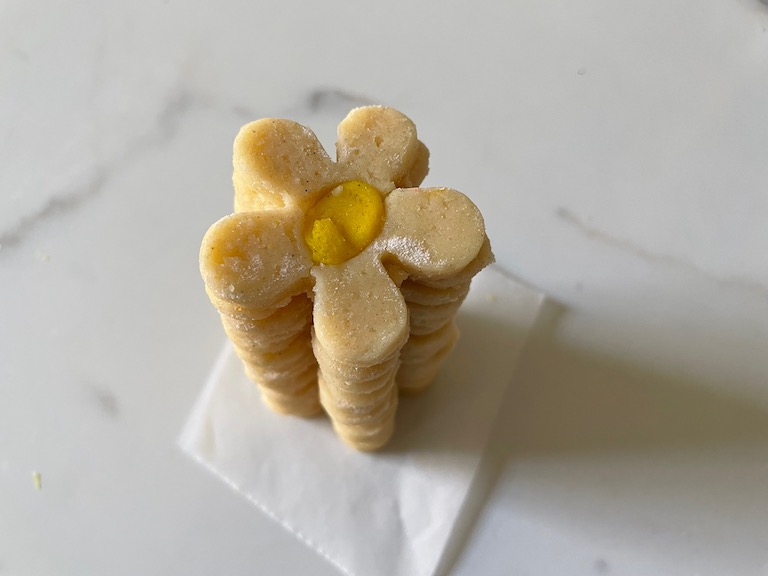
Wrap stack in clingfilm/plastic wrap or parchment (or place on a parchment-lined tray) and freeze for at least 15 minutes, or until very cold and solid. Meanwhile, remove all remaining yellow dough from the refrigerator and allow it to soften slightly.
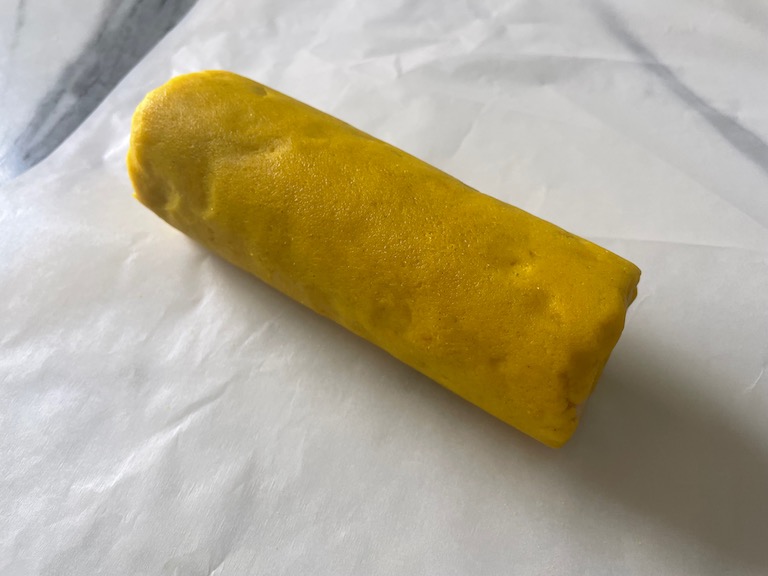
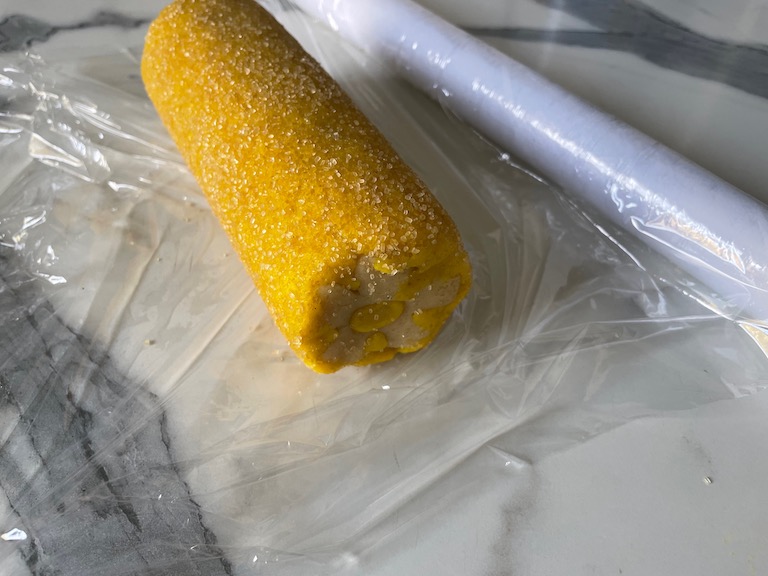
Remove flower stack from freezer. Pack yellow dough around the stack, making sure you fit it into all of the open spaces. Use a chopstick*** to push the yellow dough into all cracks and crevasses. (If you don’t do this carefully, there may be small gaps or holes in your finished cookies).
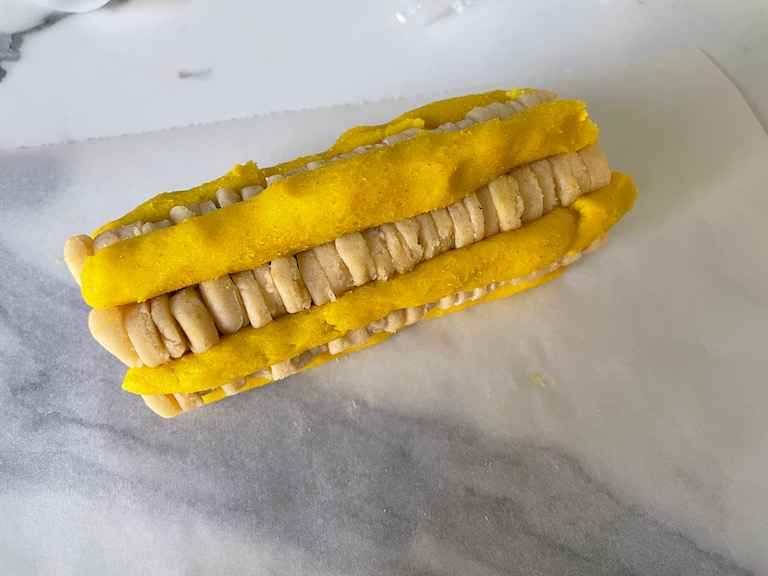
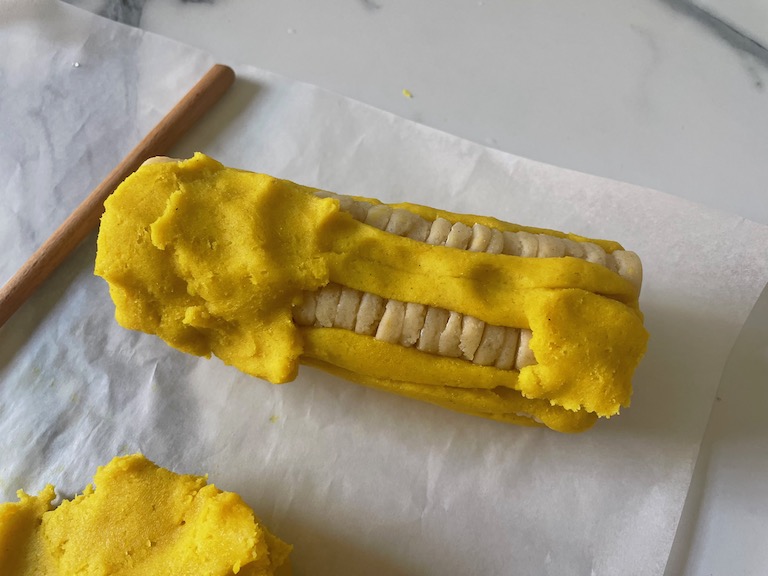
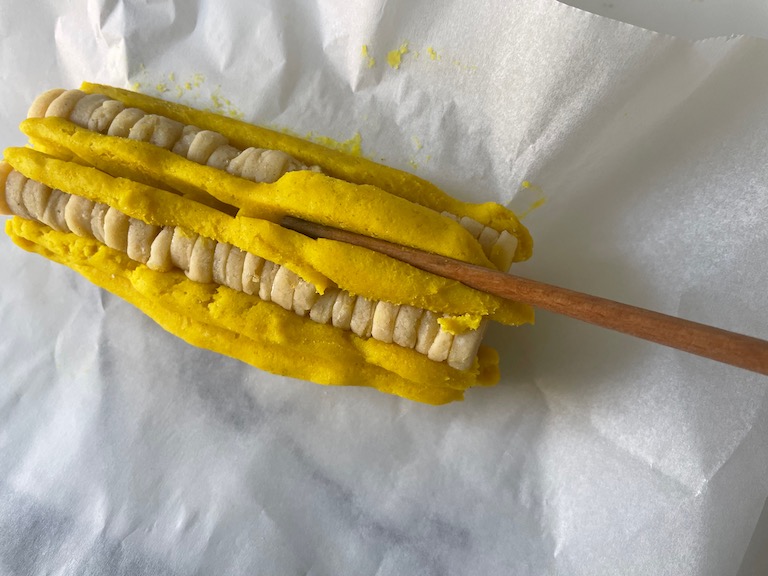
Continue packing yellow dough around the log. Use all of the yellow dough and make sure the white is completely hidden, aside from the ends of the log.
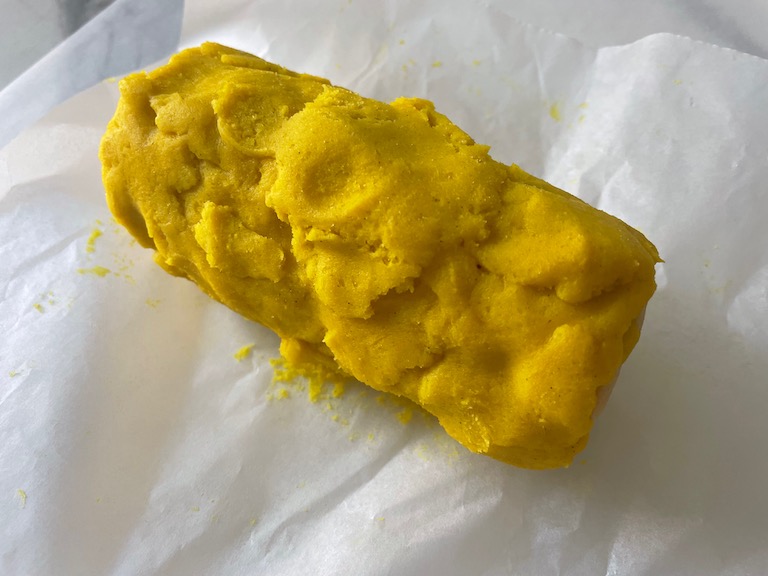
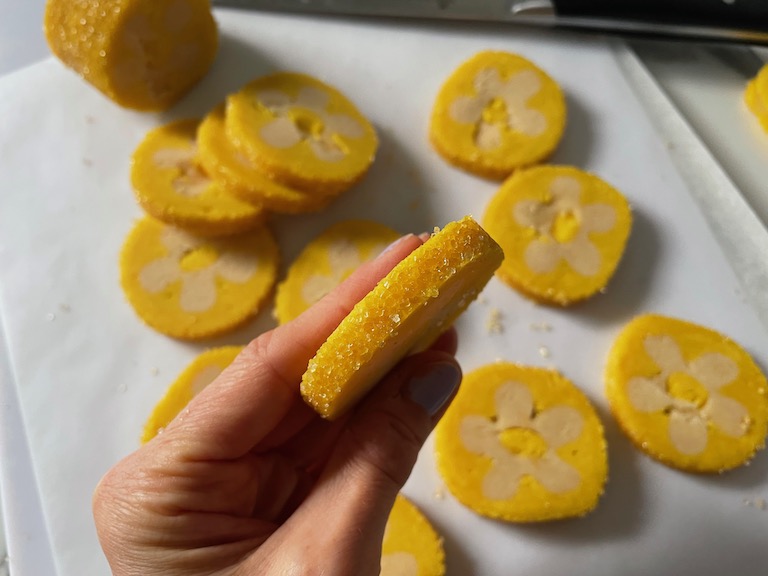
Gently roll log across the countertop, smoothing the yellow dough and lengthening slightly in the process. The smooth, finished log should be approximately 6 inches (15 centimeters) in length.
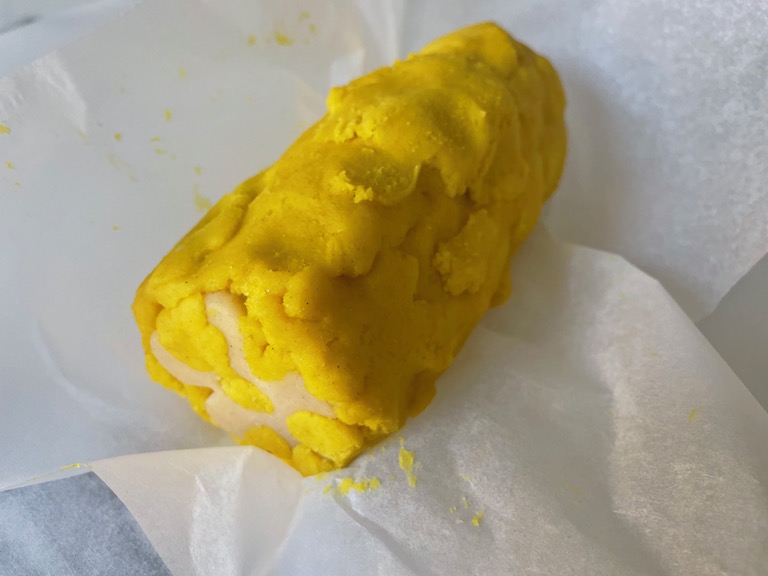
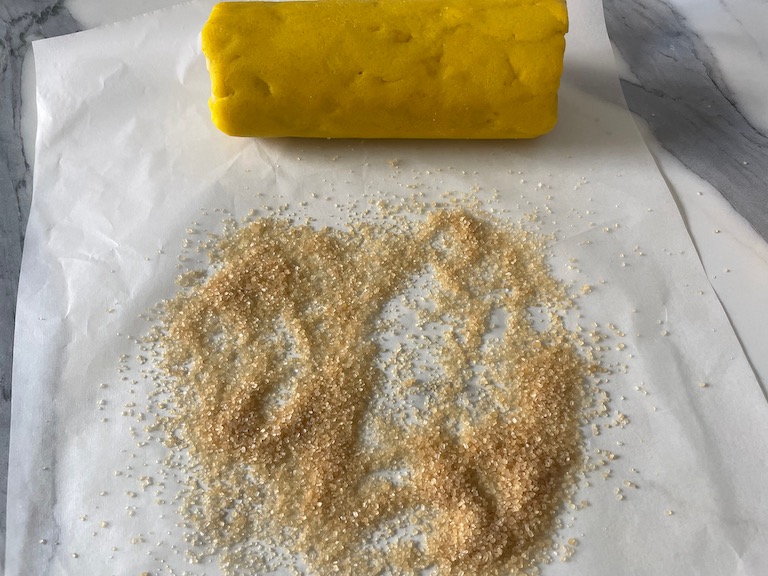
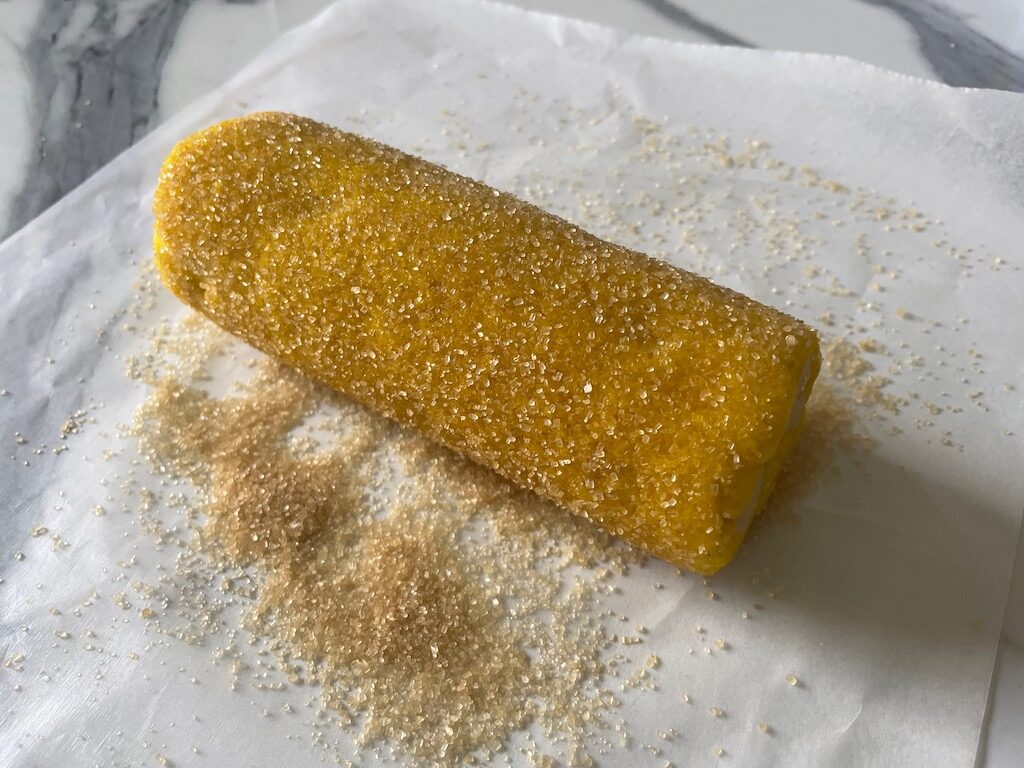
Once smooth, roll the log in Demerara sugar to coat.
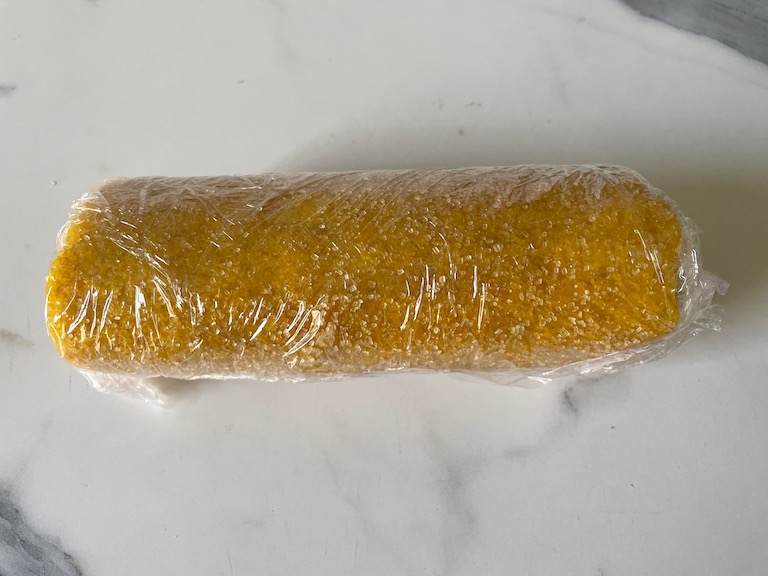
Wrap log in clingfilm/plastic wrap and freeze for at least one hour, or overnight.
To bake, remove log from the freezer and unwrap. Place on a cutting board. With a sharp chef’s knife, trim the ends and discard.
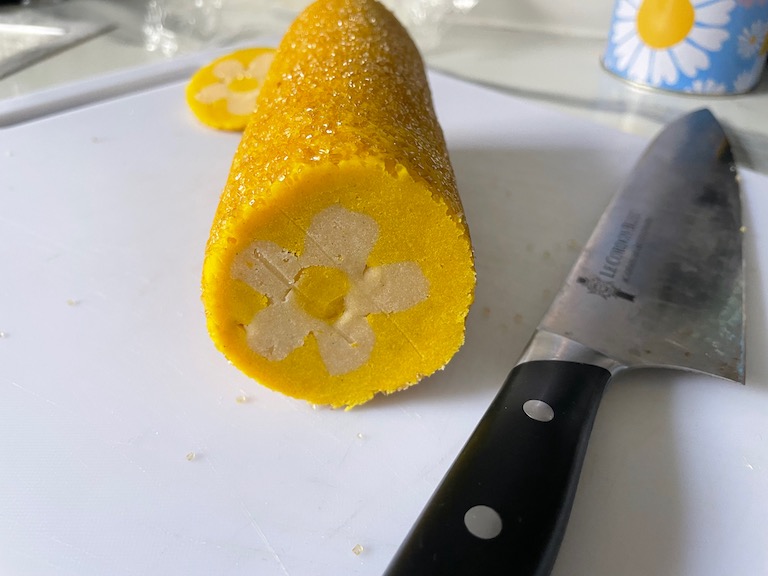
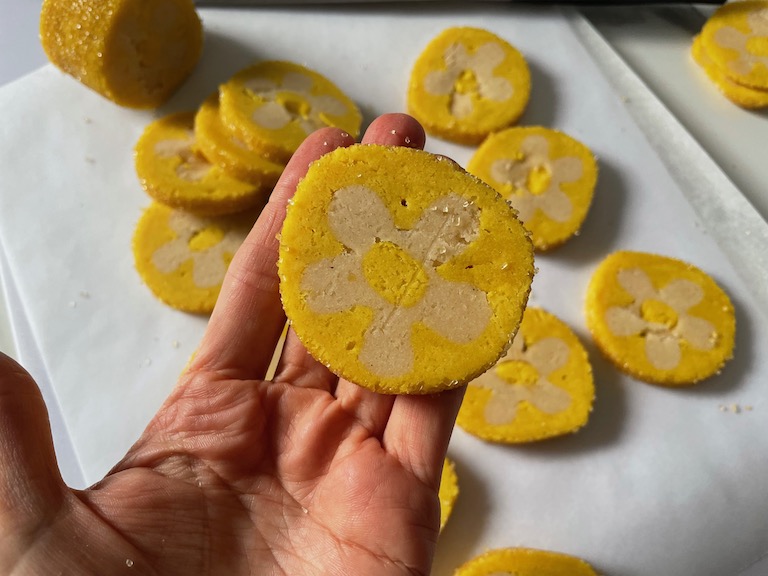
With a sharp chef’s knife, slice log into 1/4-inch thick slices. You should have approximately 16 -18 slices total.
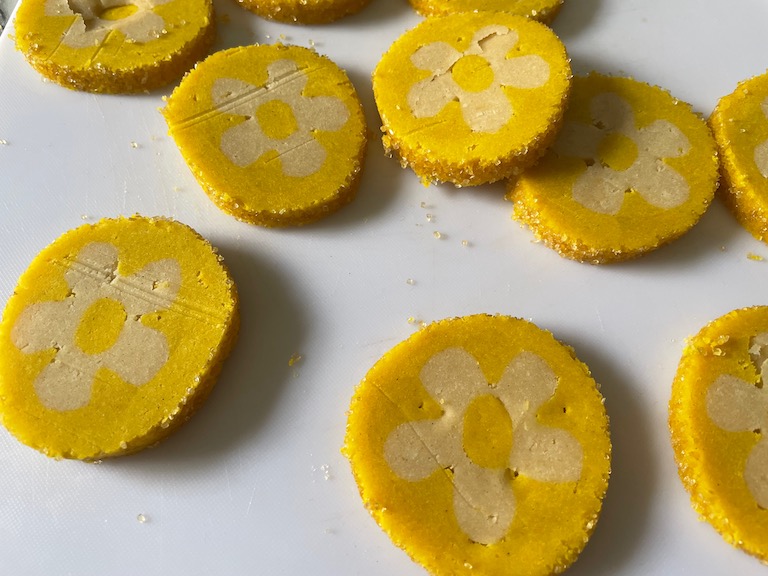
If you notice small cracks or gaps in the dough (there will probably be a few!) simply use your fingertips to gently smooth these over; this will make for a prettier finished product.
Stack cookies between small squares of parchment and freeze for 15 minutes. (Alternately, if you have a large freezer you can place your cookies directly on the prepared baking tray and place the tray in the freezer. Once frozen, transfer the tray directly to the oven to bake.) Do not skip the freezing step, or cookies may spread too much as they bake.

Meanwhile, preheat oven to 325° F / 165° C.
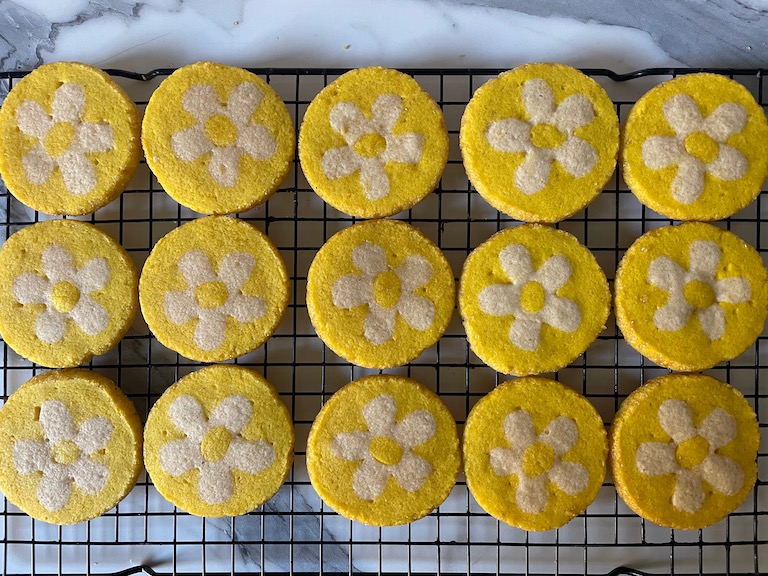
Place chilled slices on prepared tray, allowing 1-2 inches in between the slices. Bake for 12 -14 minutes or until cookies appear matte rather than glossy or doughy. They should not be more than very lightly brown around the edges.
Remove from oven and use a round cutter to gently reshape the cookies. (This is entirely optional, but will make your finished cookies rounder and more uniform in appearance!)
Allow cookies to cool for a few minutes on the baking tray, then transfer to a wire rack to cool completely.
Store lemon daisy cookies in an airtight container at room temperature for up to five days, or layer between sheets of parchment and freeze in an airtight container for up to three months.


Notes
*Don’t roll your dough too thin. 1/4-inch is perfect, but slightly thicker than that is fine, too.
**When in doubt, chill! During cutting and assembly, you might notice your dough becoming soft or sticky. If this happens, return it to the refrigerator or freezer and allow it to chill for a few minutes, then continue where you left off. Cold dough is key to making sure the flowers retain their shape.
***Some household “tools,” such as a chopstick, skewer, or toothpick/cocktail stick, can help with packing the yellow dough around the flower pieces. You might also need the chopstick to “pop” the yellow dough pieces from the tiny round cutter.
****Your butter should be soft enough to combine easily with the sugar, but it should not be hot or melted — this will hinder the quality of your finished product, and possibly cause your cookies to over-spread when baked.
- Prep Time: 90 minutes
- Chilling Time: 175 minutes (approximately 3 hours, divided)
- Cook Time: 12-14 minutes
- Category: Biscuits and Cookies
- Method: Oven
- Cuisine: Dessert
Find it online: https://bastecutfold.com/sunny-lemon-daisy-cookies/