Halloween Pretzels
This post may contain affiliate links. Please read the disclosure policy to learn more.
Thank you for supporting this blog!
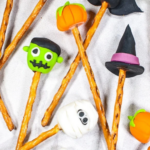
Halloween is one of my favorite times to get creative in the kitchen, and my Halloween pretzels offer the perfect way to get into the spirit of the spooky season. Featuring salty pretzel sticks dunked in melted chocolate and decorated with Halloween-themed fondant toppers, these no bake pretzels are so easy to make, even kids can help with the dipping and decorating. Arrange in a shallow glass with a handful of shredded orange crinkle cut paper for a cute Halloween centerpiece; or distribute as Trick-or-Treat treats, classroom gifts, or Halloween party favors!

Halloween Pretzel Ingredients
- Pretzel Sticks – For this recipe, opt for thin pretzel sticks rather than rods. I used Lajkonik, a Polish brand readily available on Amazon. These measure about 5 inches long and are roughly 1/4-inch thick. Any similarly-sized pretzel sticks will work. If you can’t find thin sticks, rods will work (see my video below for an example) but the larger fondant decorations end up being a bit clunky, so I recommend removing them before eating the pretzels!
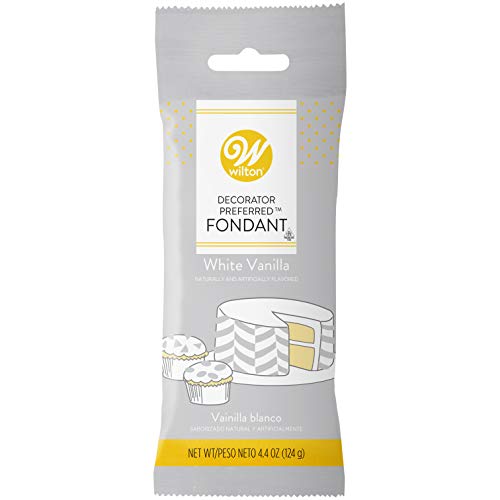
- White Fondant – I used about 200 grams, or 7 ounces, of white fondant (soft white icing) to make the decorations for my pretzel sticks. You might need a little more or a little less fondant, depending on the designs you want to make. Fondant dries out quickly, so remember to keep it tightly covered when not in use.

- Gel Food Coloring – I divided my fondant into six portions, and tinted it in Halloween colors (orange, green, black, purple, yellow; the other I left white) but you can choose any colors you’d like. For gel food coloring, my go-to brand is Chefmaster. You can also use pre-colored fondant if you happen to have some left over from other projects, like my taco cookies or peanut butter pumpkins.
- Chocolate – Dipping the ends of the pretzels in melted chocolate helps to secure the fondant topper to the pretzel stick. I used white chocolate for the white decorations (ghosts, mummies), and dark chocolate for the black decorations, but feel free keep things simple by using one chocolate for all of your pretzels. You can dip your pretzel sticks in milk, white, dark, or even something like ruby or blonde chocolate.

Tips for Making the Fondant Decorations
- Follow my examples, or create your own. I made pumpkins, bats, candy corn, witch hats, ghosts, mummies, and monsters. Other ideas include spiders, jack o’ lanterns, caramel apples, cauldrons, tombstones, zombies, black cats, brooms, gourds, or candy shapes. If making this recipe with younger children, I suggest sticking to one or two simple designs, like ghosts or pumpkins.

- Don’t make the decorations too big. No matter which Halloween-themed decorations you decide to make, it’s important to keep them on the smaller side. Aim for about 1 inch (2 1/2 centimeters) in size. Larger, heavier decorations will make your pretzel treats top-heavy or possibly cause the pretzel sticks to snap. If you want to make very large or elaborate decorations, opt for pretzel rods instead. See my video below for an example.
- Wear gloves for tinting only. I usually wear gloves to work the gel food coloring into the fondant, to avoid staining my bare hands. However, gloves aren’t practical for making the fondant shapes. The fondant sticks to the rubber, and it’s also difficult to make tiny, delicate decorations with gloved hands. The gel won’t stain once it’s worked into the dough.
- Keep the extra fondant covered at all times. After tinting it into Halloween colors, wrap each color in its own sheet of clingfilm/plastic wrap, or place it in a sealed food storage bag to prevent the fondant from drying when not in use.


Halloween Pretzels
- Total Time2 -3 hours
- Yield15-20 pretzel sticks 1x
Cute Halloween pretzels dunked in chocolate and decorated with fondant toppers. These no bake Halloween pretzel treats make a fun activity for the entire family.
Ingredients
15-20 pretzel sticks
200 grams white fondant (7 ounces)
Orange, green, yellow, purple, and black gel food coloring
25 grams chopped white chocolate (2 tablespoons)
25 grams dark chocolate (2 tablespoons)
Instructions
Line a small tray with parchment or a silicone mat.
With gloved hands, divide the fondant into 5 golf ball-sized balls (about 40 grams each) , and one marble-sized ball. Add gel food coloring to tint each ball as desired. Wrap balls in clingfilm/plastic wrap, and keep wrapped when not in use.


Make fondant decorations, about 1 inch in size. (I made candy corn, ghosts, mummies, monsters, pumpkins, bats, and witch hats, but you can make any shapes you’d like!) Press each decoration onto the top of a pretzel stick, creating a 1/2-inch deep indentation. Remove the fondant decoration and return to tray. (As you work, keep the tray covered with a sheet of clingfilm/plastic wrap to prevent the decorations from drying too quickly.)


Arrange on prepared tray. Set aside and allow decorations to dry.


Assembly:
Melt each chocolate in a separate microwave-safe bowl.

Dip one end of each pretzel stick in the melted chocolate, then secure a fondant decoration on top. (I used dark chocolate for the black decorations, and white chocolate for the white, but you can use one kind of chocolate if desired.)


Return pretzels to tray and allow the chocolate to set at room temperature.

Store Halloween pretzels in an airtight container at room temperature for up to 2 weeks.




- Category: Miscellaneous
- Method: No Cook

Recommended Tools and Supplies
- Fondant Tool Set – A cheap set of fondant tools makes crafting the decorations much easier. (These also come in handy for all sorts of kitchen projects, from cookie decorating to novelty macarons, so they’re a nice addition to your toolkit!)
- Toothpicks – Toothpicks (cocktail sticks) allow you to add texture, and help with adhering small pieces such as eyes.
- Sharp Paring Knife – For cutting the fondant. You can also use the back of your knife to score the pumpkins as shown.
- Microwave – For melting the chocolate. If you don’t have a microwave, you can melt the chocolate over a bain marie or double boiler instead.
- Silicone Mat – I like to line my countertop with a silicone mat for easy cleanup, and line a tray with a second mat as a place to arrange and dry my finished decorations. If you don’t have a silicone mat, use parchment or wax paper instead.
- Clingfilm – It’s important to keep a roll of clingfilm/plastic wrap nearby. You’ll need it to cover the tray as you’re working, and to wrap the balls of fondant so the fondant doesn’t dry out mid-project.
- Rubber Gloves – Don’t skip these! You’ll want to wear rubber gloves to work the gel coloring into the fondant, or you’ll find yourself with Halloween-themed hands for a couple of days.
Packaging and Gifting Halloween Pretzels
For a Halloween party, arrange and display bouquets of pretzel sticks in shallow glasses, cups, or vases. Stuff the bottom of each cup with shredded black and orange paper, or with Halloween confetti. You could even fill the bottom of each glass with a handful of homemade candy corn. To package Halloween pretzels for classroom treats, party favors, or Trick-or-Treat gifts, I love the idea of using Halloween themed cello bags, and finishing each one with a big orange bow.
Other Autumn Recipes You Might Enjoy
Halloween Candy Corn
Pumpkin Spice Caramels
Parsnip Cookies
Spiced Pumpkin Butter
Halloween Chocolate Bark
“Boo Berry” Hot Chocolate
Ghost Marshmallows
And if you do make these, or any of my recipes, don’t forget to tag me @bastecutfold or use the hashtag #bastecutfold on Instagram. I always love to see what you’re making!