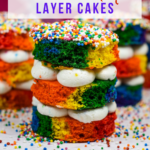
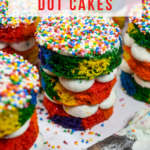
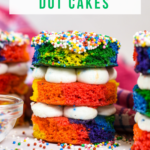
Miniature Rainbow Dot Cake Recipe
This post may contain affiliate links. Please read the disclosure policy to learn more.
Thank you for supporting this blog!
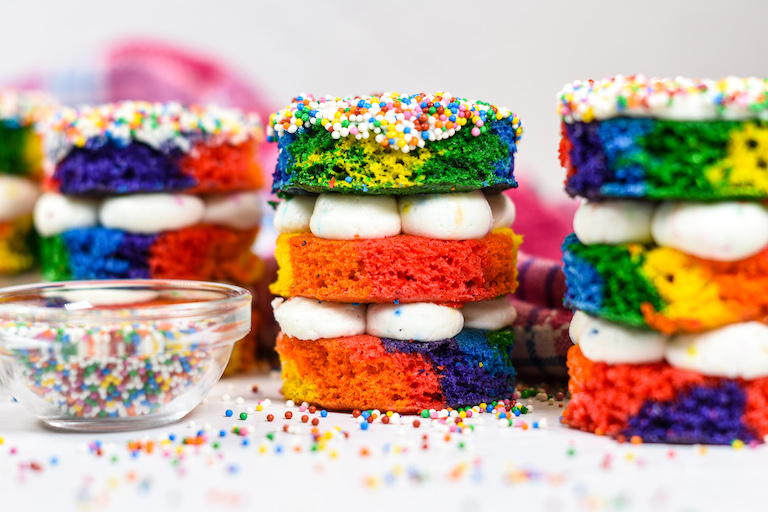
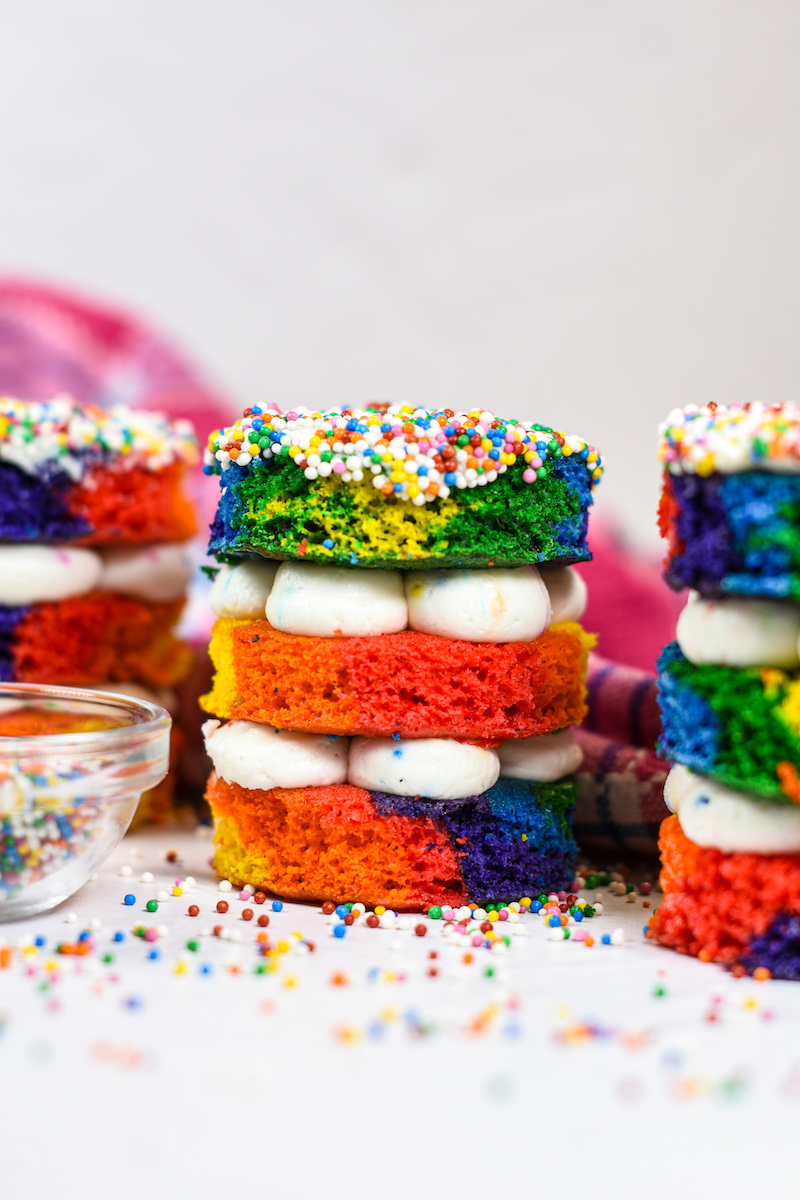
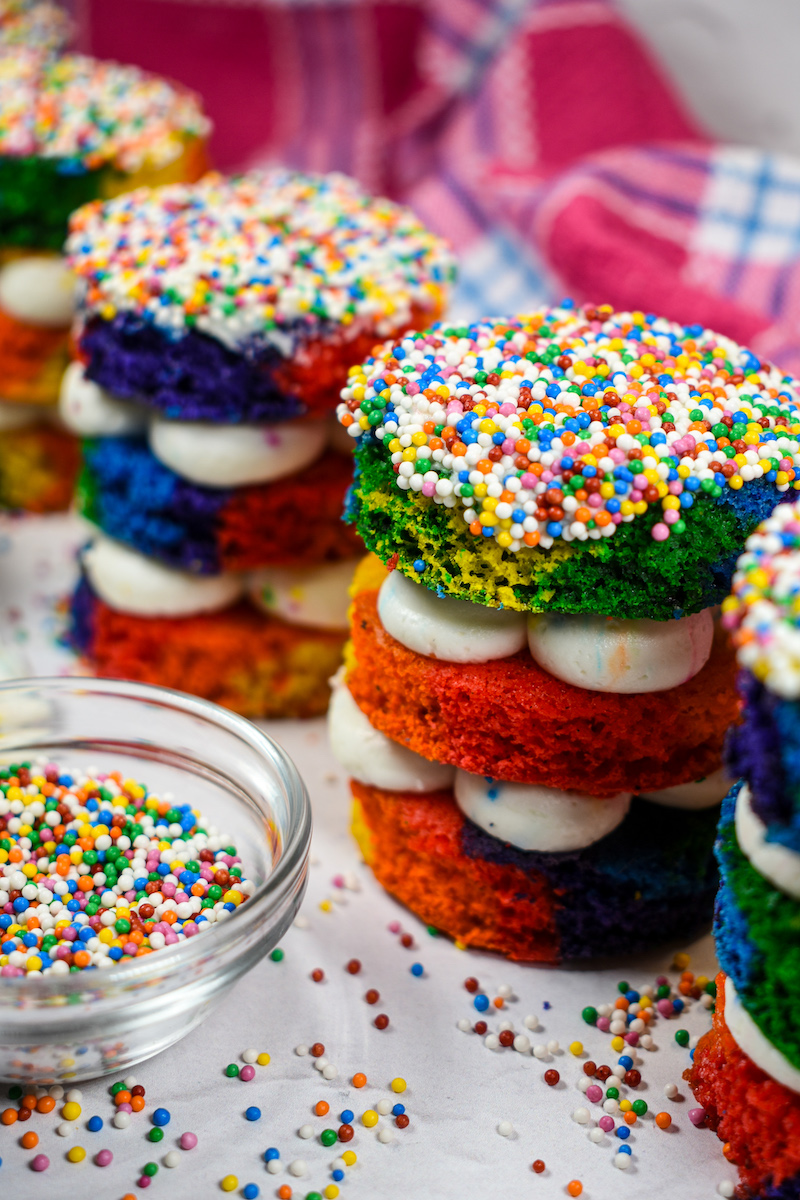
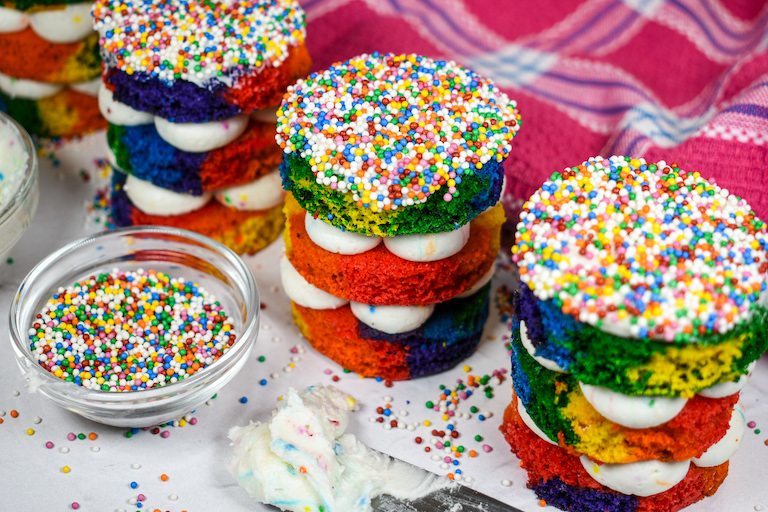
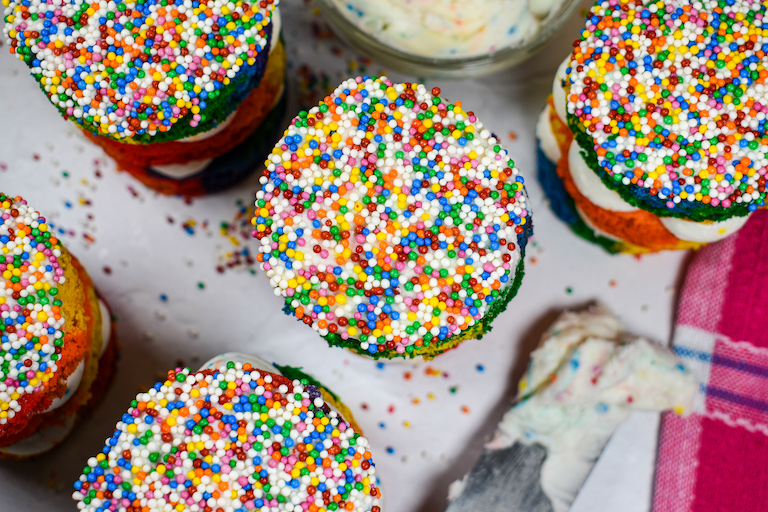
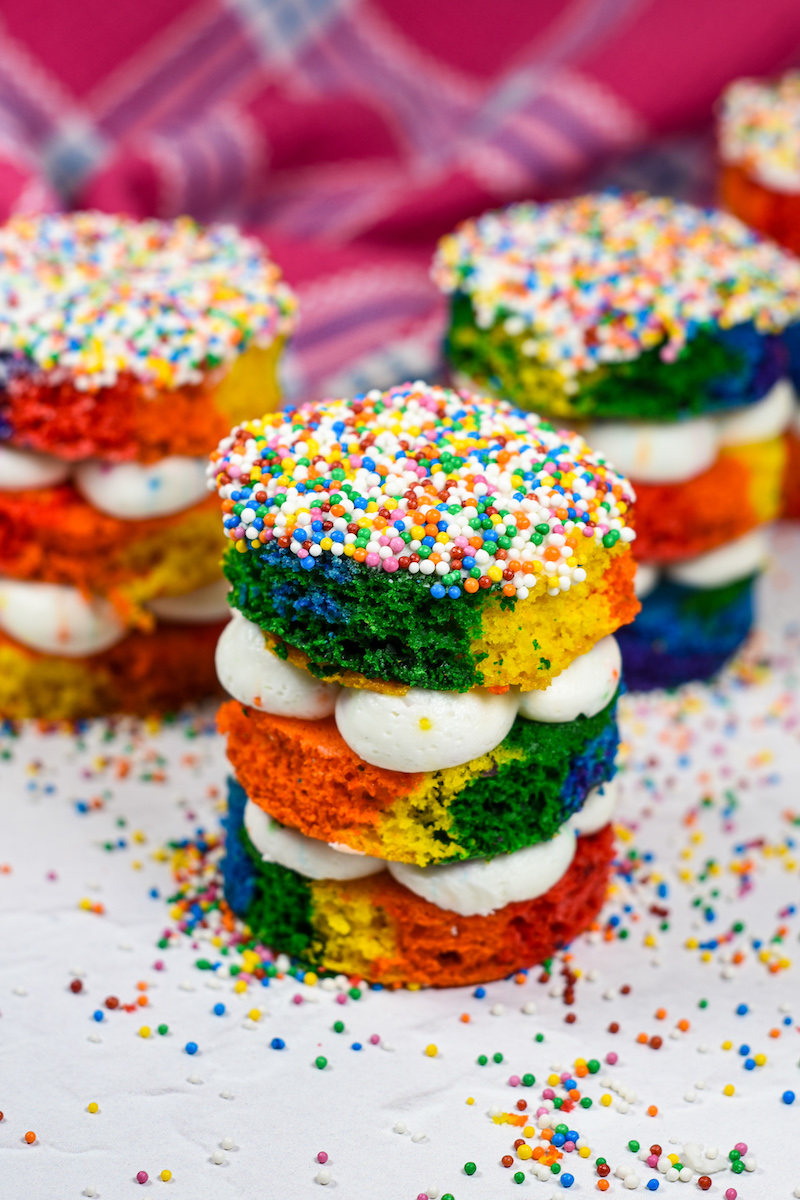
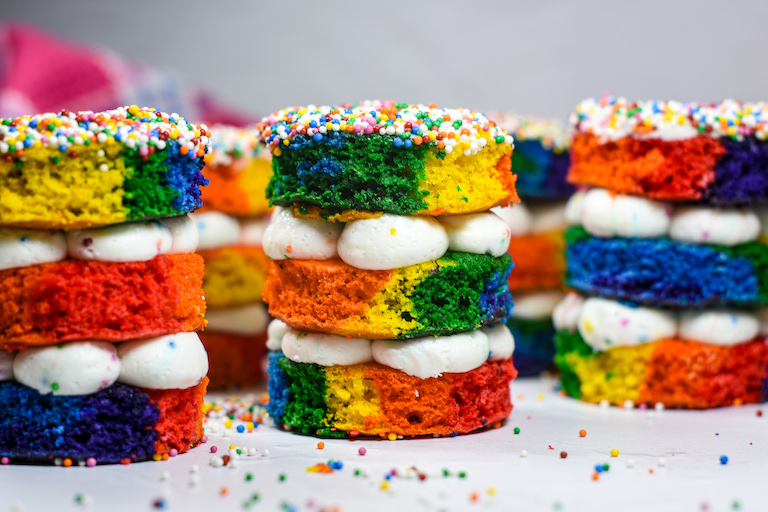
A miniature rainbow dot cake recipe inspired by the viral dot cakes craze. Layers of piped rainbow sponge, funfetti buttercream, and rainbow nonpareils sprinkles form these delightful mini layer cakes.
What Inspired This Rainbow Dot Cake Recipe?
If you’ve been paying any attention to food social media lately, you’ve definitely seen dot cakes. These diminutive, nonpareil-covered cakes are the latest dessert trend to explode on TikTok, Instagram, and Pinterest.
The craze stems from The Dot Cakes, a family-run bakery in Roslyn, New York, whose sprinkle-covered Dotcups began drawing online attention in 2026. These single-serving treats feature layers of cake and frosting packed into a cup and topped with a thick coating of rainbow nonpareil sprinkles, creating the signature “dot” topping.
I already love using rainbow nonpareils in my recipes (see also, my rainbow chocolate chip biscotti, slice and bake rainbow heart cookies, and piped meringue rainbow wreath!), so of course I had to create my own version of these viral cakes.In my recipe, layers of piped rainbow sponge cake alternate with funfetti cake batter buttercream to create the cutest miniature layer cakes. To finish, I’ve slathered the top of each mini layer cake in frosting, then dunked it in rainbow nonpareils for a crunchy, colorful treat.
Dot Cake Recipe Ingredients
To make your own miniature dot cakes, you’ll need the following:
- Eggs – The piped rainbow sponge requires four large eggs, at room temperature.
- Granulated Sugar – Granulated sugar (or caster sugar, measured by weight) sweetens and moistens the sponge.
- Vanilla Bean Paste – I recommend a good-quality vanilla bean paste from a brand like Taylor & Colledge, Rodelle, or Nielsen-Massey. Or, substitute a high-quality extract, or the scrapings of a whole vanilla pod.
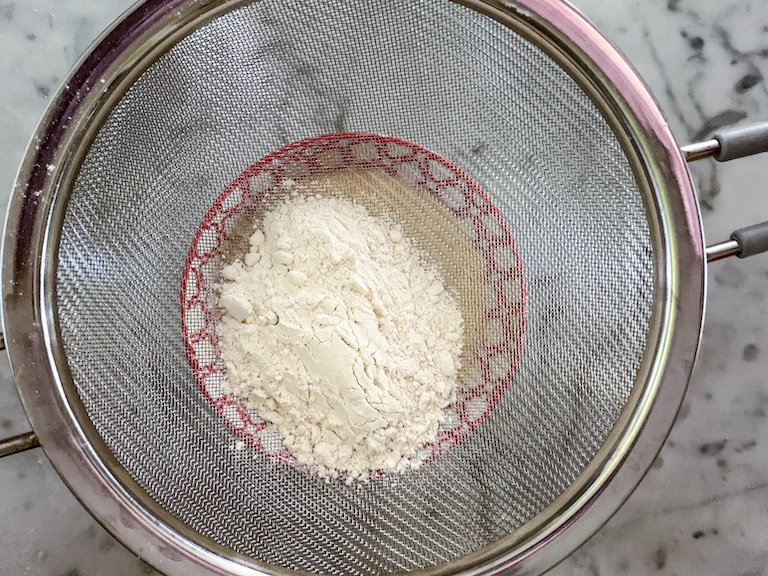
- Self Rising Flour – Self rising flour (known as self-raising flour, in the UK) allows the sponge to rise without baking powder or soda. Before making the batter, you’ll need to use a kitchen scale to weigh the flour into six 28-gram portions.
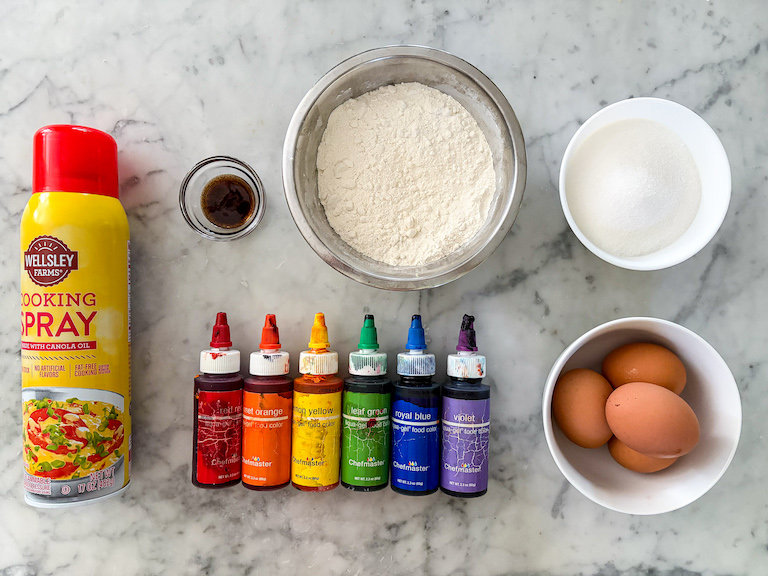
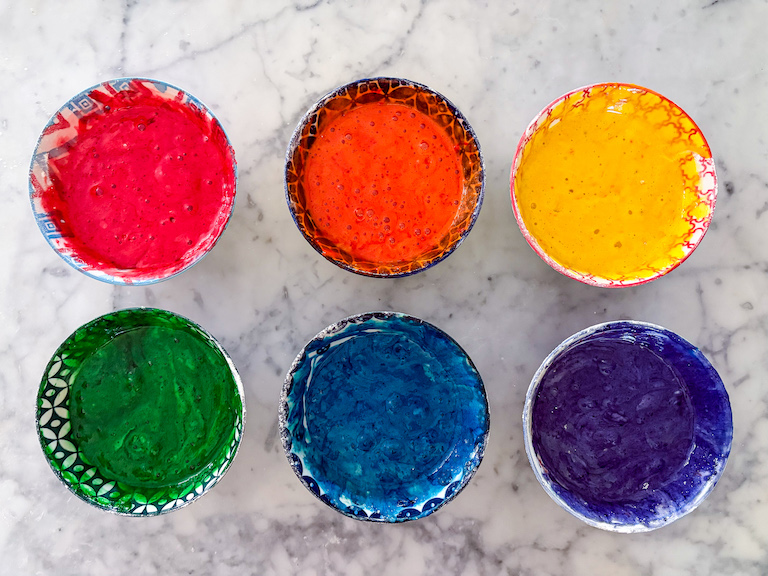
- Gel Food Coloring – I tinted my batter with Chefmaster gel food coloring. Use gel rather than water-based food coloring; the latter are not strong enough to produce bright, vibrant rainbow stripes.
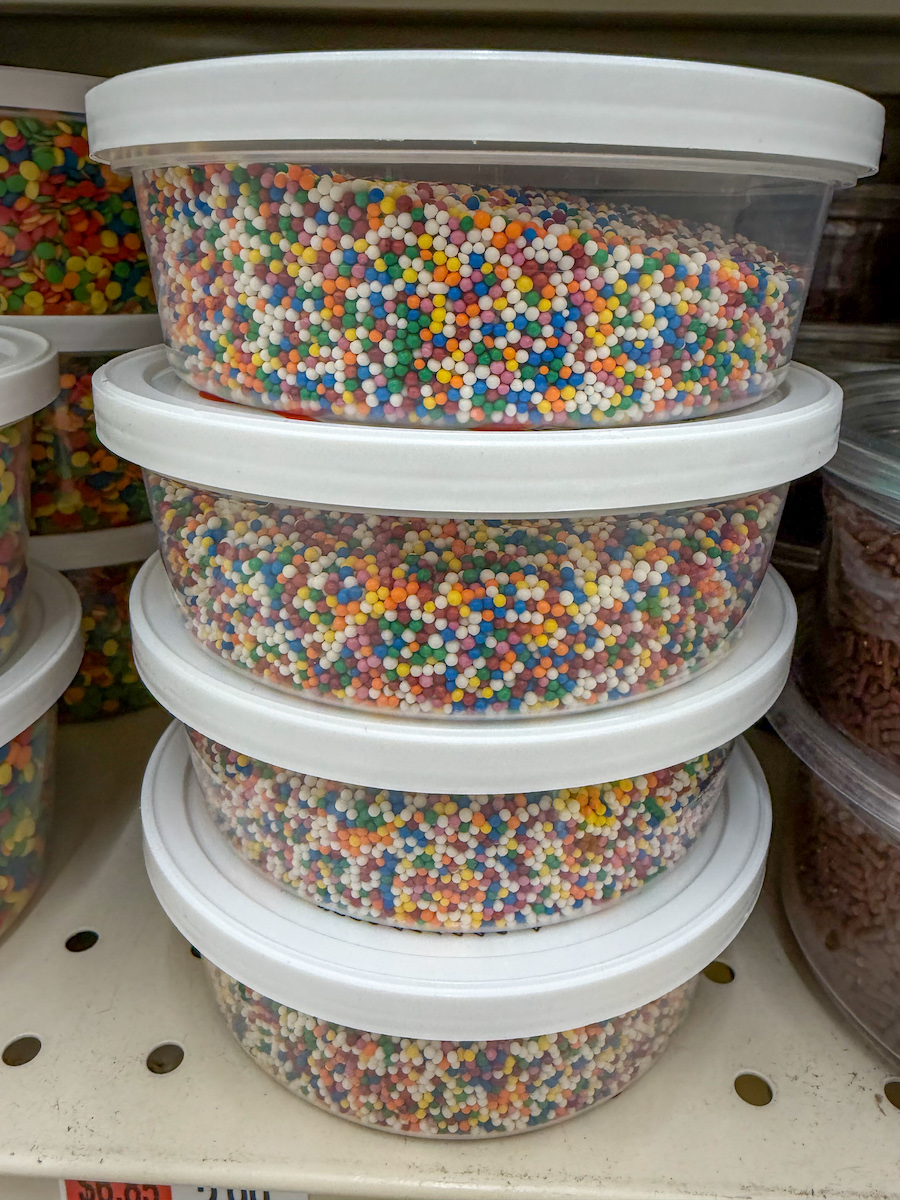
- Rainbow Nonpareils – The key ingredient for making dot cakes! You’ll need rainbow nonpareils (or hundreds and thousands, depending on your location) for the funfetti buttercream, plus more for coating the tops of the cakes.
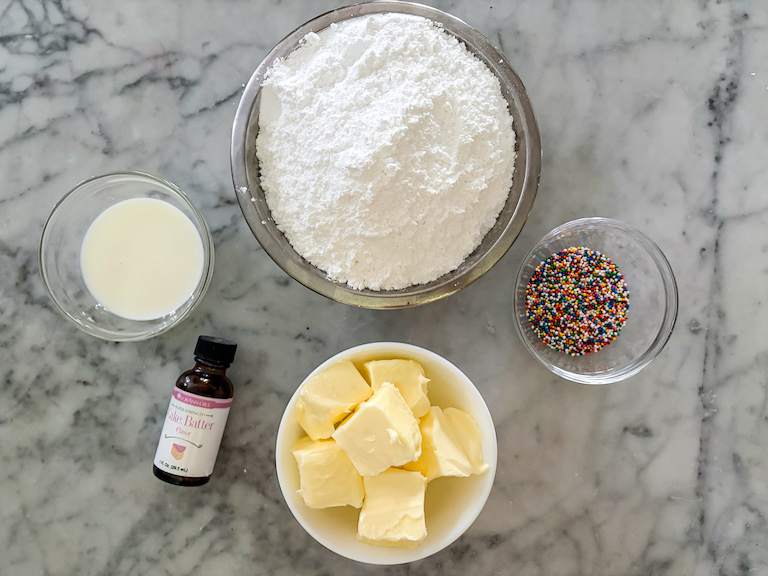
- Unsalted Butter – To make the buttercream frosting.
- Confectioner’s Sugar – Confectioner’s sugar (icing sugar, powdered sugar) sweetens the buttercream.
- Milk – I used whole milk to adjust the consistency of my frosting; half-and-half, whipping cream, skimmed milk, or your favorite plant milk will also work.
- Cake Batter Flavoring – I used a cake batter flavoring from LorAnn Oils, but any good-quality cake batter or birthday cake flavoring will work. If you don’t have cake batter flavoring, choose another flavor (strawberry, cotton candy, bubble gum) or flavor the buttercream with additional vanilla bean paste.
Making the Sponge Cake
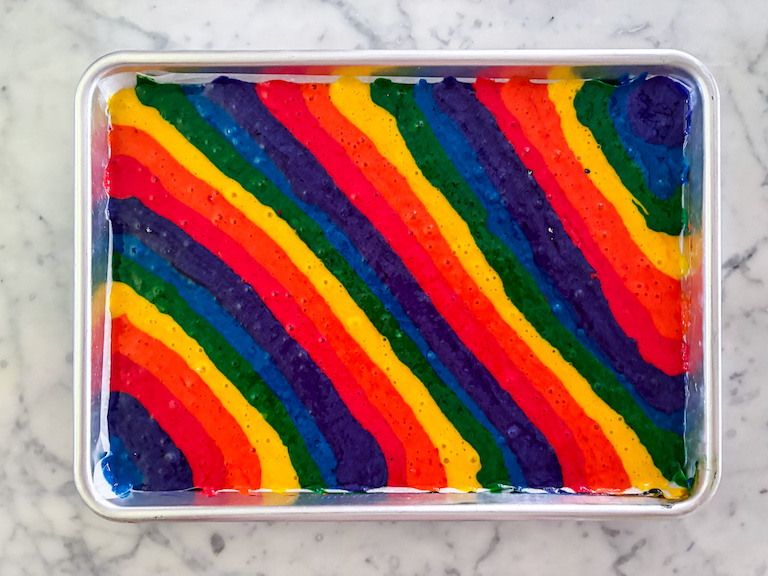
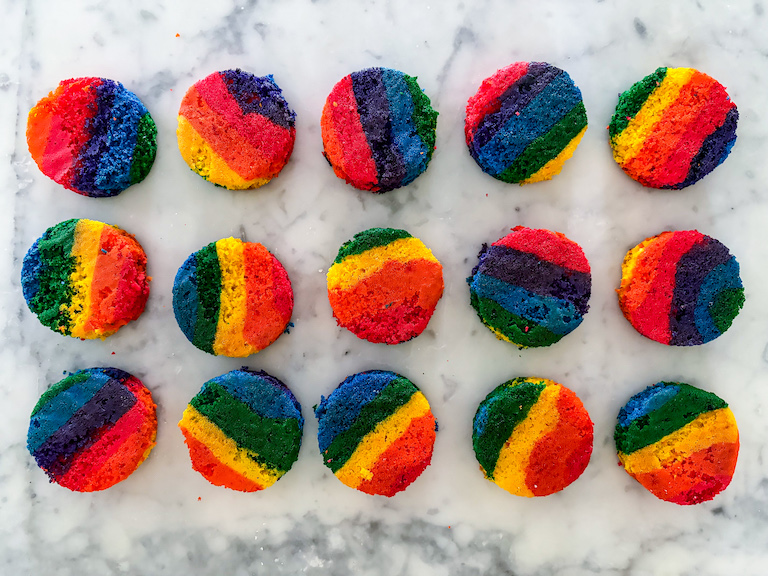
To make the rainbow sponge cake, whip eggs with granulated sugar, divide the batter into small bowls, then use a rubber spatula to gently fold in self-rising flour and gel food coloring to create six rainbow colors. Then, working carefully, pipe each colored batter diagonally across a quarter sheet baking tray to form the rainbow pattern, the bake until set.
After allowing the cake to cool completely, use a 2-inch round metal cutter to cut the layers for your mini cakes:
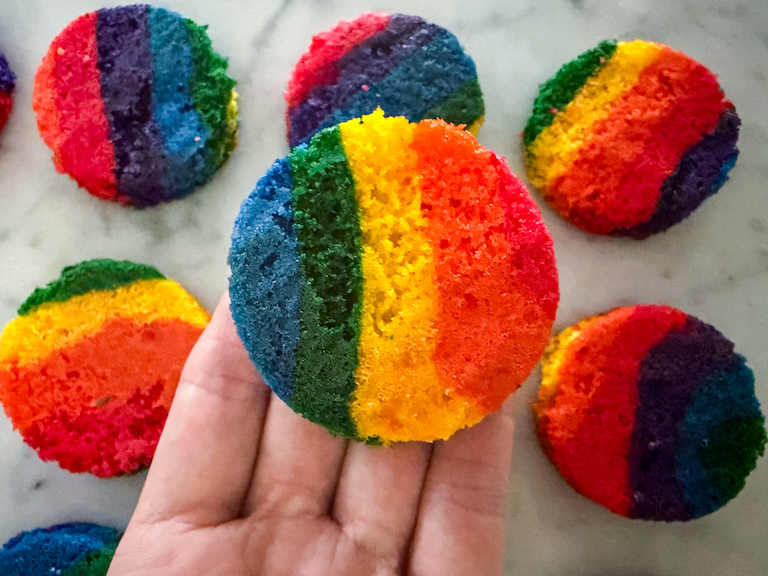
If you’re new to making piped sponge cakes, I suggest visiting my rainbow cake roll recipe for additional tips and tricks.
Assembling the Layers
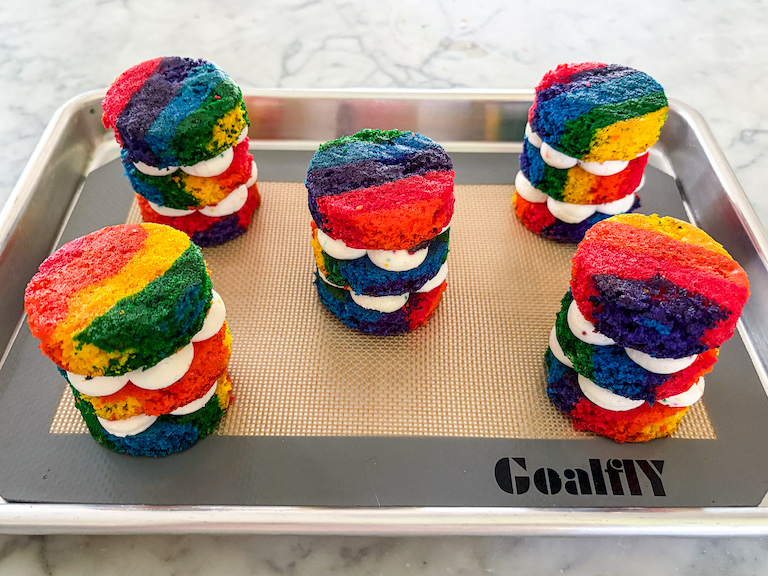
For the cakes shown here, I cut my sponge into 15, 2-inch discs to create a total of five, 3-layer cakes. If desired, you can cut 16 discs to make four, 4-layer cakes instead. You can also experiment with a slightly bigger or smaller cutter.
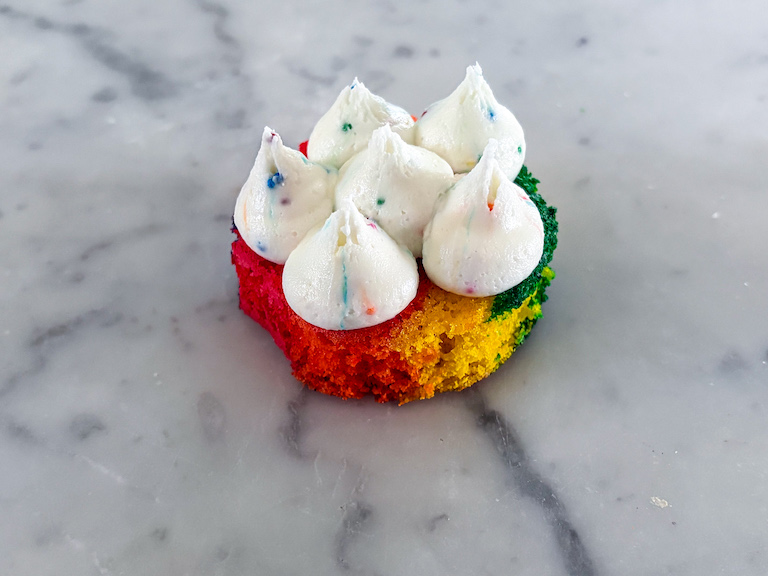
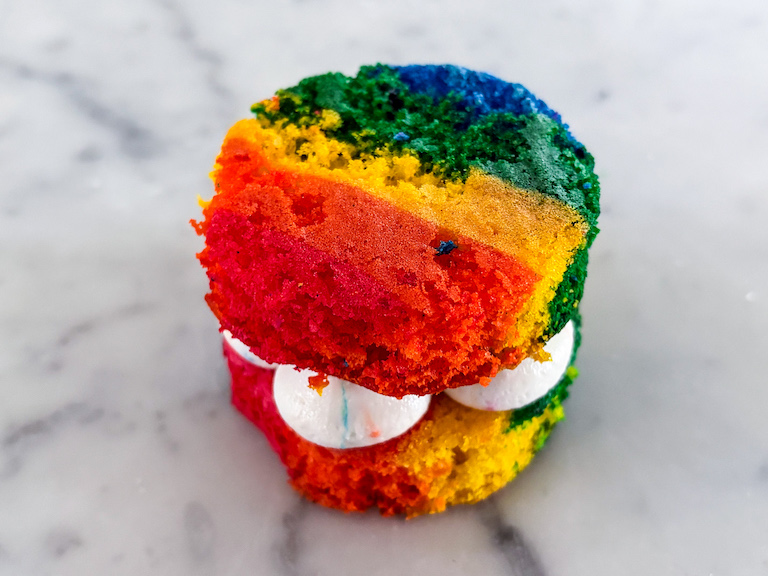
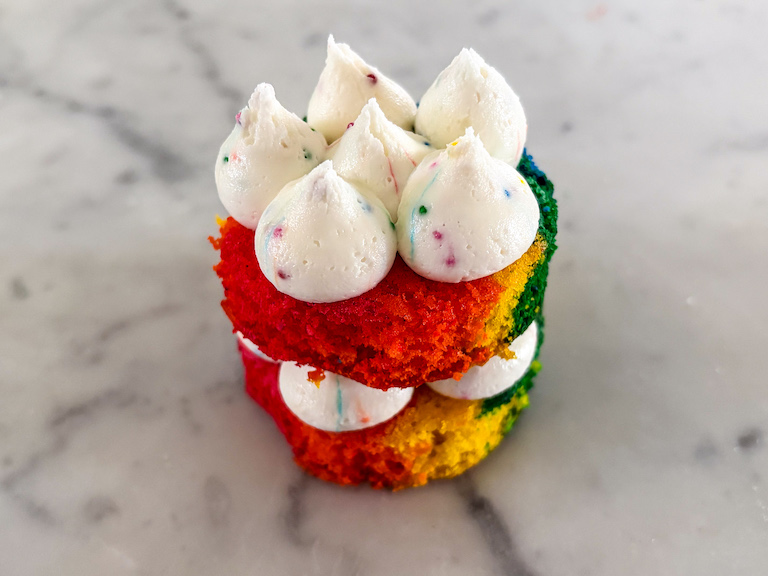
To assemble the dot cakes, alternate layers of sponge cake with piped dots of buttercream (I piped five dots per layer), finishing with cake on top:

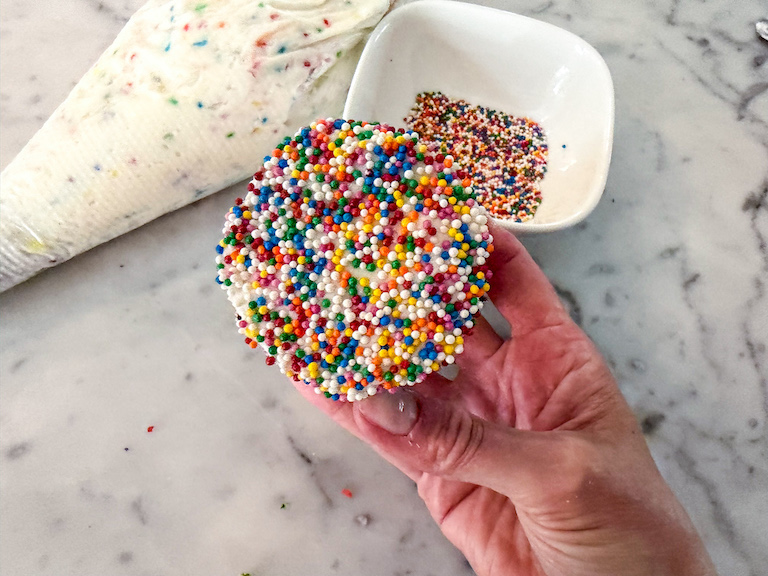
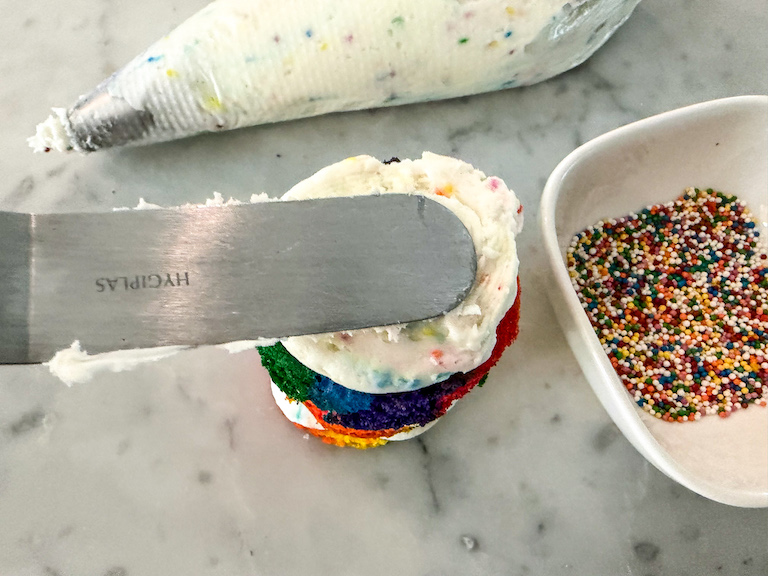
Refrigerate the cakes until firm, then frost the top of each cake with more of the funfetti buttercream:

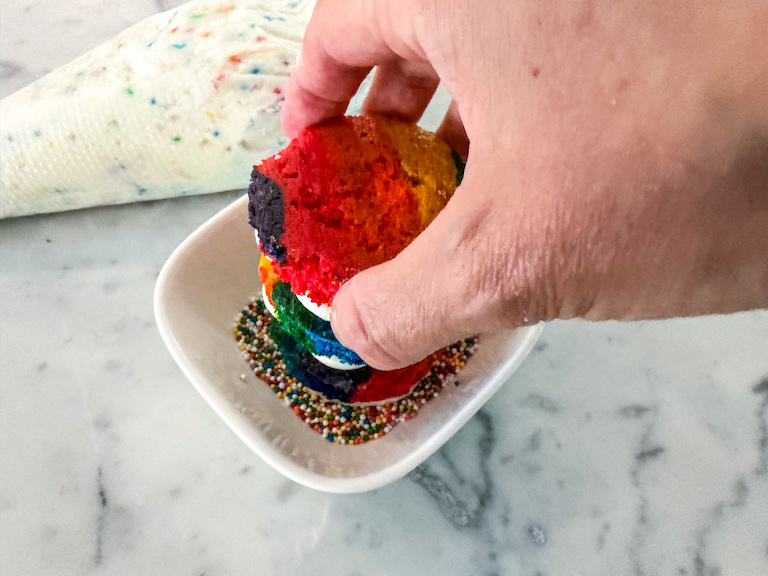
To finish, invert the cake in a bowl of rainbow nonpareils to create the signature crunchy top!
For step-by-step instructions and process photos, scroll down to the recipe card below.
Notes on Buttercream
I like the “naked” cake look, but if you want to completely coat your cakes in frosting rather than piping delicate dots in between the layers, I recommend doubling the frosting recipe.
Helpful Tools
To make the sponge cake, you’ll need a good kitchen scale. to measure the flour and batter (it’s important to create precise portions or you’ll find yourself with too much of one color and not enough of another); a rimmed quarter sheet tray (tray size is important here—do not use a bigger or smaller tray, or your sponge will be too thick or too thin); a set of small bowls; and six disposable piping bags.
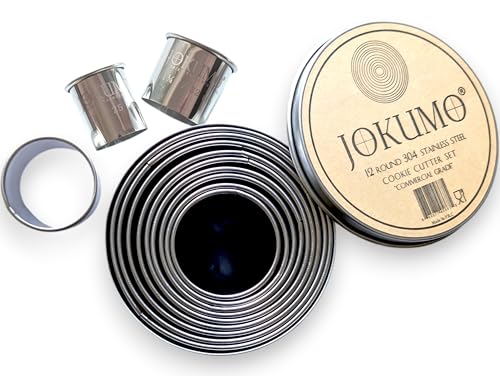
For assembly, you’ll need a 2-inch round metal cutter (I used one from my trusty set of round cutters) to cut the cake layers; a small stepped palette knife; and a round piping tip and another disposable piping bag for piping the buttercream.
Make-Ahead and Storage Suggestions
You can prepare the buttercream up to 24 hours in advance, and refrigerate in the piping bag until ready to use. Allow buttercream to sit at room temperature until soft enough to pipe.
Store leftover rainbow dot cakes in an airtight container in the refrigerator for up to three days.
Other rainbow nonpareil recipes you might enjoy:
Rainbow Cake Roll
Rainbow Meringue Heart Wreath
Funfetti Biscotti
Slice and Bake Rainbow Heart Cookies
And if you do make these, or any of my recipes, don’t forget to tag me @bastecutfold or use the hashtag #bastecutfold on Instagram. I always love to see what you’re making!
Print
Miniature Rainbow Dot Cake Recipe
- Total TimeAbout 2 hours
- Yield5 3-layer miniature cakes 1x
A miniature rainbow dot cake recipe inspired by the viral dot cakes craze.
Ingredients
Cakes:
4 large eggs, at room temperature
150 grams granulated sugar (3/4 cup)
1 teaspoon vanilla bean paste
170 grams self rising flour (6 ounces; 1 1/3 cups), weighed into six 28-gram portions
Red, orange, yellow, green, blue, and purple gel food coloring
Nonstick spray, for greasing tin
Buttercream:
85 grams unsalted butter, softened (3 ounces)
235 grams confectioner’s sugar (8 1/4 ounces), plus more for dusting
15 milliliters whole milk or whipping cream (1 tablespoon), plus more to adjust consistency
1/2 teaspoon vanilla extract or cake batter flavoring
30 grams rainbow nonpareils sprinkles (2 tablespoons)
Rainbow nonpareils sprinkles (hundreds and thousands), to decorate
Instructions
Cake Batter:
Preheat oven to 350° F (176° C). Generously spray a quarter sheet rimmed baking tray with nonstick spray, line with parchment, then spray with more nonstick spray.
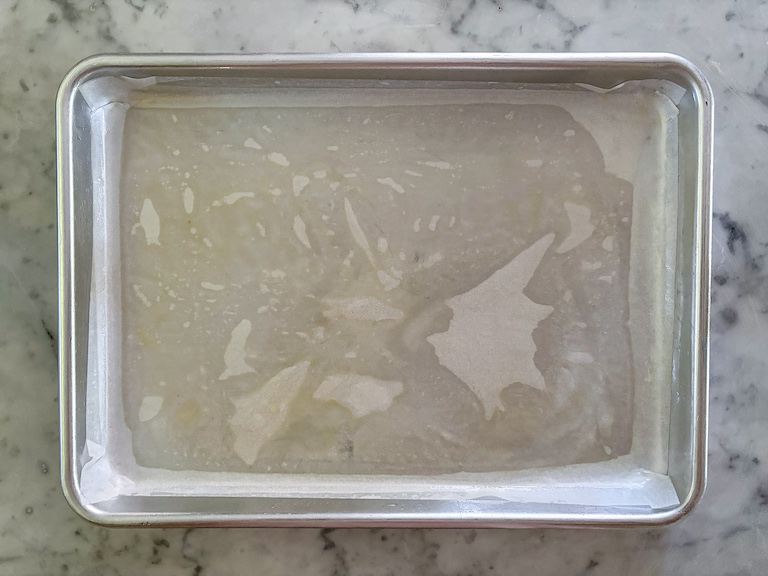
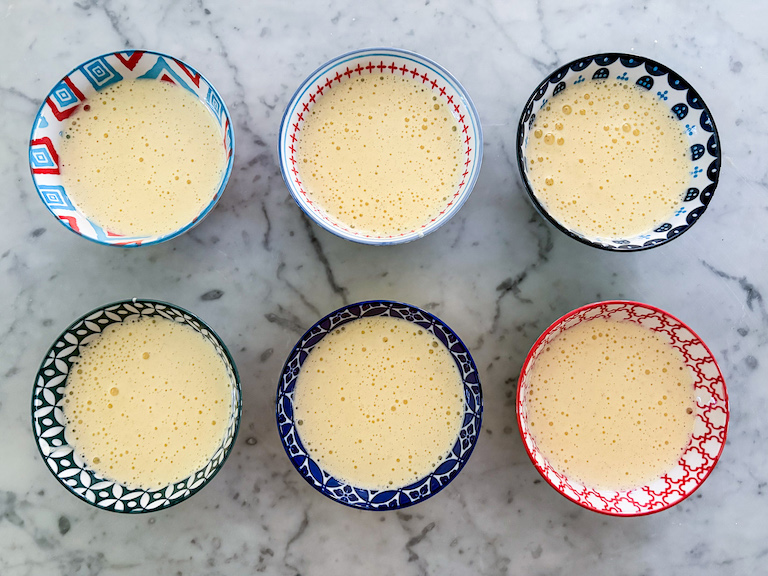
With a kitchen scale, weigh 6 portions of self rising flour into individual bowls. Each portion should weigh 28 grams (about 1 ounce).
In a large mixing bowl or the bowl of a stand mixer, whip eggs and granulated sugar on high speed until pale, fluffy, and voluminous, about 3-4 minutes. Mix in the vanilla bean paste.
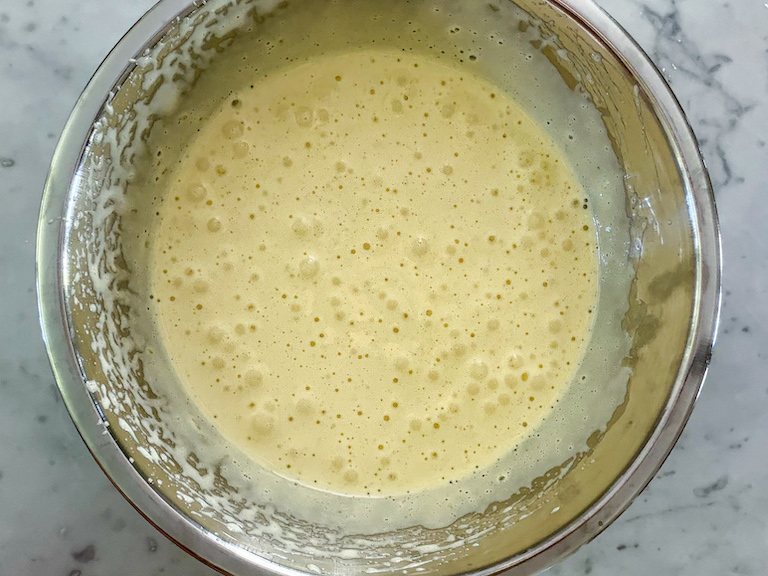
With a kitchen scale, weigh batter into 6 small bowls. Each portion should weigh approximately 60 grams (about 2 ounces).
With a fine mesh sieve, sift a self-rising flour portion into each batter bowl.
Add 2-3 drops of gel food coloring to each bowl to create red, orange, yellow, green, blue, and purple batters. With a rubber spatula, gently fold the flour and food coloring into the eggs until just barely combined, deflating the mixture as little as possible. Do not overmix.
Scoop each color into a separate disposable piping bag. Clip the tip of each piping bag with kitchen scissors.
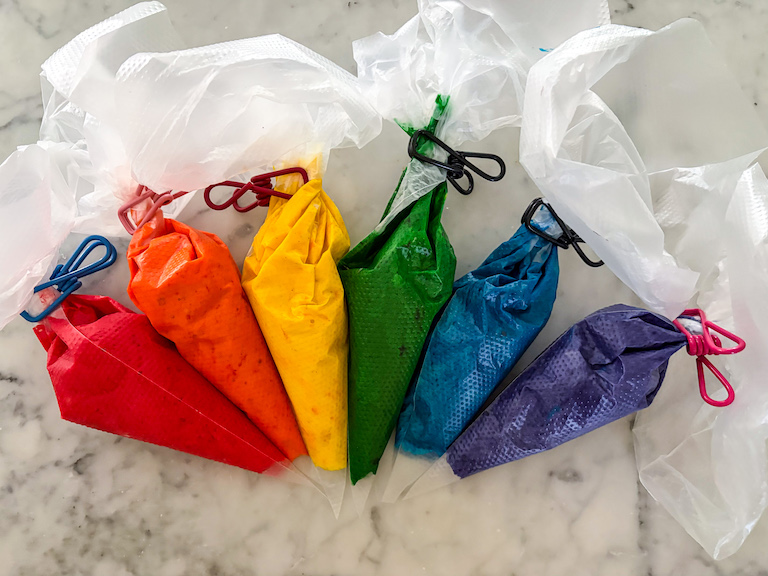
Pipe batter diagonally across prepared tray, alternating colors to form the classic rainbow pattern. Depending on the tray you’ve chosen you might have a small amount of batter left over, but try to use most of it or the cake will be too thin.
Bake in preheated oven for 18-20 minutes or until cake sets and feels dry to the touch.
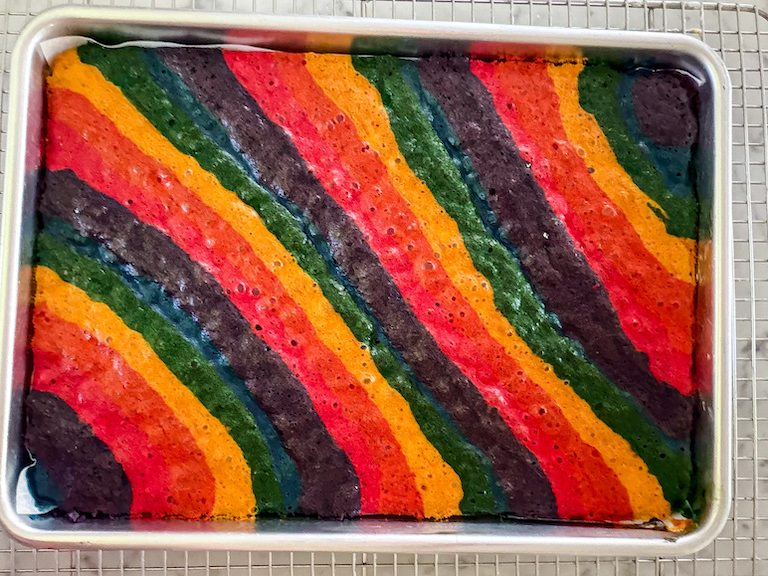
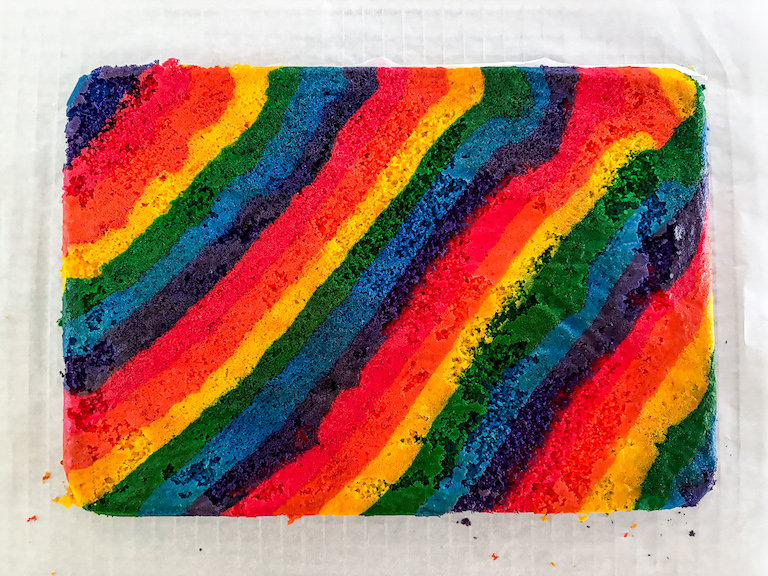
Run a sharp knife around the edge of the cake. Immediately flip cake onto a clean sheet of parchment. Tap bottom of tray to release cake, then peel away the parchment. Cool completely.
Buttercream:
In a large mixing bowl or the bowl of a stand mixer, mix the butter on high speed until light and fluffy. Add the confectioner’s sugar in small increments, alternating with the milk and mixing well after each addition. Use a rubber spatula to scrape down the sides of the bowl as needed, until you’ve fully incorporated all of the sugar. Add the cake batter flavoring and mix until creamy, about 3-5 minutes. If necessary, add more confectioner’s sugar or whole milk to adjust the consistency. With a flexible rubber spatula, fold in the rainbow nonpareils.
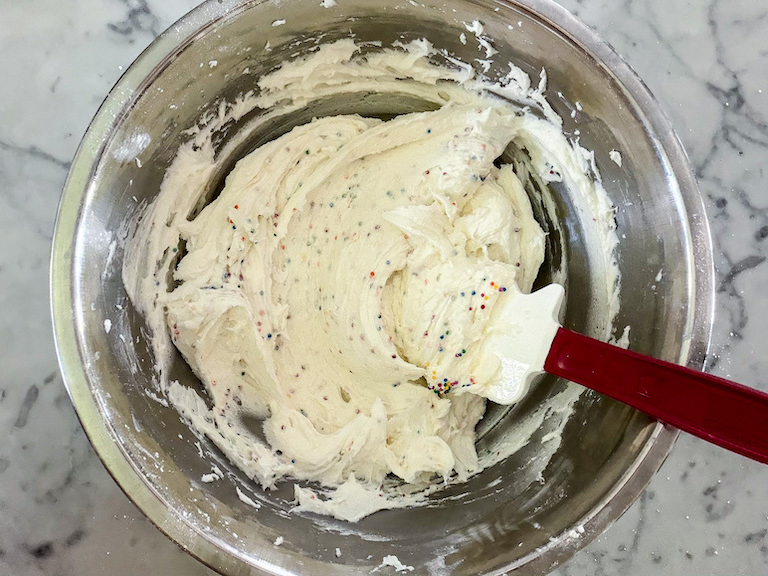
Scoop into a disposable piping bag fitted with 1/2-inch round piping tip.
Assembly:
Line a quarter sheet rimmed baking tray with a silicone baking mat.
With a 2-inch round cutter, cut cake into 15-16 discs.*
In alternating layers, stack discs and dots of piped buttercream, finishing with a disc of cake on top.
Arrange on prepared tray. Cover and refrigerate until firm, at least 2 hours, or overnight.
Pour rainbow nonpareils into a small dish or rimmed dessert plate.
With a small stepped palette knife, spread the top of each cake with a thick layer of buttercream.
Invert cakes to coat in nonpareils.
Serve immediately. Store leftover rainbow dot cakes in an airtight container in the refrigerator for up to 3 days.


Notes
*I cut 15 discs for five, 3-layer cakes. If desired, you can cut 16 discs to make four, 4-layer cakes instead.
- Prep Time: 1 1/2 hours
- Chilling Time: 2 hours
- Cook Time: 20 minutes
- Category: Cakes and Cupakes
- Method: Oven