Soft Peppermints
This post may contain affiliate links. Please read the disclosure policy to learn more.
Thank you for supporting this blog!
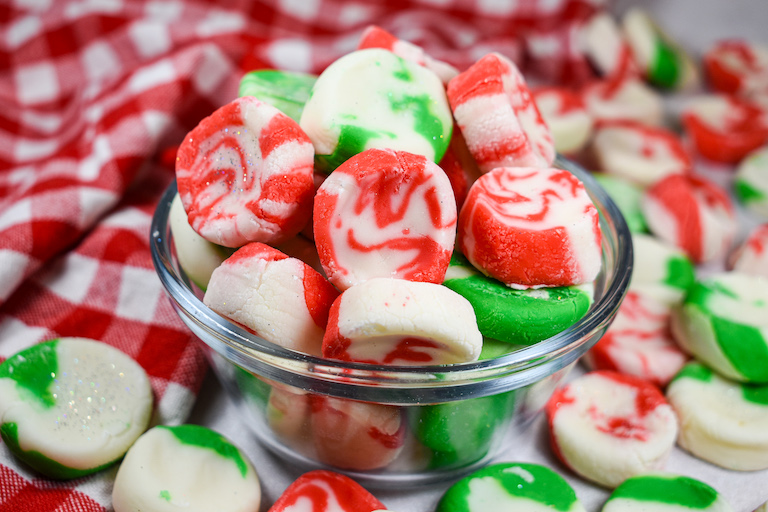
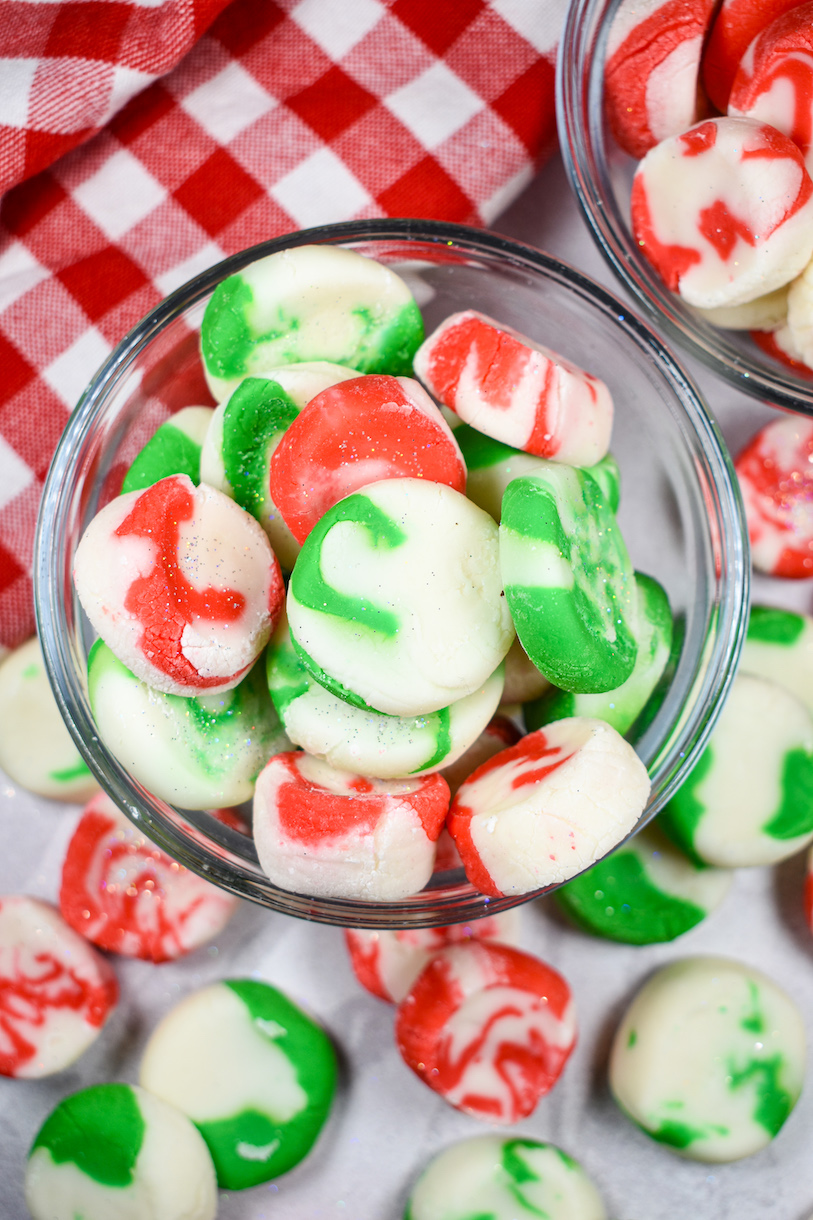
Soft peppermints made with sweetened condensed milk, confectioner’s sugar, and natural peppermint oil. Featuring colorful swirls of red, white, and green, this soft peppermint candy makes a festive holiday treat.
What Inspired These Soft Peppermints?
While browsing Pinterest to brainstorm ideas for the festive season, I spotted lots of recipes for “soft Christmas peppermints.” These mints all looked unbelievably precise, with bright red swirls so delicate and refined that they almost seemed like they’d been hand-painted with a brush. Intrigued, I tested a few of these recipes. It didn’t take long to realize that most of the “soft christmas peppermints” on Pinterest (and, sadly, more and more social media recipes in general) aren’t developed and tested by actual humans; they’re AI creations. So, after my frustrating experience with AI recipes, I decided to create a real, tested, AI-free Christmas peppermint recipe that anyone can make at home.

These Christmas candies taste exactly as they sound: soft and sweet, with just the right amount of natural peppermint flavor, plus colorful swirls of red, white, and green (or any other color you’d like—you could easily make these in blue and purple for Hanukkah celebrations, too!) Requiring just four ingredients and about 40 minutes of active prep time, these soft Christmas peppermints are ideal for gifting throughout the holiday season.
Ingredients for Making Soft Christmas Peppermints
- Confectioner’s Sugar – You’ll need 270 grams (about 2 US cups) of confectioner’s sugar, also known as icing sugar or powdered sugar. And keep some extra on hand for dusting your work surface to prevent the dough from sticking.
- Sweetened Condensed Milk – Make sure to reach for sweetened condensed milk, not evaporated milk.

- Peppermint Oil – Opt for natural peppermint oil, not flavoring or extract. And use it sparingly! 2-3 drops is plenty! A small vial goes a long way, so you can use the rest to make other minty holiday treats, like peppermint marshmallows, peppermint stick ice cream, a candy cane cake roll, or piped peppermint meringue kisses.

- Gel Food Coloring – I used a mix of Chefmaster’s Christmas Red and Leaf Green to tint my peppermint candy dough. You can use one or both; introduce other colors; or make snowy-white peppermints if you prefer a dye-free approach.
- Edible Glitter – For seasonal sparkle, I dusted my peppermints with edible glitter.

Tips for Shaping and Slicing the Peppermints
These peppermints are not difficult to master, but here are a few tips and tricks to make the process easier:
- Wear gloves. I suggest wearing a pair of rubber gloves while you knead the food coloring into the dough. Otherwise, the food coloring will tint your hands and fingers into a festive shade of holiday red or green!
- Don’t use too much sugar. I recommend dusting the countertop with a light coating of confectioner’s sugar, but don’t use too much! An excess of sugar will make the dough too dry to roll.
- Allow time for trial and error. You might need to roll, twist, or re-roll the dough a few times to achieve your desired thickness. If the rope seems too thin, squash the dough back together, then re-roll. I like to keep my candies about 1 inch thick. And clean your knife periodically to ensure smooth, even cuts.


- Keep the dough covered. When not in use, wrap the dough in clingfilm/plastic wrap to prevent it from drying out. And work quickly! The dough will start to crack as it dries.
- Each mint will have a unique pattern. You can roll and re-roll the rope until yoo get the pattern you want, but the pieces will never be perfectly uniform. Don’t be fooled by AI images of peppermints with thin, precise swirls—without a machine (or the time and dexterity to hand paint each mint with a paintbrush!) you will never achieve this look.
- Take a hand-shaping shortcut. If you don’t want to mess with rolling and twisting the dough, you can skip this step and use your hands to roll it into balls instead. You can also press the dough into molds, or pat to 1/2-inch thickness then cut into shapes using a small metal cutter.

Soft Peppermints
- Total Time40 minutes (+ drying time)
- YieldAbout 35-40 1-inch round peppermints 1x
Soft Christmas peppermints made with sweetened condensed milk, confectioner’s sugar, and natural peppermint oil.
Ingredients
270 grams confectioner’s sugar (2 cups), sifted, plus more for dusting
150 grams sweetened condensed milk (1/2 cup), plus more to adjust consistency
2-3 drops natural peppermint oil
Red or green gel food coloring
Edible glitter, optional, for dusting
Instructions
Line a quarter sheet tray with parchment or a silicone mat. Set aside.
In a large bowl, whisk together sweetened condensed milk and peppermint oil.

Gradually add confectioner’s sugar, 1/2 cup at a time, using your hands or a bench scraper to work the ingredients together until a soft dough forms. Dough should be smooth and pliable, but not sticky. You might not need all of the confectioner’s sugar.


Divide dough into 2 portions. Keep about 3/4 of the dough white. Into the smaller portion, knead 2-3 drops red gel food coloring or green gel food coloring.


Divide both portions in half. You should now have 2 large white portions, and 2 smaller colored portions.

Wrap 1 portion of each color dough in clingfilm/plastic wrap. Set aside.
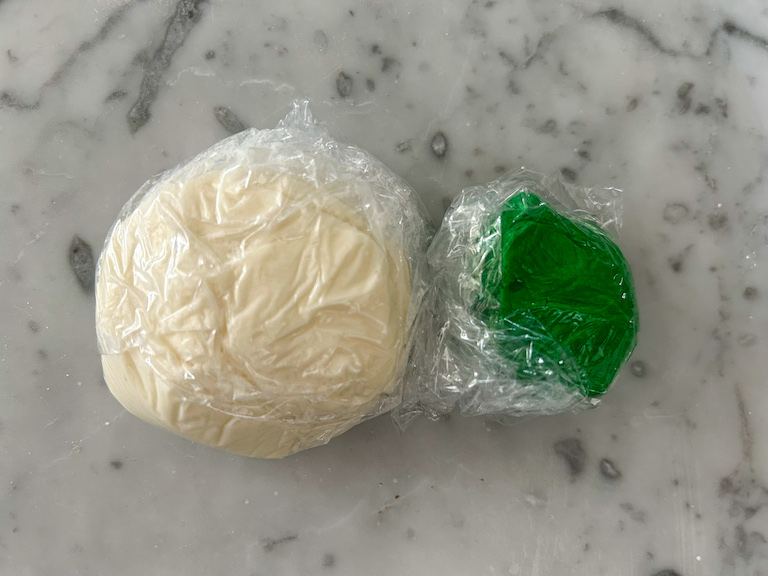
Lightly dust countertop with confectioner’s sugar. With your hands, roll each of the remaining portions into 10-inch ropes.

Twist the white rope and the colored dough rope together.*

Roll on countertop to form a smooth, thick rope, about 12-14 inches long and 1-inch thick.

With a sharp chef’s knife, trim the ends, then slice into 1/2-inch pieces. Dough will flatten slightly as you cut. Use your hands to gently reshape each piece into a round mint.


Arrange peppermints, flat sides up, on prepared tray.

Repeat with remaining dough.
If desired, dust mints with edible glitter.

Allow soft peppermints to sit uncovered at room temperature for 8-10 hours or until dry to the touch. Use a small stepped palette knife to flip the mints halfway through to ensure that they dry evenly on both sides.
Store soft peppermints in an airtight container at room temperature for up to 3 weeks.


Notes
*It might take some trial and error to find the twisting method and rope thickness that works for you. I like to twist mine multiple times to create unique swirls and patterns.
You’ll need rubber gloves for kneading and adding food coloring to the dough.
Wrap dough in clingfilm/plastic wrap when not in use, to prevent it from drying out. And work quickly! Dough will crack and become difficult to work with as it dries.
- Prep Time: 40 minutes
- Drying Time: 8-10 hours
- Category: Candy and Confectionery
- Method: No Cook
- Cuisine: Christmas

Make-Ahead and Storage Suggestions
Store soft Christmas peppermints in an airtight container at room temperature for up to three weeks, layered between sheets of parchment or wax paper to prevent the mints from sticking together.
Other Christmas Candy Recipes You Might Enjoy
Festive Cranberry Jelly Candies
Old-Fashioned Hard Candy
Peppermint Marshmallows
Chocolate Peppermint Christmas Lollipops
Candied Orange Peels
And if you do make these, or any of my recipes, don’t forget to tag me @bastecutfold or use the hashtag #bastecutfold on Instagram. I always love to see what you’re making!