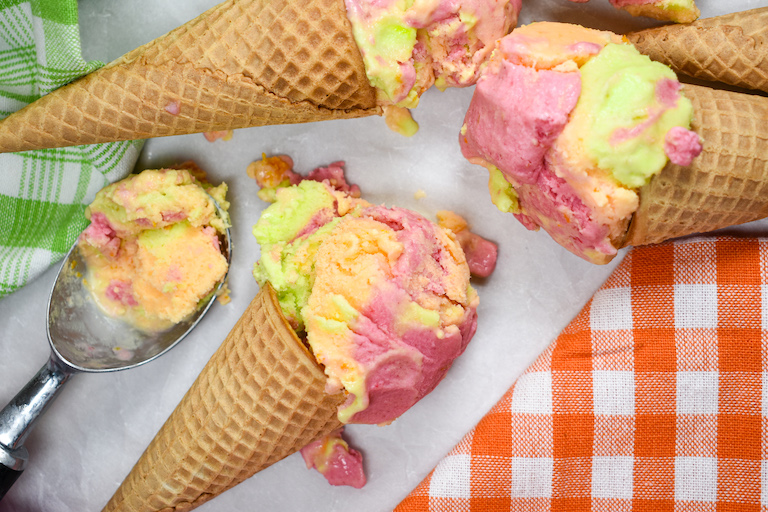
Rainbow Sherbet
This post may contain affiliate links. Please read the disclosure policy to learn more.
Thank you for supporting this blog!
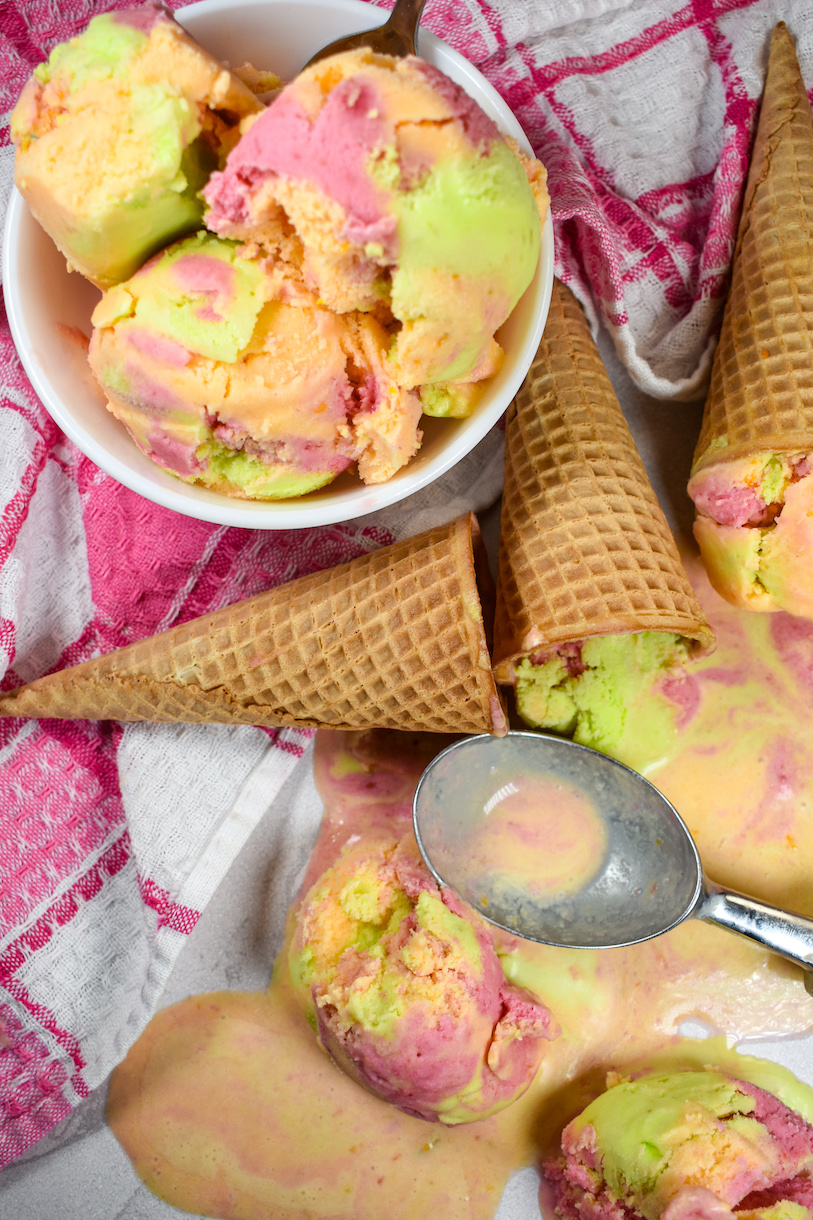
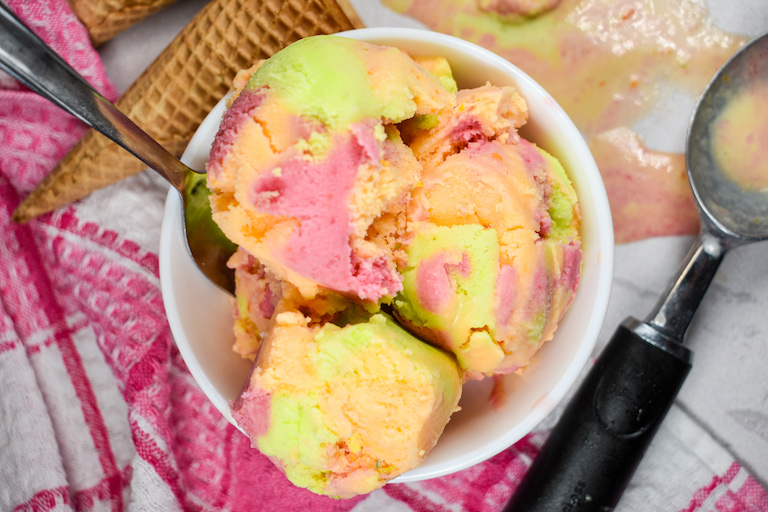
A homemade rainbow sherbet recipe made with real raspberry, orange, and lime, plus plenty of fresh citrus zest.
What Inspired This Rainbow Sherbet Recipe?
I’ve always been a fan of all things rainbow. Rainbow Rice Krispie treats, rainbow cake rolls, rainbow cookies, cupcakes piled high with rainbow buttercream…I love it all.
Given this fondness, it probably comes as no surprise that even as an adult, rainbow sherbet remains one of my all-time favorite frozen treats. Although this retro dessert sometimes takes a backseat to popsicles, ice cream, sorbet, and granita, in the childhood nostalgia department, rainbow sherbet reigns supreme.
I’ll always choose rainbow sherbet if I see it on a diner menu, or in the freezer case at the supermarket. But if I can’t get my hands on the store-bought kind, I’ll make my own at home.
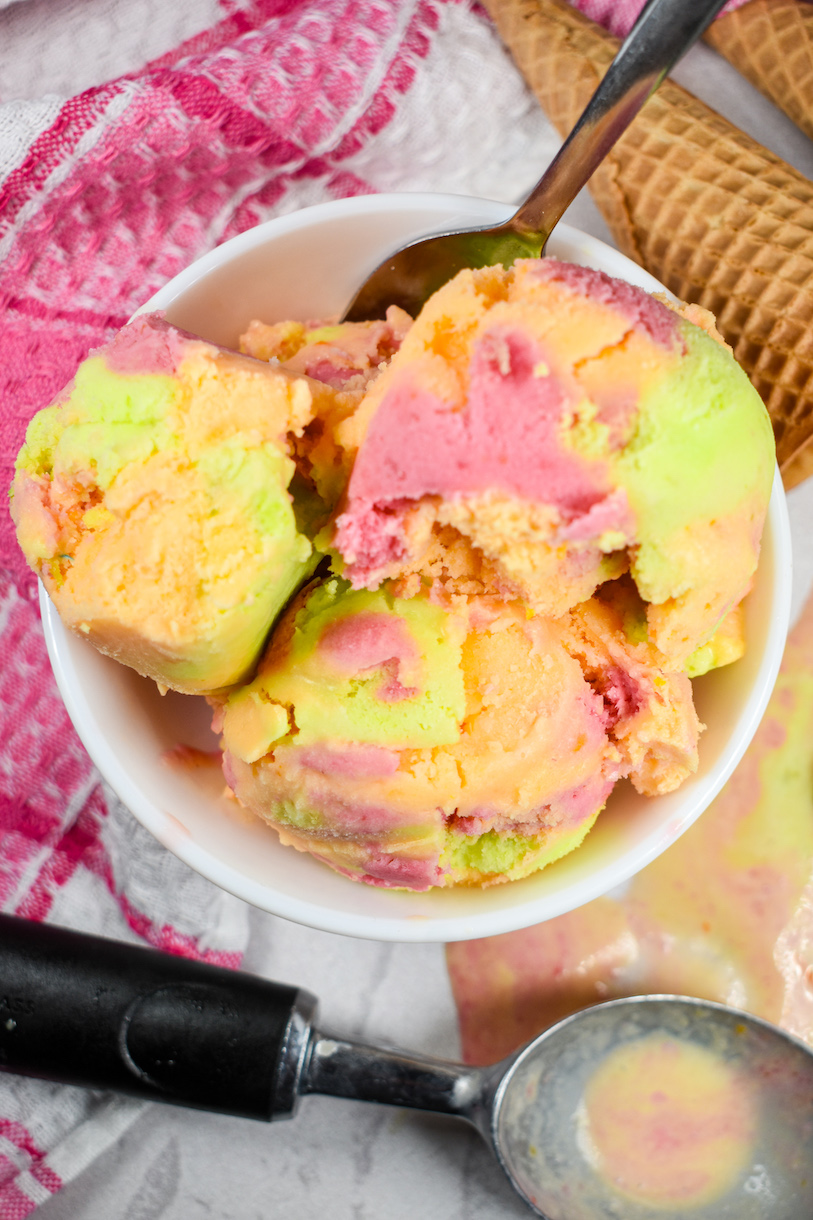
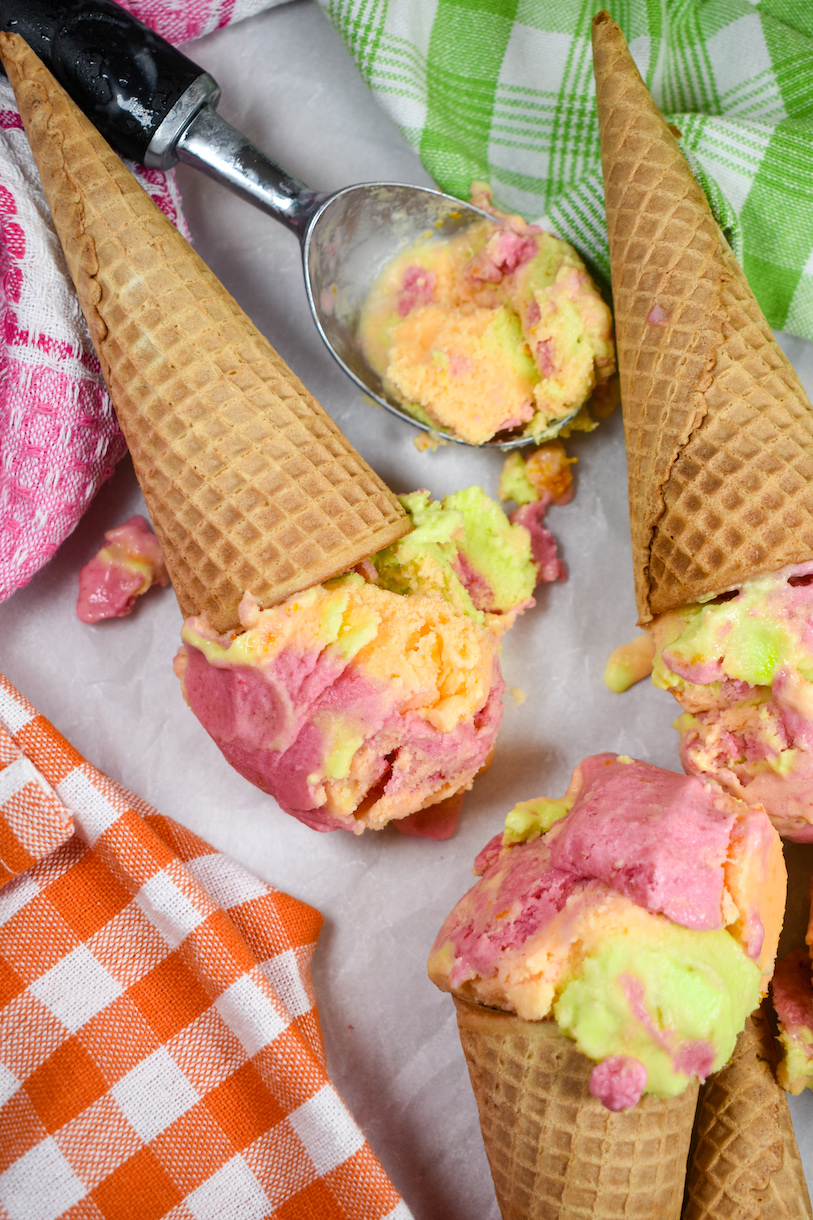
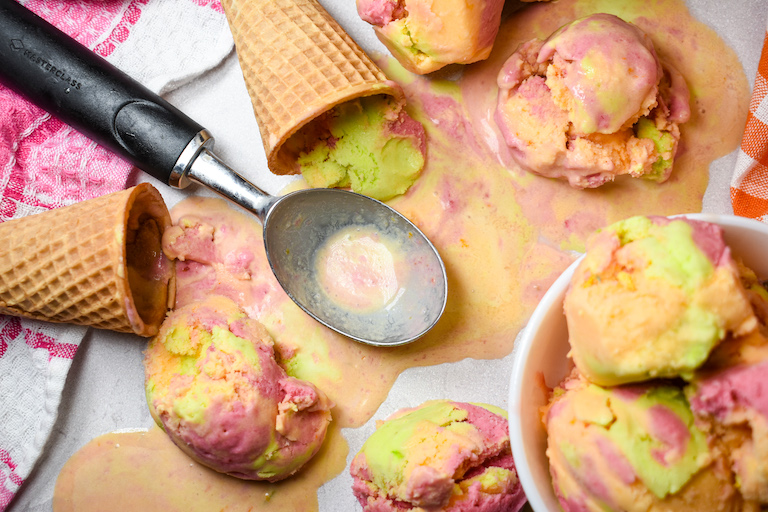
This homemade version begins with an ice cream base comprised of whole milk, sugar, and heavy cream. After churning in an ice cream maker, it’s divided into three portions (flavored with fruit purée, juice, and citrus zest), layered into a tub, and frozen until creamy and scoopable. Featuring real raspberry, orange, and lime in every scoop, this frosty treat will bring the colors of Pride to your dinner table all June (and all summer!) long.
Rainbow Sherbet Recipe Ingredients
To make your own rainbow sherbet, you’ll need the following ingredients:
- Whole Milk and Whipping Cream – Like my homemade ice cream recipes, this sherbet starts with a milk and cream base. Opt for whole milk, and whipping cream (heavy cream) with a milkfat percentage around 27%.
- Granulated Sugar – Granulated sugar (or caster sugar, measured by weight) sweetens both the sorbet base and the raspberry purée.
- Raspberries – You’ll need 170 grams (6 ounces) of raspberries to make the raspberry sherbet. Fresh or frozen berries will both work nicely. And if you have some left over, save them to make raspberry crumble bars or raspberry sorbet.
- Lemon – A small amount of lemon juice and zest adds a tart note to the raspberry portion.
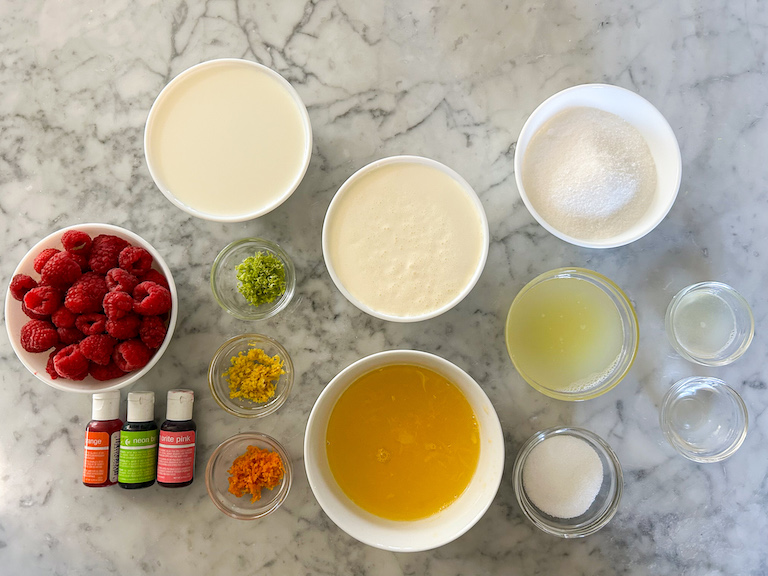
- Orange – To make the orange sherbet you’ll need 160 milliliters (2/3 cup; or about 3-4 oranges depending on the size of the fruit) of freshly squeezed orange juice, plus a teaspoon of zest.
- Lime – I used 80 milliliters of freshly squeezed lime juice, chilled (about 1/3 cup, or the juice of 2-3 limes) and 1 teaspoon of lime zest to make the lime-flavored sherbet. (And save the extras to make my lime curd recipe!)
- Gel Food Coloring – I added a few drops of Chefmaster‘s pink, orange, and green Neon Brites gel food coloring to my sherbet base for a brighter, more eye-catching color palette. You can omit the food coloring if you prefer a natural look.
- Alcohol – A tablespoon of alcohol, such as rum or vodka, makes the frozen sherbet easier to scoop. You can skip the alcohol if desired; just allow the sherbet to stand at room temperature for a few extra minutes prior to serving.
How to Make Rainbow Sherbet
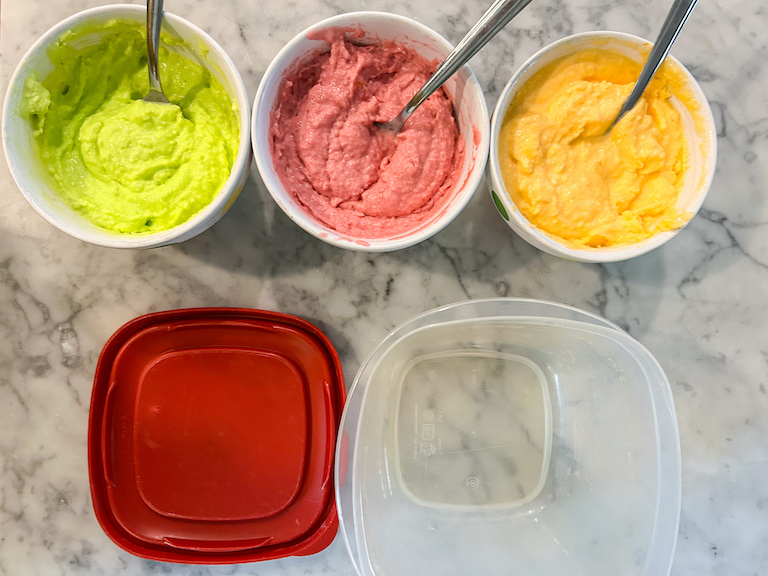
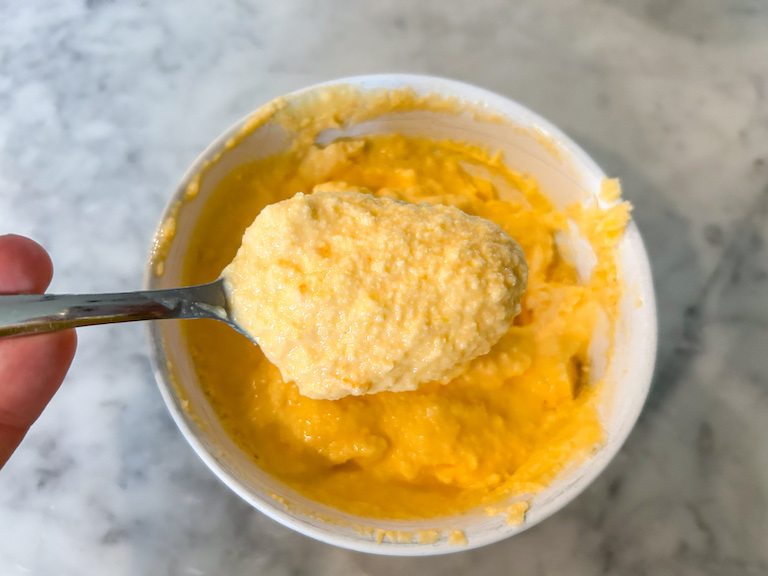
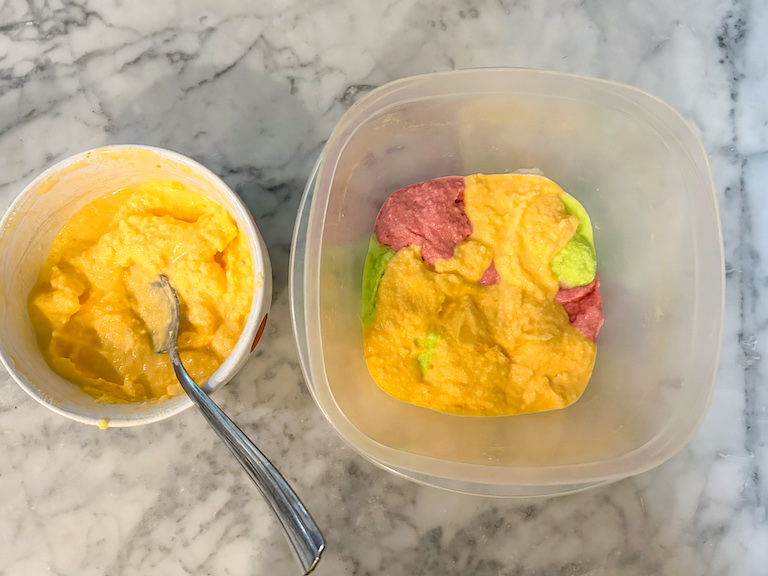
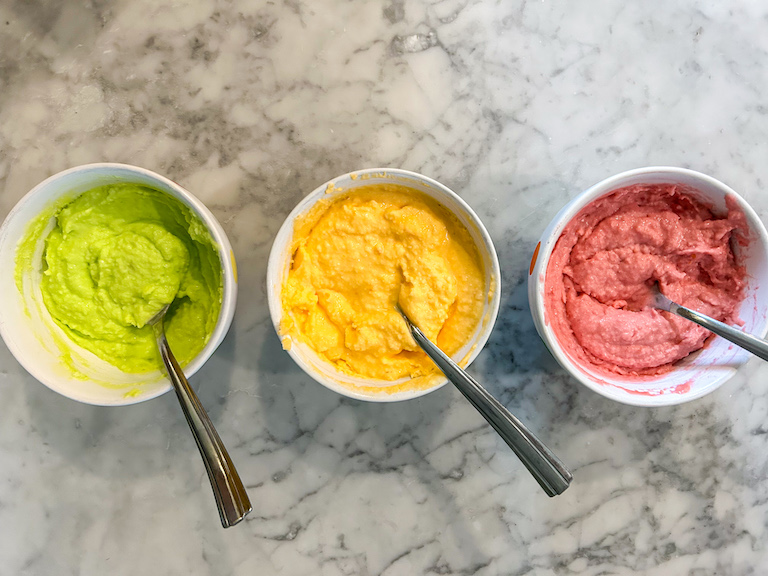
To create the rainbow layers, begin by making three individual flavors (raspberry, lime, orange) of sherbet. Pop each bowl into the freezer, scraping and stirring every 15 minutes (just like you would when making granita) until all flavors reach the consistency of a thick, slightly icy milkshake:
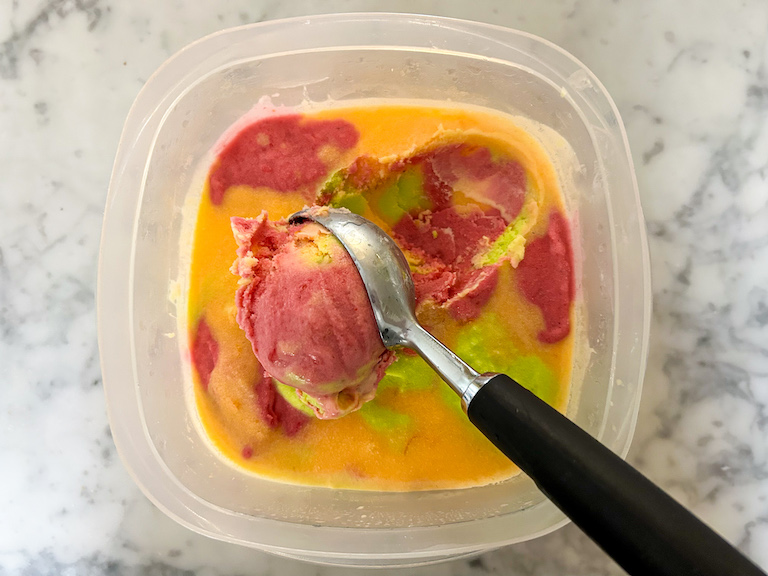
Then, use a standard dinner spoon or small measuring cup to scoop the sherbets into a freezer-safe container in alternating spoonfuls, creating an abstract rainbow pattern:
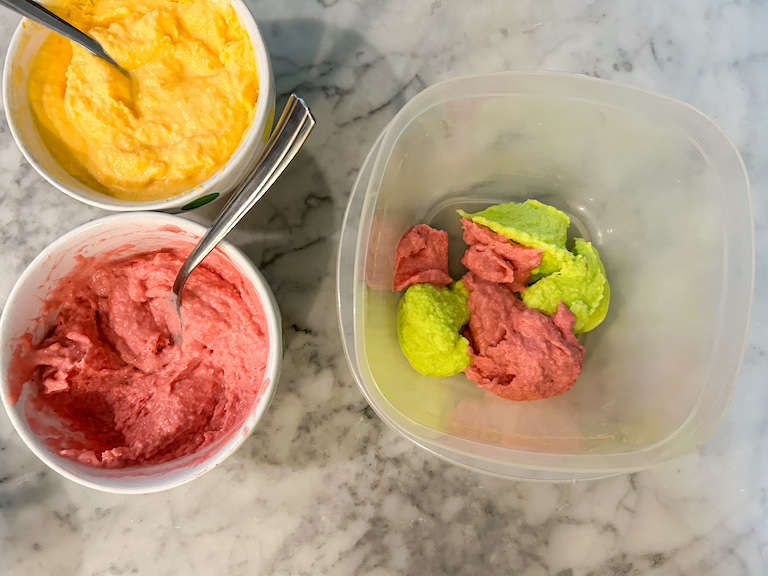
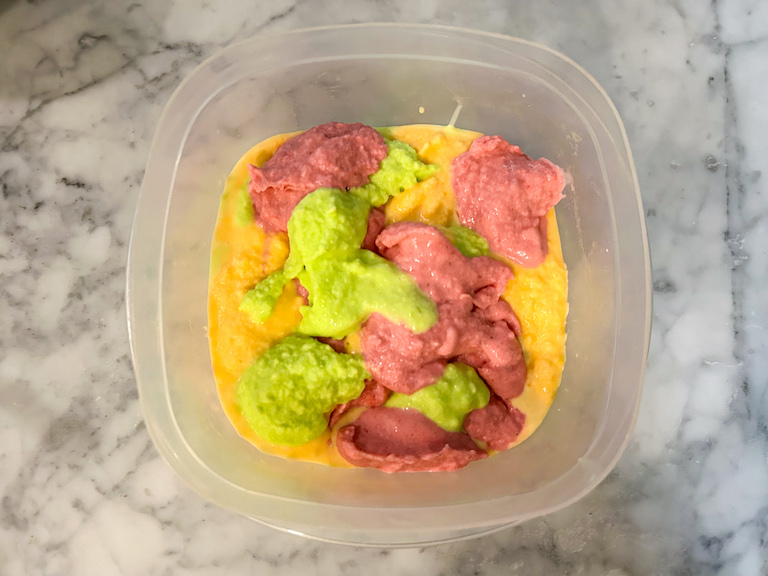
As you layer the colored sherbets into the container, periodically tap container gently on countertop to settle the contents. Continue layering until you’ve used all of each flavor:
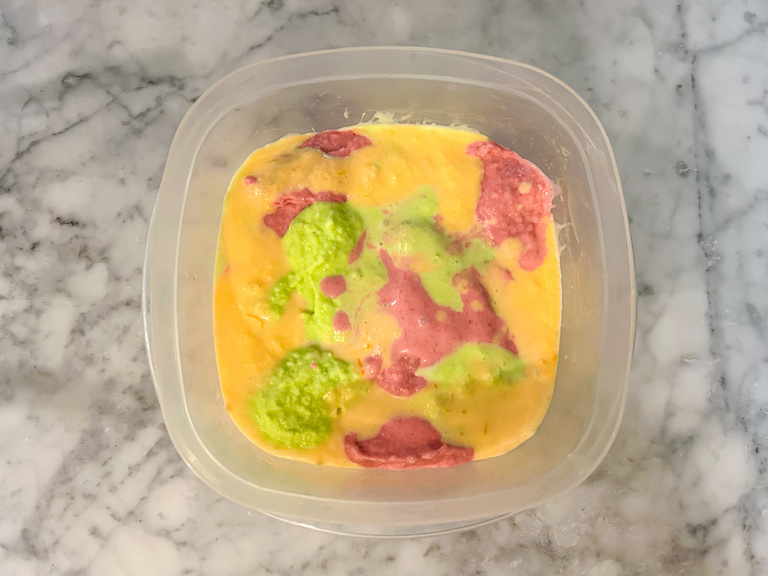
Then, transfer the layered sherbet to the freezer and freeze until smooth and scoopable. This will take approximately 2-4 hours, depending on the temperature of your freezer and the size of the container you’ve chosen.
For detailed, step-by-step instructions and quantities, scroll down to the recipe card below.
Helpful Tools
To make this recipe you’ll need a countertop ice cream maker (I love my Cuisinart 1.5-quart model) for churning the base; a set of small bowls for mixing the individual flavors; a blender or food processor for making the raspberry purée; a fine mesh strainer for straining the purée; a wire whisk for whisking the base; a rubber spatula for folding in the fruit; and a Microplane for zesting the lemon, orange, and lime.
You’ll also want to have a lidded, freezer-safe rubber container available for freezing, and a sturdy ice cream scoop for serving! Or, portion your sherbet into cardboard pint containers for gifting.
Recipe Tips and Tricks
Brighten things up. To make the sherbet more eye-catching, I added a single drop of pink, green, and orange food coloring to the raspberry, lime, and orange sherbet bases, respectively.
Keep it cold. When mixing the three flavors, work on one flavor at a time. Keep the other two bowls frozen when not in use.
Use a Microplane. For best results, finely zest the citrus on a Microplane, rather than using a box grater.

Make-Ahead and Storage Suggestions
Plan your timings accordingly. You’ll need to allow at least 12 hours to chill the base (I also recommend chilling the raspberry purée overnight), 1 hour to make and freeze the individual sherbet flavors, and 2-4 hours to freeze the container of layered sherbet prior to serving.
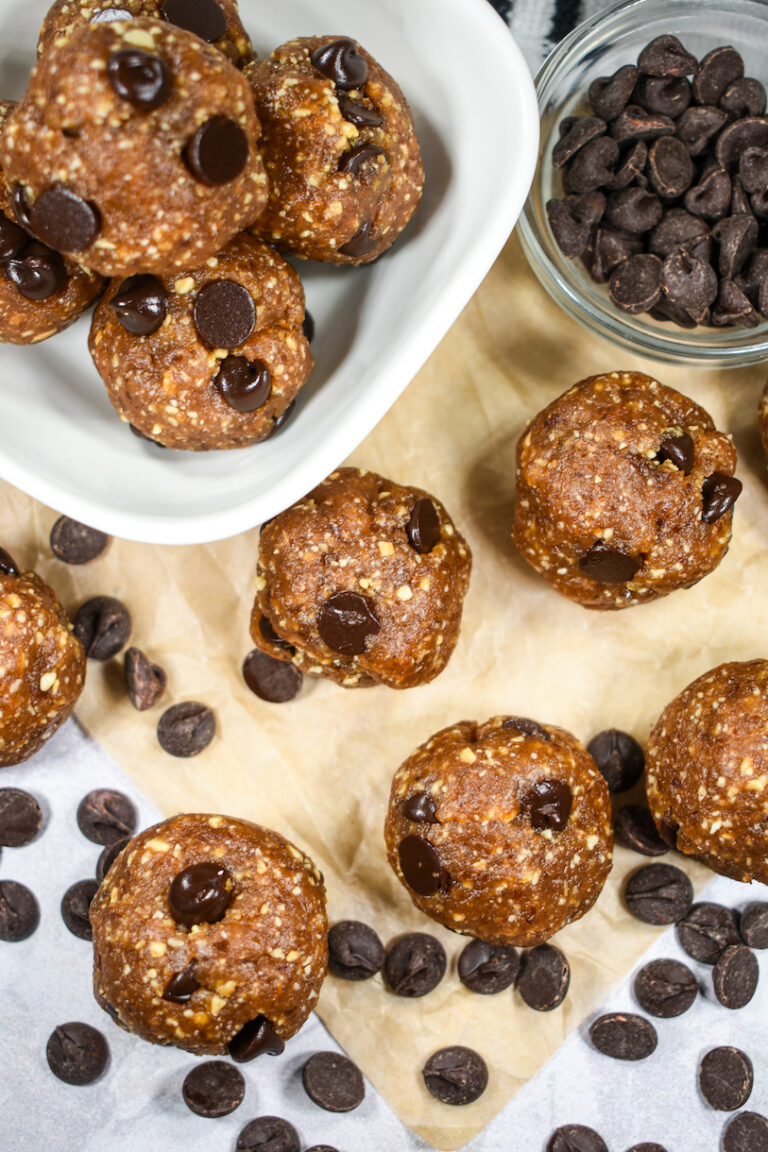
Other frozen dessert recipes you might enjoy:
Raspberry Sorbet
Cherry Cola Granita
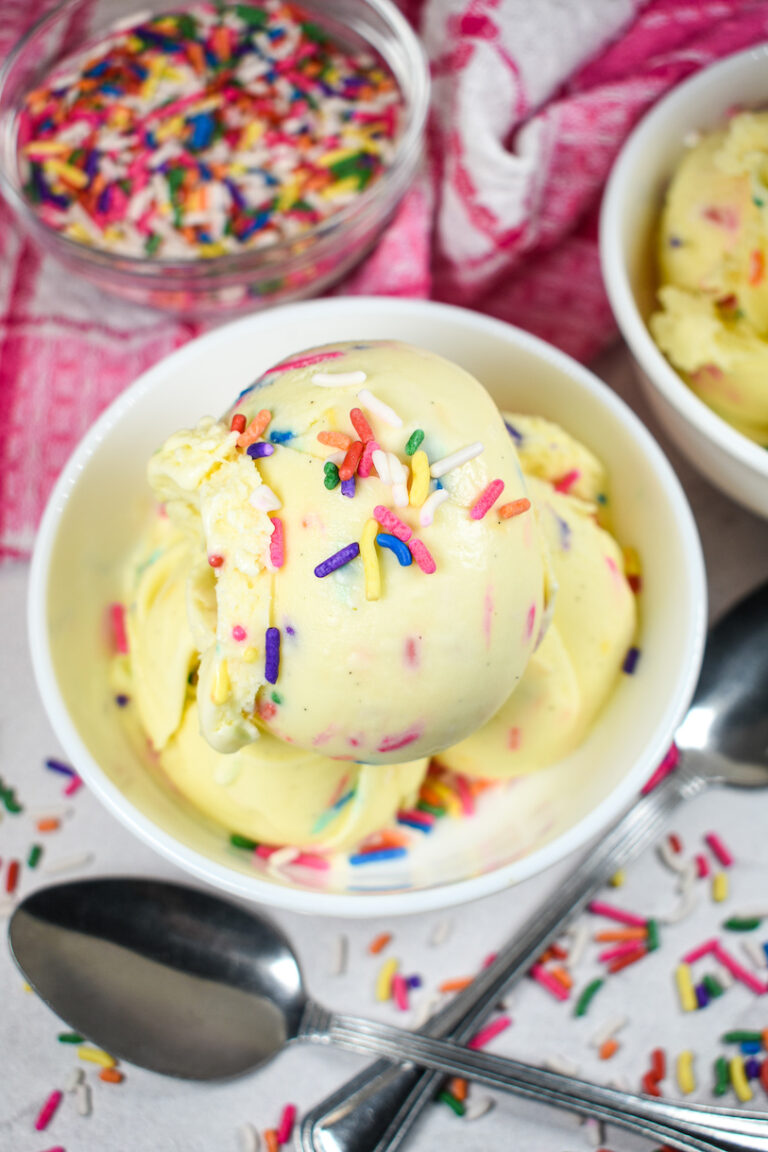
Birthday Cake Ice Cream
Cookies and Cream Ice Cream
Blueberry Sorbet
And if you do make these, or any of my recipes, don’t forget to tag me @bastecutfold or use the hashtag #bastecutfold on Instagram. I always love to see what you’re making!
Rainbow Sherbet
- Total Time45 minutes (plus chilling/freezing time)
- Yield1 kilogram (about 2 pints) 1x
Homemade rainbow sherbet made with real raspberries, oranges, and limes, plus plenty of fresh citrus zest.
Ingredients
240 milliliters whole milk (1 cup)
240 milliliters whipping cream (1 cup)
150 grams granulated sugar (3/4 cup)
1 tablespoon citrus vodka, optional, to prevent freezing
Raspberry Sherbet:
170 grams fresh or frozen raspberries (6 ounces)
25 grams granulated sugar (2 tablespoons)
1 tablespoon freshly squeezed lemon juice
1 teaspoon lemon zest
Pink gel food coloring
Orange Sherbet:
160 milliliters freshly squeezed orange juice, chilled (2/3 cup; juice of 3-4 oranges)
1 teaspoon orange zest
Orange gel food coloring
Lime Sherbet:
80 milliliters freshly squeezed lime juice, chilled (1/3 cup; juice of 2-3 limes)
1 teaspoon lime zest
Green gel food coloring
Instructions
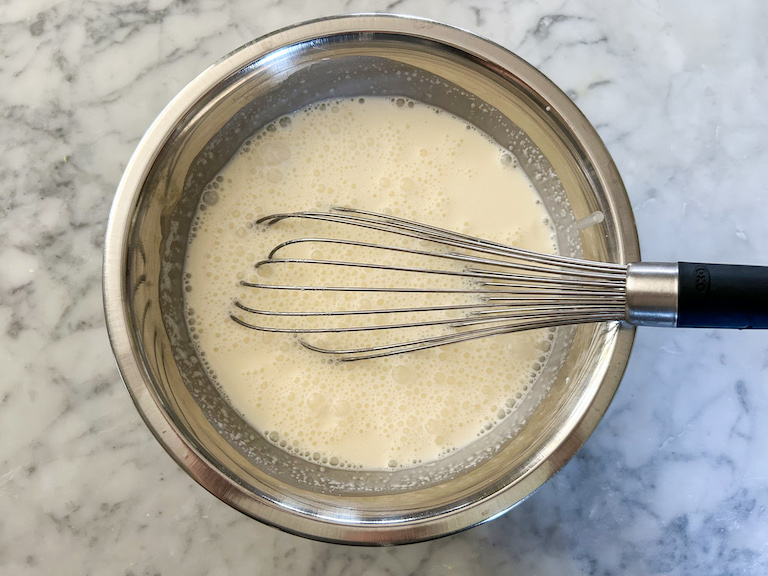
In a large bowl, combine whole milk, whipping cream, granulated sugar, and citrus vodka, whisking until sugar dissolves. Cover bowl and refrigerate for at least 12 hours, or overnight.
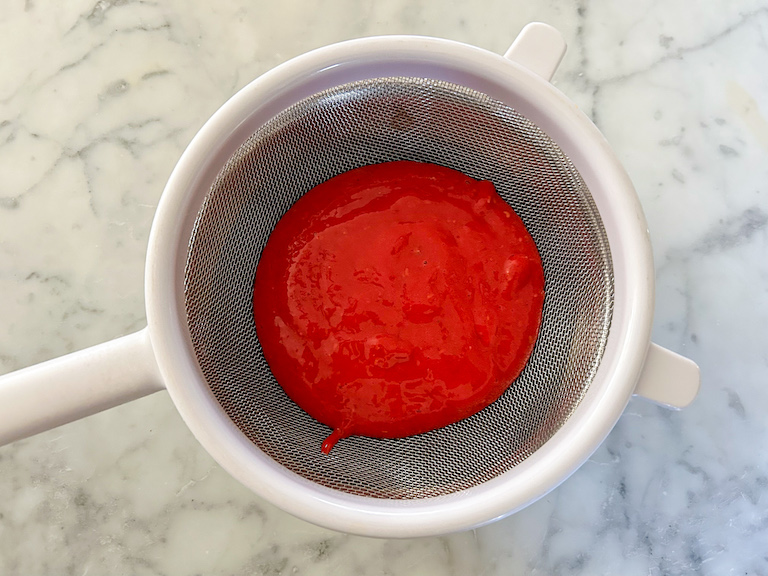
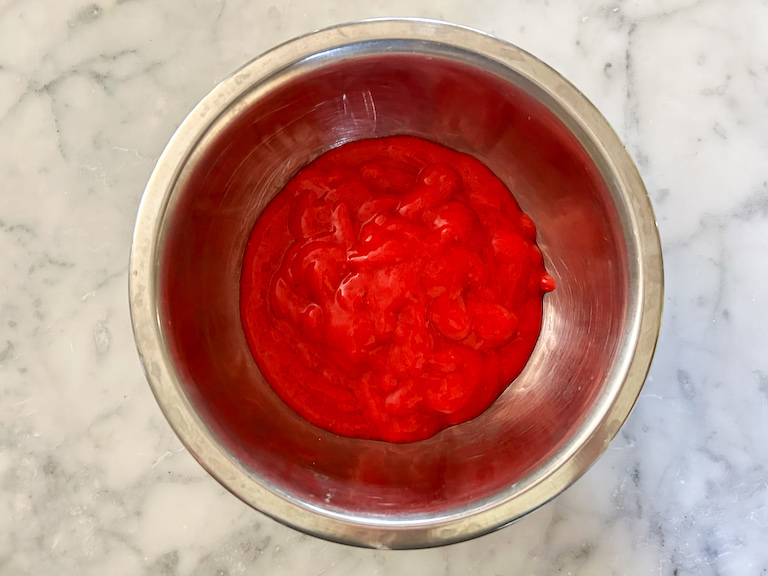
In a blender or the bowl of a food processor, purée raspberries, granulated sugar, and lemon juice until smooth. Pass purée through a fine mesh strainer to remove the seeds. Cover and refrigerate overnight.
Whisk chilled ice cream base briskly to recombine. Pour into ice cream maker, with bowl frozen according to manufacturer’s instructions. Churn until thick and creamy, about 15-20 minutes, or until consistency resembles soft serve ice cream.
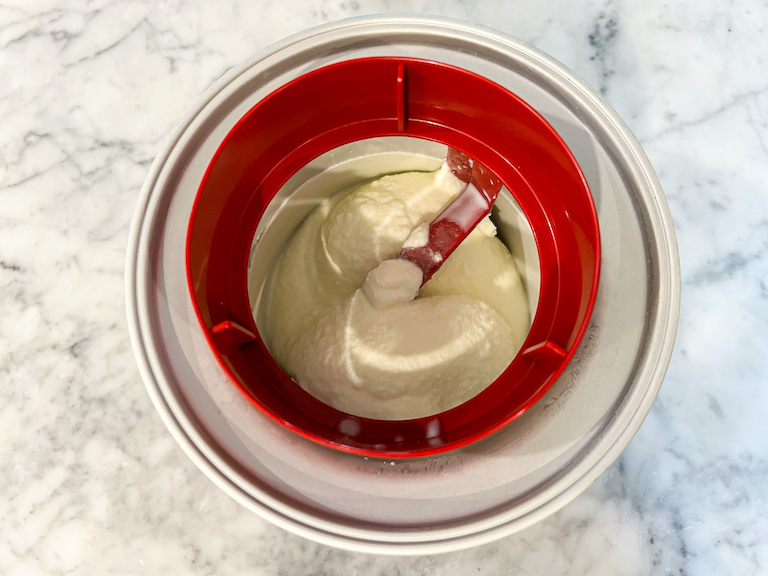
Portion churned ice cream base into 3 small bowls.
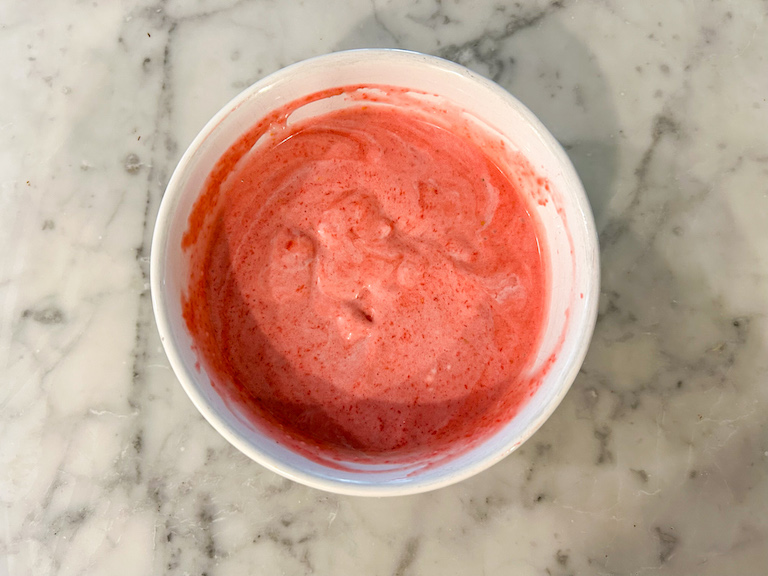
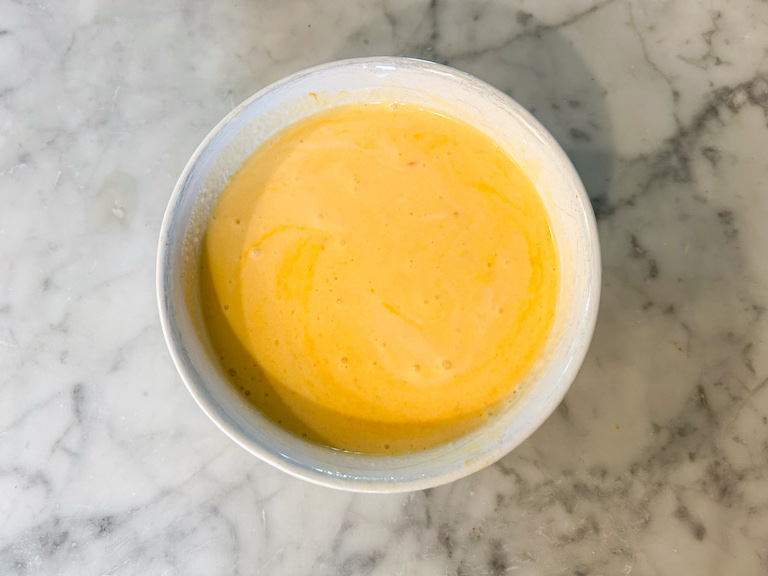
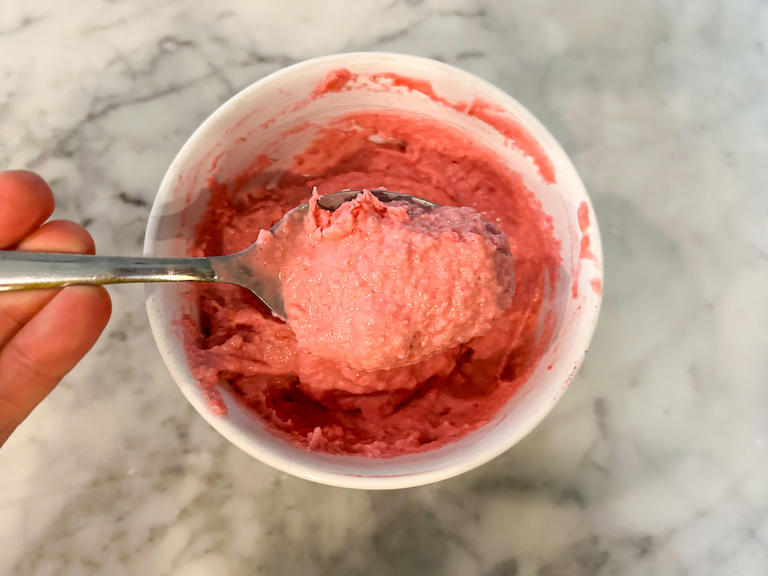
Into the first bowl, fold raspberry purée, lemon zest, and pink gel food coloring. Mixture will be very thin, like a melted milkshake.
Into the second bowl, fold orange juice, orange zest, and orange gel food coloring.
Into the third bowl, fold lime juice, lime zest, and green gel food coloring.

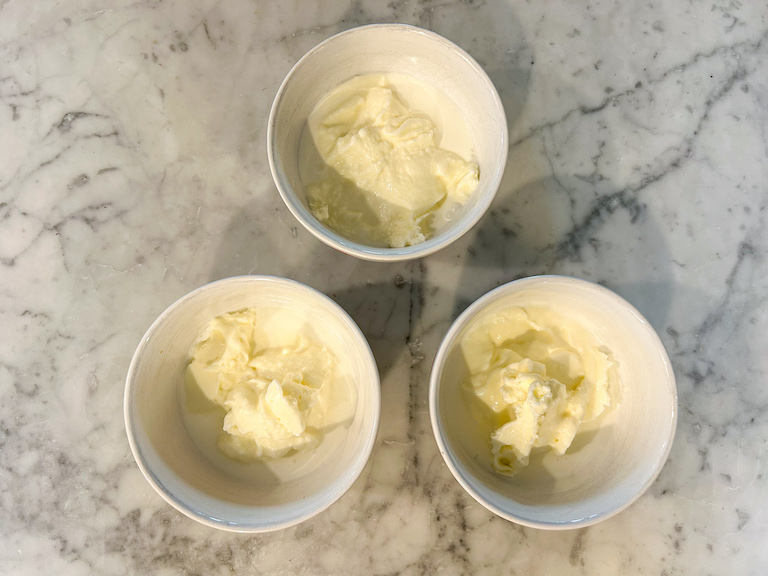
Freeze bowls for 15 minutes. Stir each flavor, scraping the sides of the bowl and mixing frozen crystals back into the base. Repeat every 15 minutes, until all flavors reach the consistency of a thick milkshake. (I repeated this step 4 times over the course of 1 hour.)
Scoop sherbets into a freezer-safe container in alternating spoonfuls, creating a layered rainbow pattern.* Do not stir.
Freeze 2-4 hours prior to serving, or until sherbet reaches a scoopable consistency.
Store homemade rainbow sherbet in the freezer for up to 1 month. For a scoopable consistency, allow to stand at room temperature for 10-15 minutes prior to serving.


Notes
*For more on creating the rainbow layers, see notes in the post above.
- Prep Time: 30 minutes
- Chilling/Freezing Time: 15-17 hours
- Cook Time: 15 minutes (churn)
- Category: Ice Cream and Frozen Desserts
- Method: Ice Cream Maker