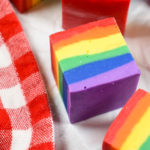
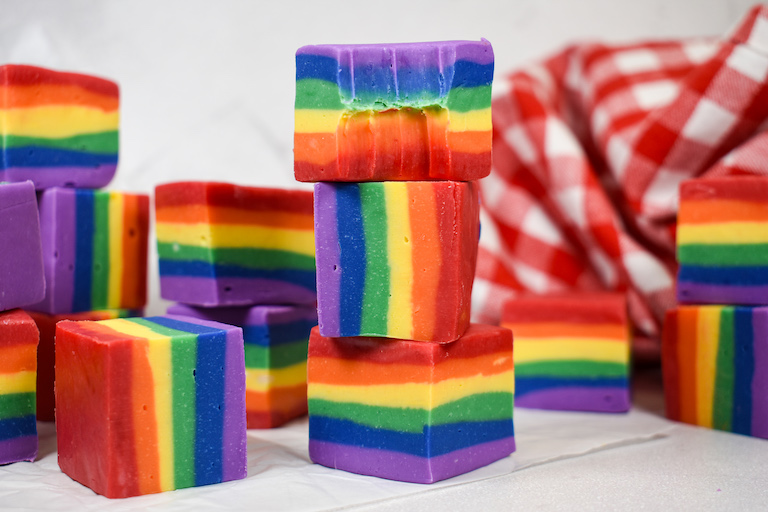
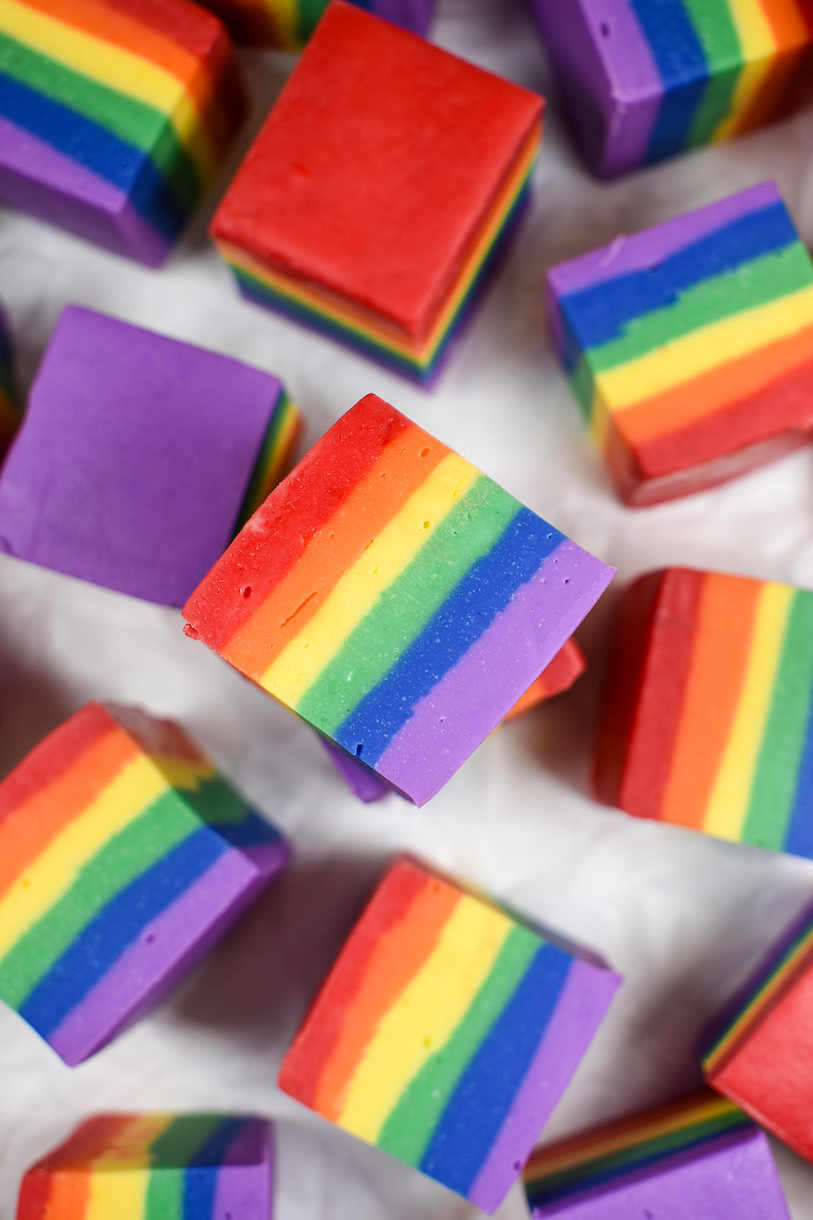
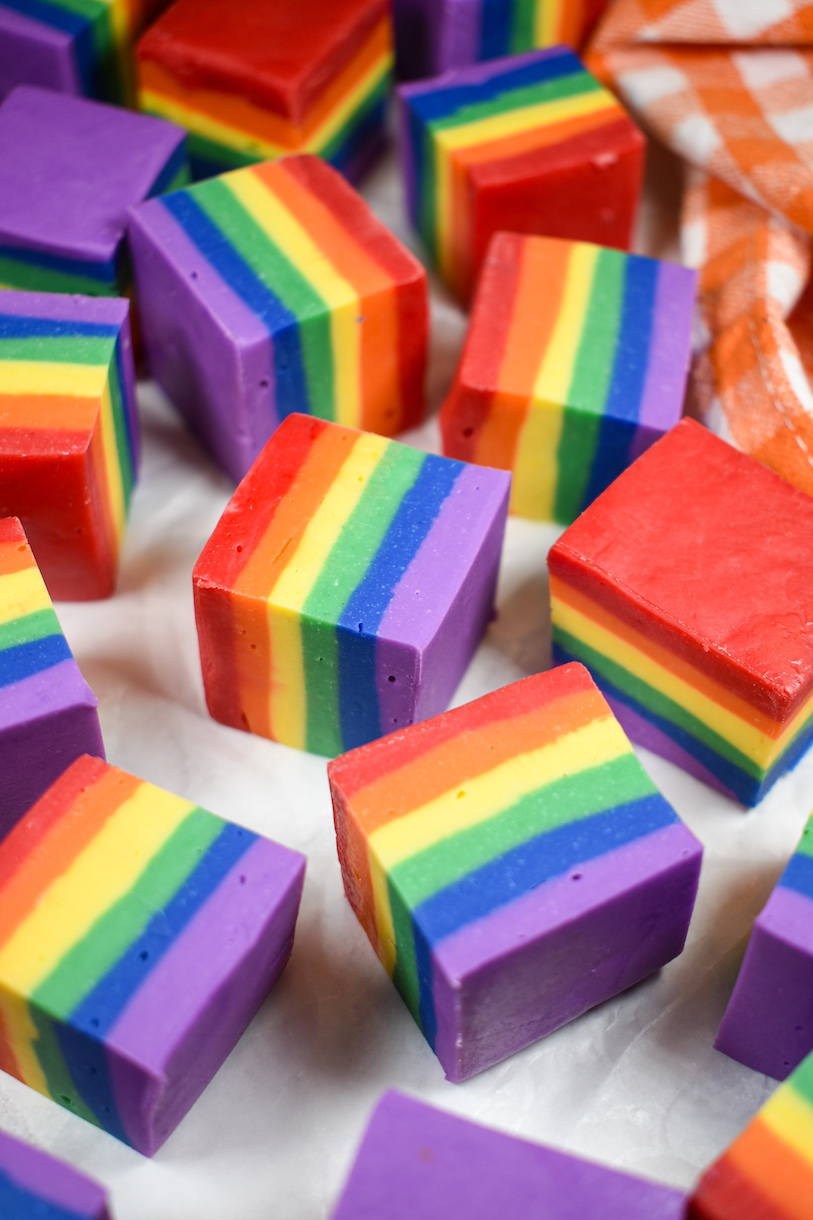
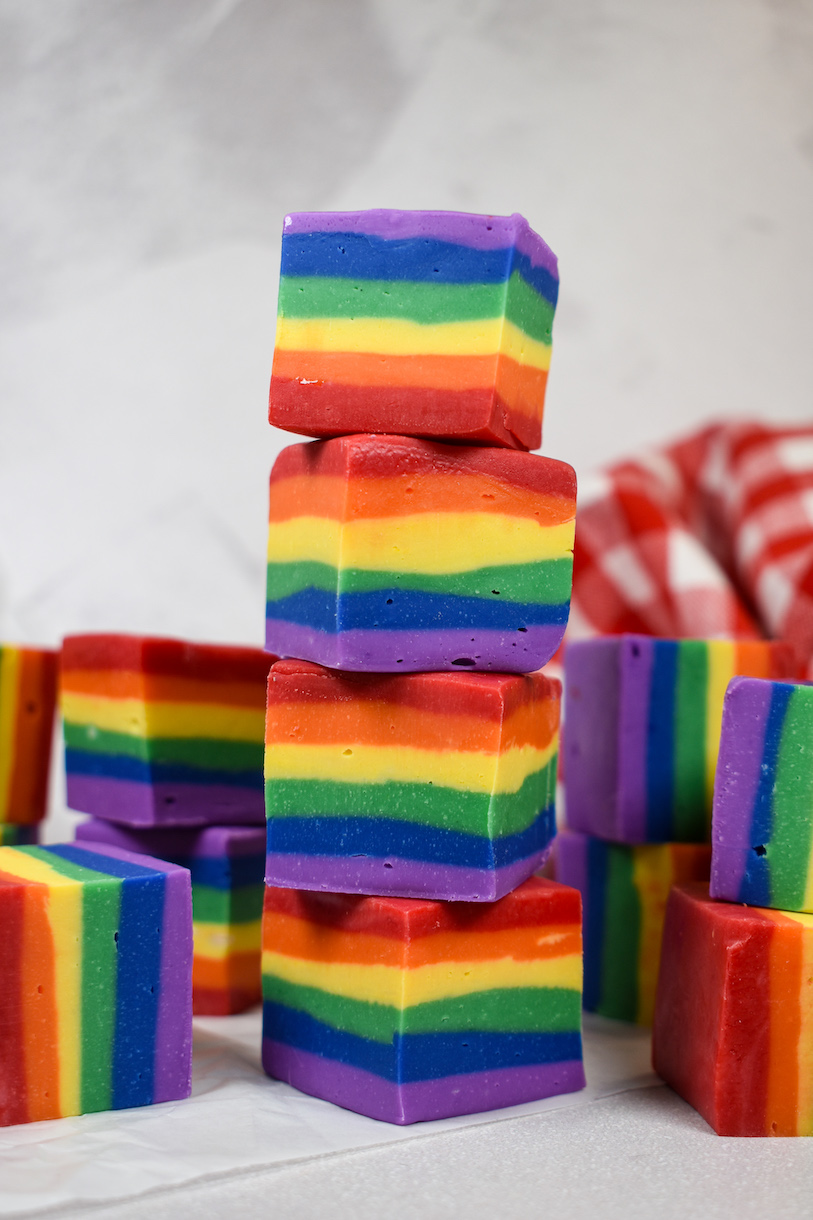
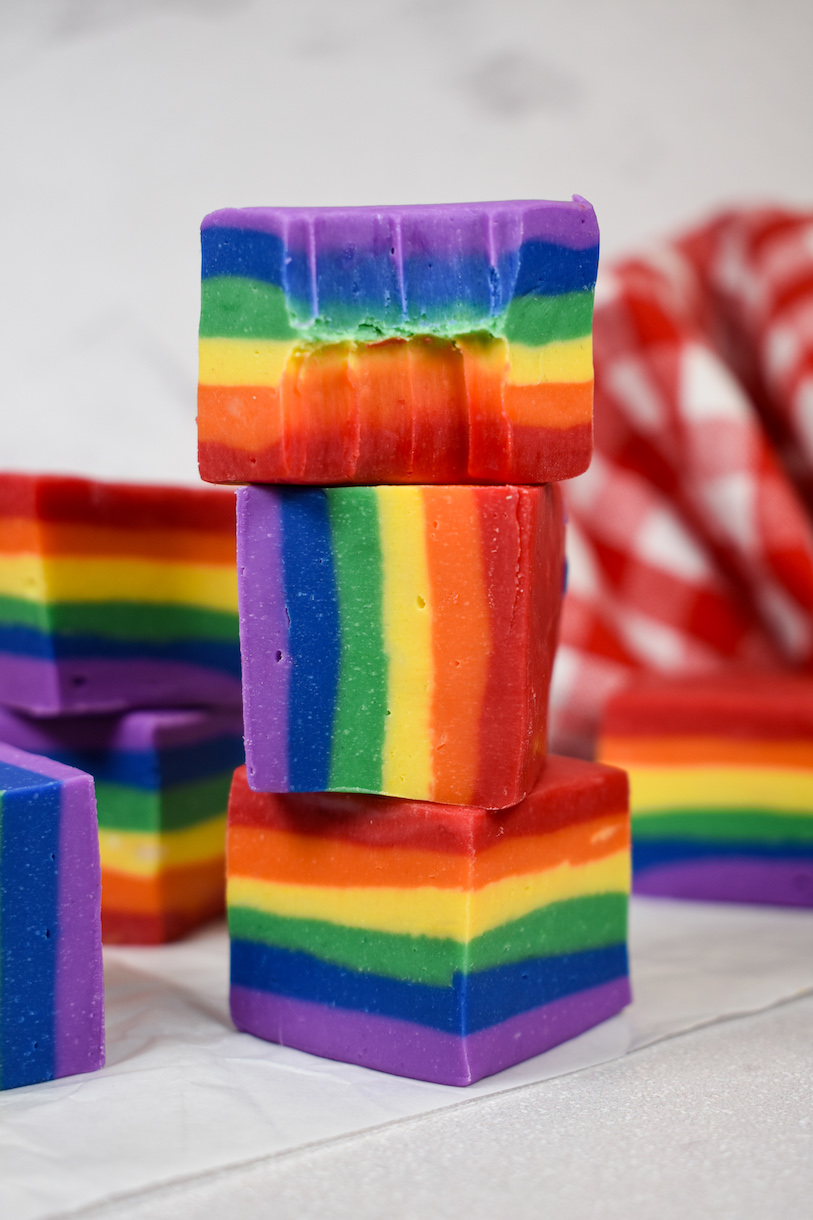
Rainbow Fudge
This post may contain affiliate links. Please read the disclosure policy to learn more.
Thank you for supporting this blog!
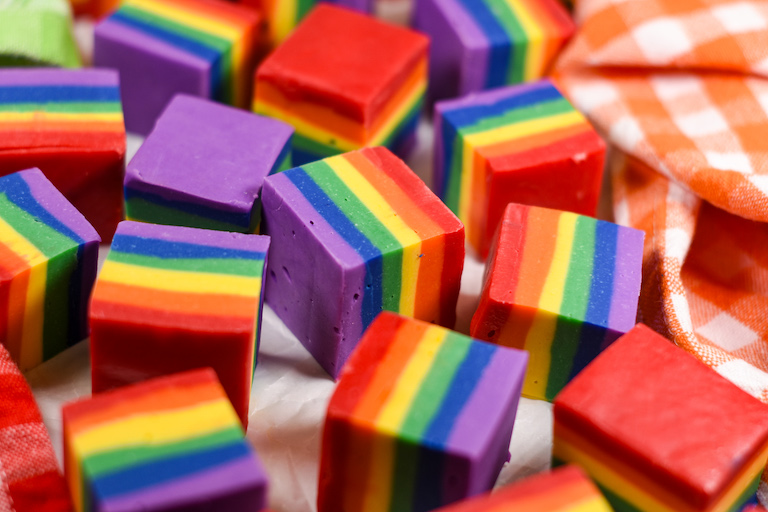
A four-ingredient rainbow fudge recipe featuring red, orange, yellow, green, blue, and purple layers of white chocolate fudge.
Why Make This Rainbow Fudge Recipe?
Made with just four ingredients, this rainbow-inspired recipe offers a fun twist on a tin of classic white chocolate fudge.
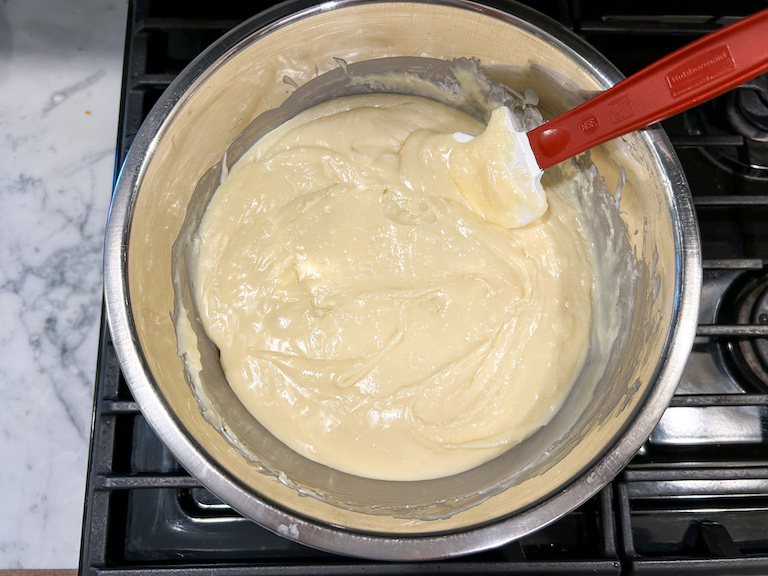
Simply melt white chocolate chips with sweetened condensed milk. Stir in a little bit of vegetable oil to adjust the consistency, then divide the mixture into smaller portions, tint with oil-based food coloring, and spread into a square pan. The result? Eye-catching, multicolored layers and a creamy, melt-in-your mouth confection.
Like my rainbow Rice Krispie treats and rainbow cake roll, this vibrantly colored fudge is perfect for adding pop of color to party trays, birthday party dessert tables, and Pride celebrations all summer long.
Rainbow Fudge Ingredients
To make this rainbow fudge recipe, you’ll need the following ingredients:
- White Chocolate Chips – Although I typically prefer to use white chocolate couverture in my recipes, for this one I recommend sticking with white chocolate chips. You’ll need 900 grams (about 32 ounces, or 4 1/2 cups).
- Sweetened Condensed Milk – This recipe calls for sweetened condensed milk, not evaporated milk. (Double check to make sure you’ve picked up the correct can!) You’ll need 21 ounces, or 600 grams, which should equal roughly 7 US cups, or about 1 1/2 cans. I highly recommend using a kitchen scale to weigh your condensed milk—too much (or not enough) liquid can affect the texture of the fudge and prevent it from setting properly.
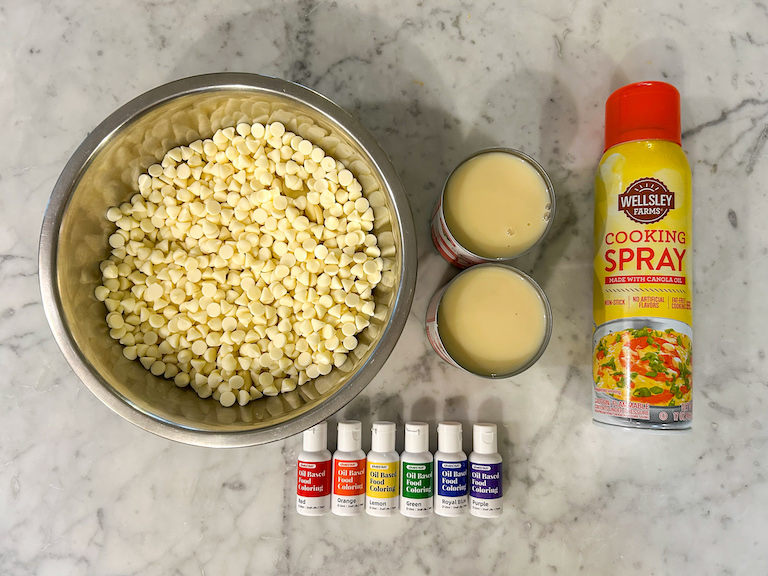
- Oil-Based Food Coloring – For tinting the white chocolate. For deep, even color, opt for an oil-based food coloring, rather than water or gel. To learn more about adding color to white chocolate, see my notes and tips below.
- Oil – A small amount of coconut oil or vegetable oil creates a smooth, spreadable consistency.
Tinting the White Chocolate
While colorful chocolate recipes (like my Lucky Charms cereal treats or kiwi frogs) sometimes call for candy melts or confectionery wafers, for this fudge recipe you’ll start with a single bowl of white chocolate and sweetened condensed milk, then create the rainbow layers by tinting the chocolate with food coloring as you go.
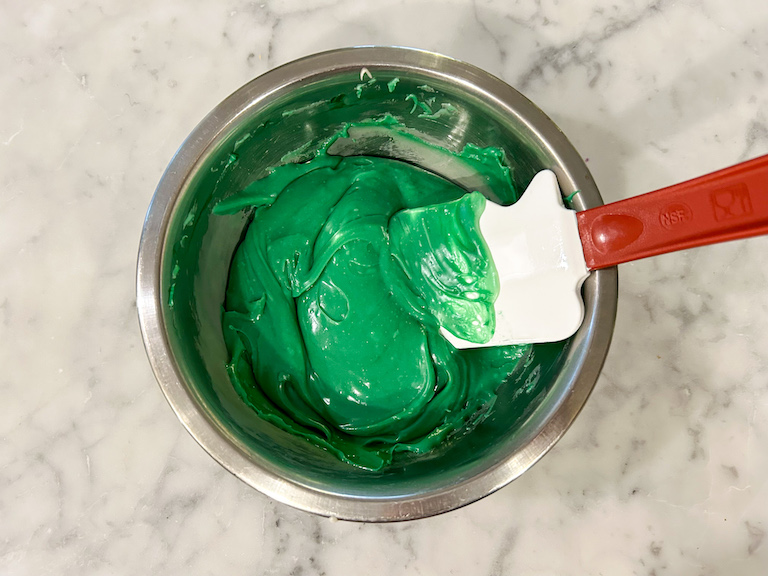 A bowl of tintedwhite chocolate
Gel food coloring works nicely for treats like hard candy and homemade marshmallows, but it’s not the best product for tinting chocolate. Adding water-based or gel colors can give white chocolate a splotchy and uneven appearance; for best results, opt for oil-based food coloring (sometimes sold as candy coloring) instead.
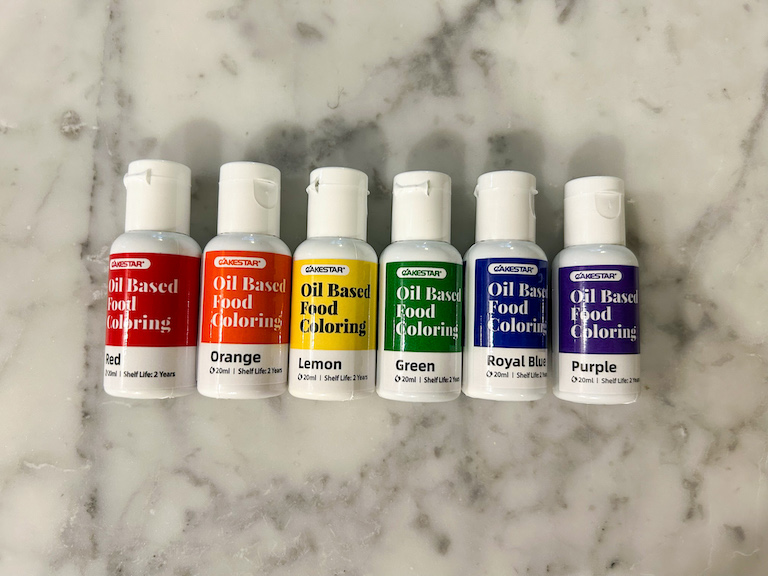 Bottled of oil-based food coloring
My biggest tip? Use a good quality, highly concentrated colorant from a brand such as Colour Mill. Cheaper products are often weak or diluted in color, so you’ll end up adding all or most of the bottle to achieve the vibrant rainbow colors.
Creating the Rainbow Layers
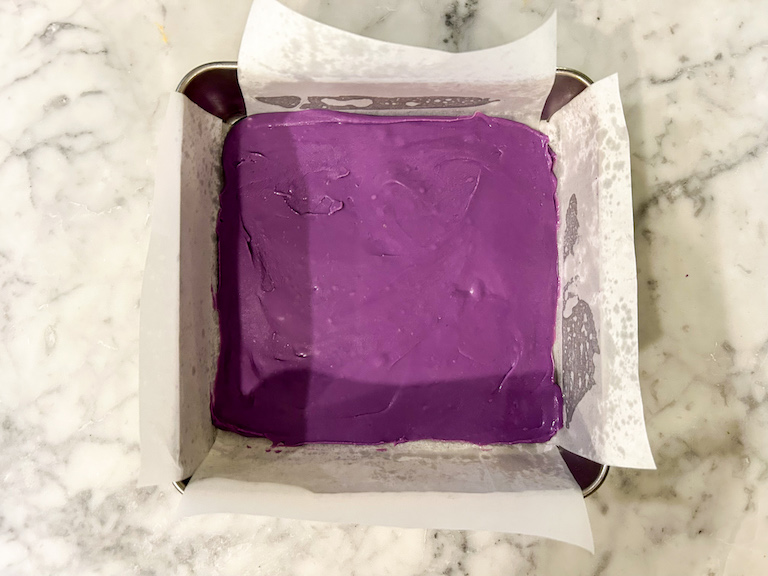
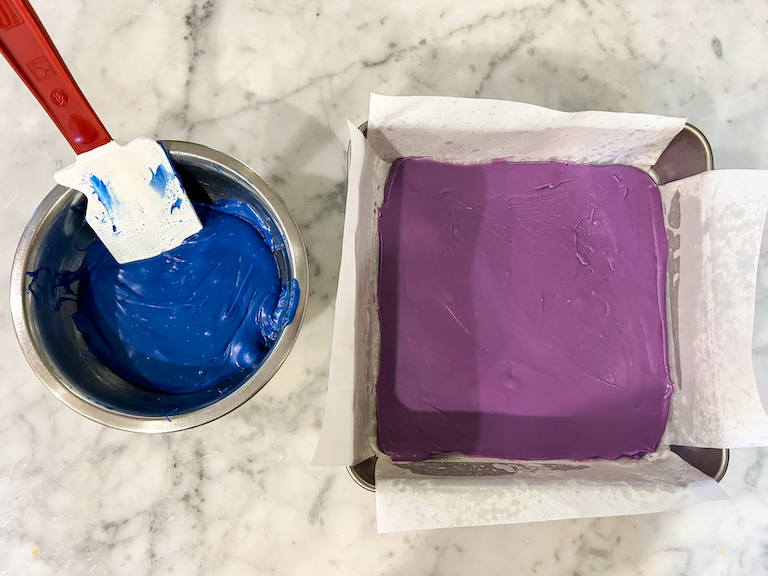
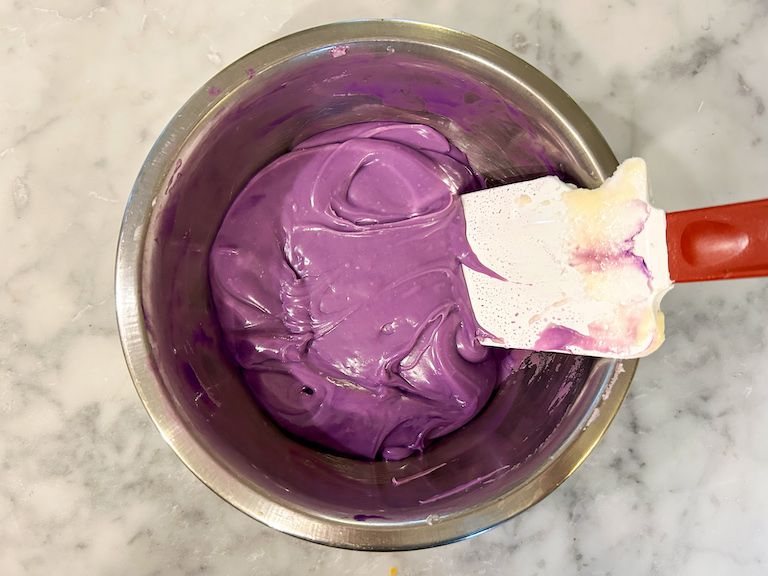
To make the layers, start by portioning 250 grams of the white chocolate mixture into a small bowl. Tint with purple food coloring, then use a small stepped palette knife or flexible rubber spatula to spread it across the bottom of your prepared tin:

Pop the tin into the freezer while you repeat the process, portioning and tinting the blue chocolate layer:
Scoop the blue chocolate on top of the frozen purple layer and spread it so it completely covers the purple:
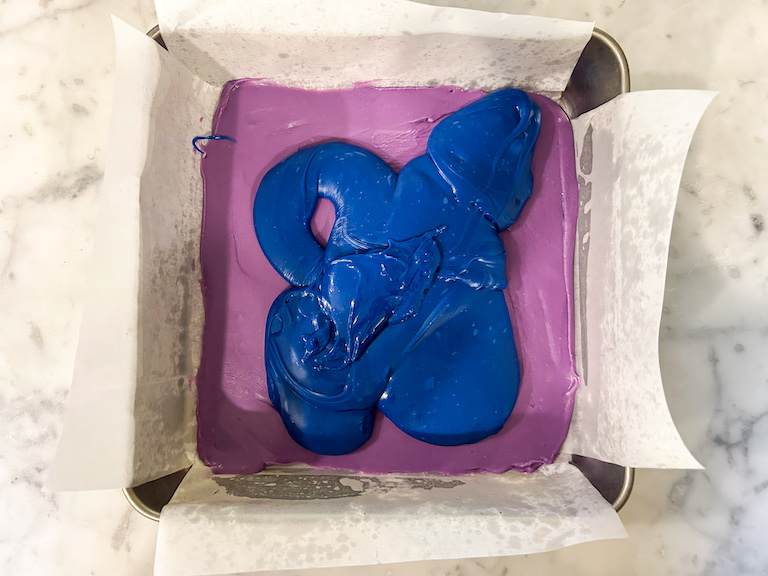
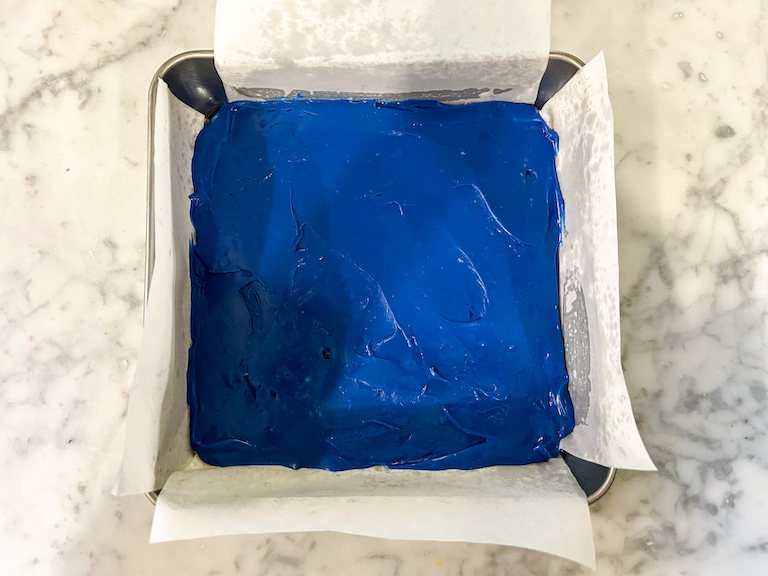
Next, do the same with the green layer. (Always freeze the tin between layers, or you’ll create a melty mess!)
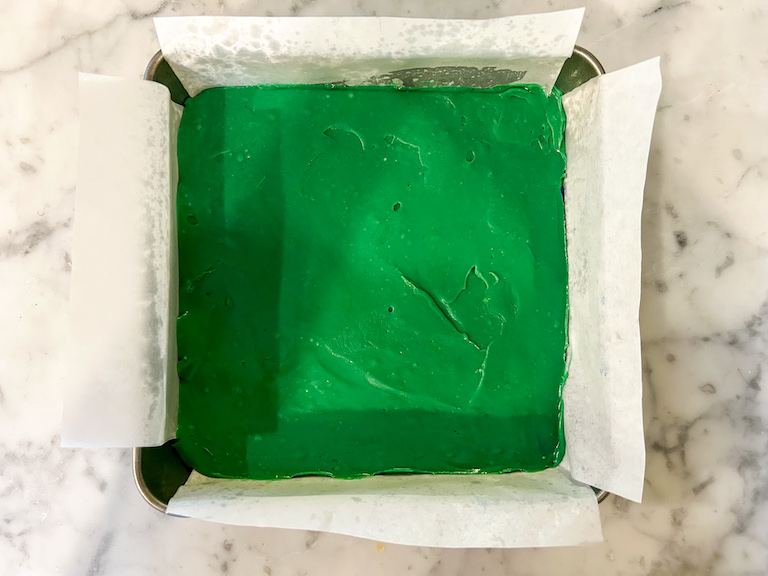
Then, do the same with the yellow:

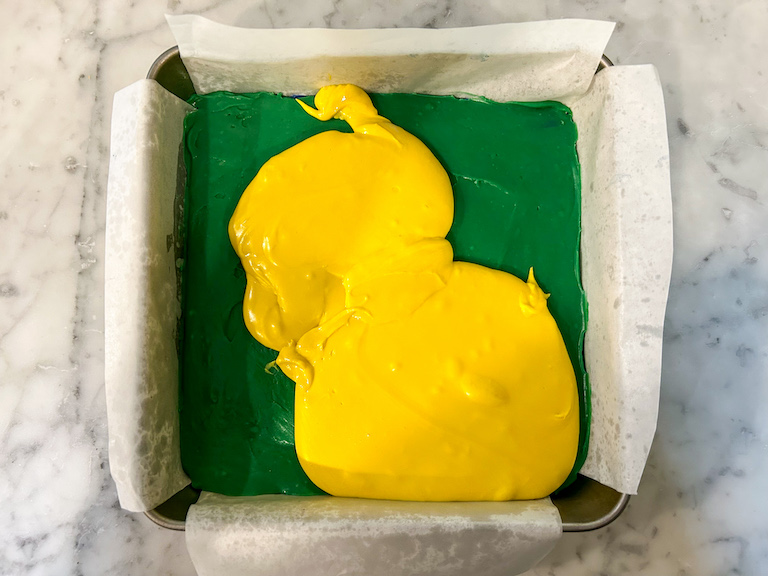
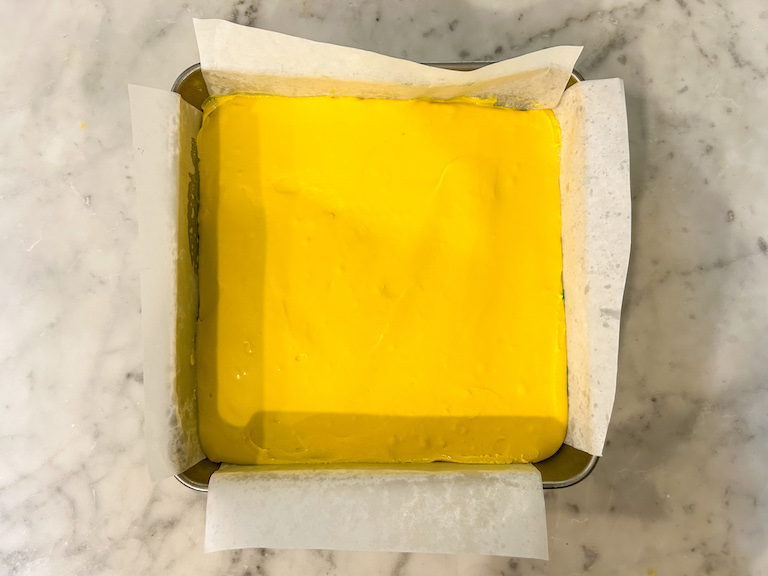
And then the orange:

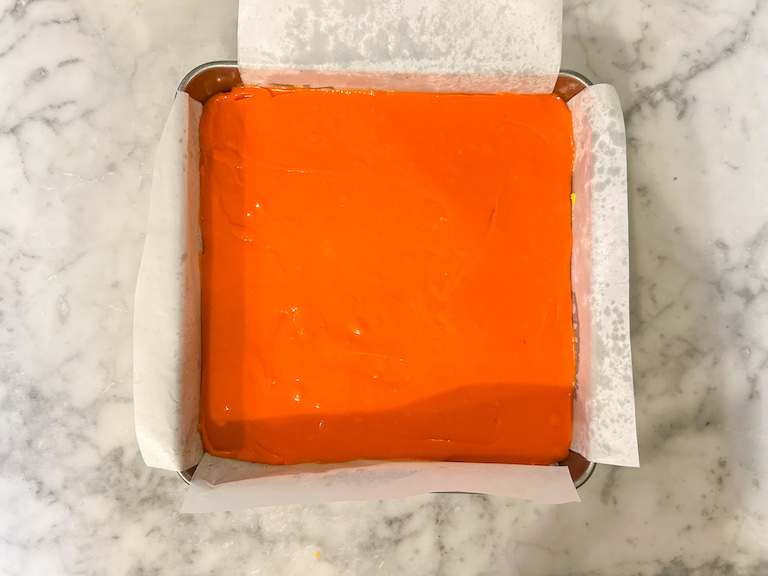
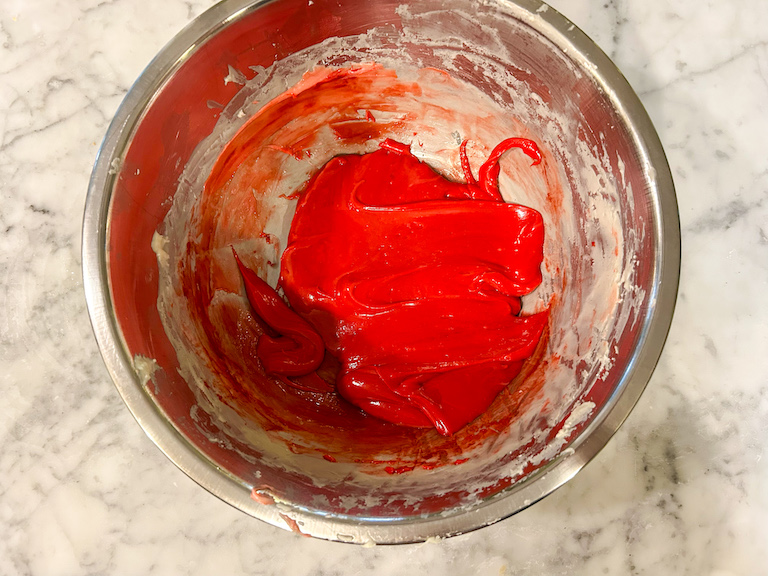
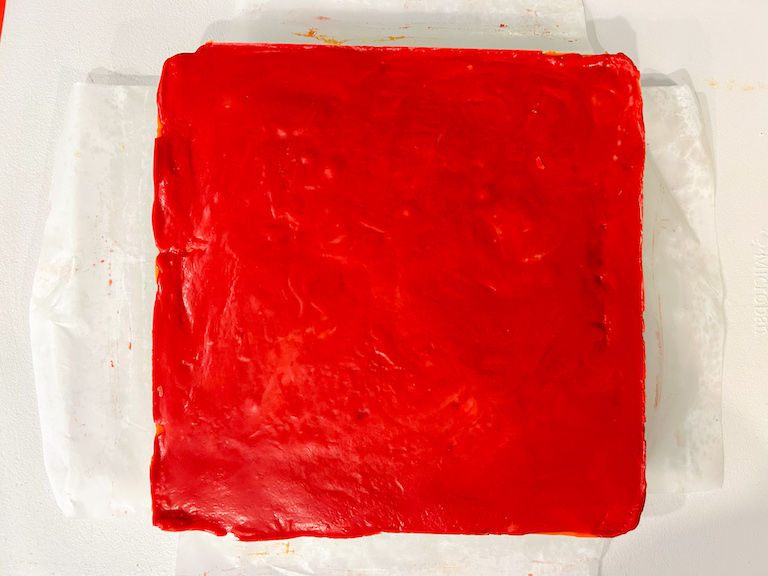
Finish with a layer of red. For the final portion, you can drop the red food coloring directly into your original bowl; no need to weigh or portion it into a separate container:
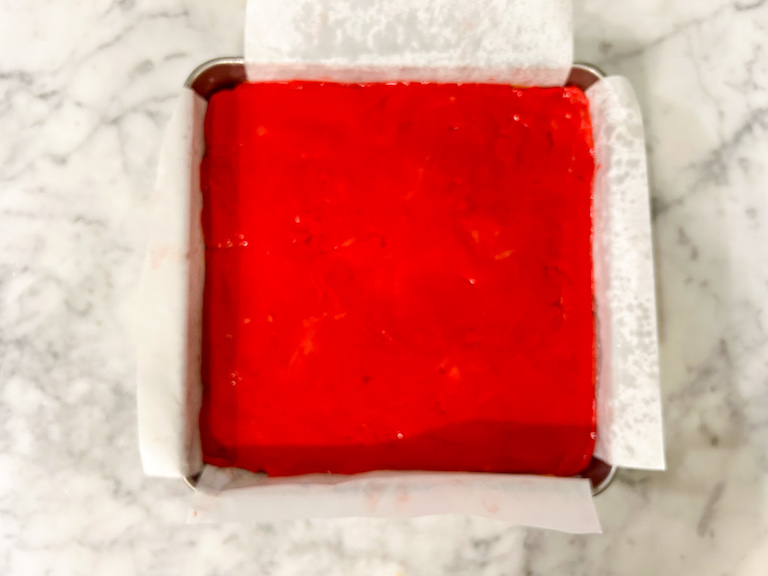
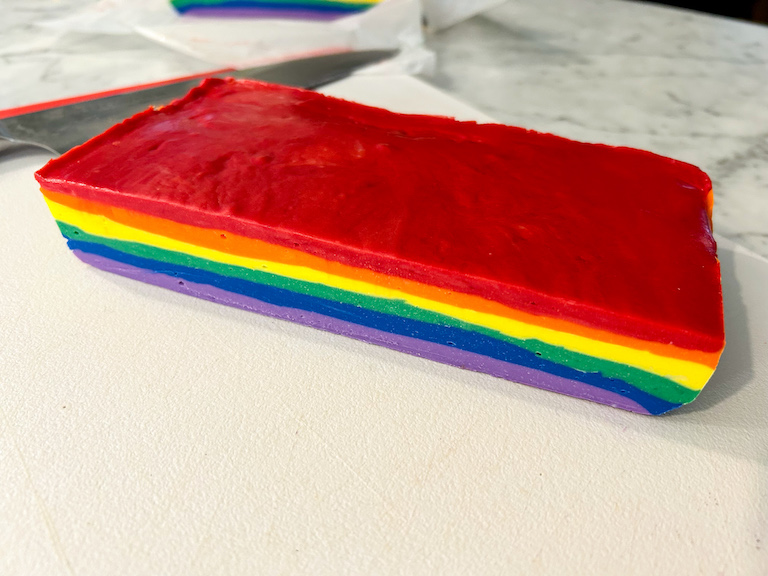
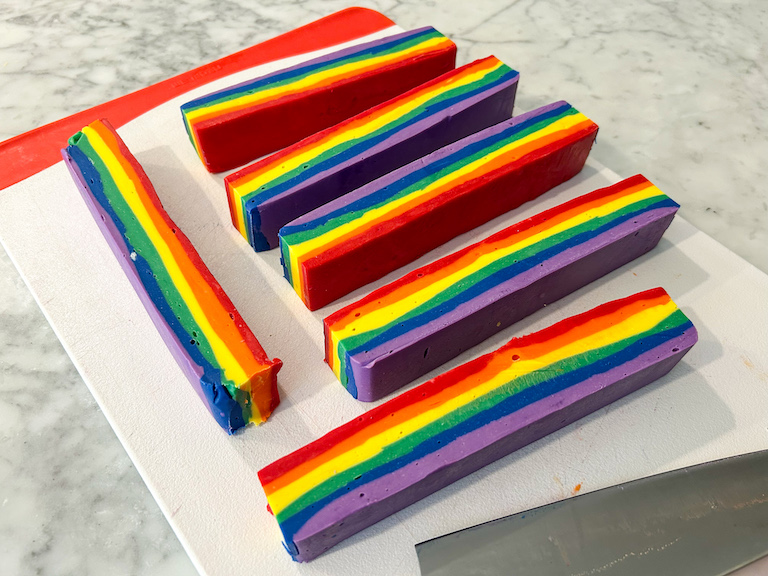
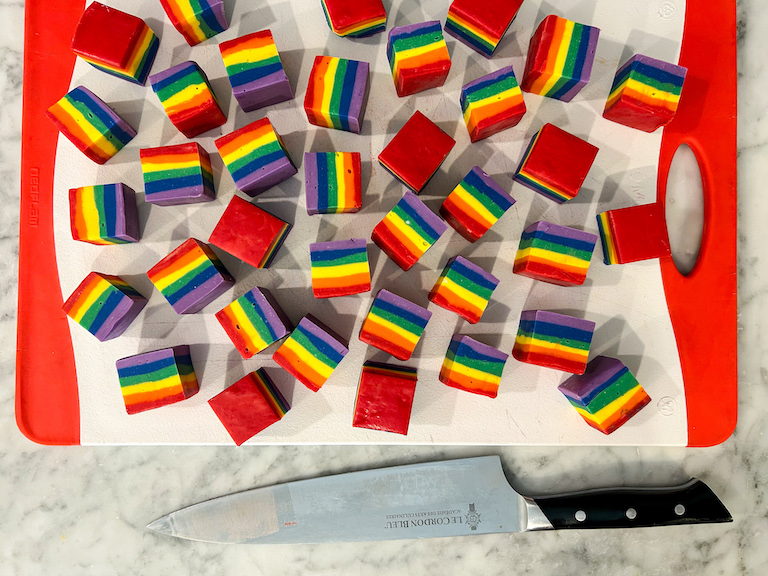
After making all of the rainbow layers, cover the tin with foil or plastic wrap and refrigerate it for at least two hours, or until the fudge sets, before slicing it into cubes.
Helpful Tools
While I provide volume measurements for most of my recipes, this one (like my French macaron recipe) absolutely requires the use of a kitchen scale. There is simply no good way to “eyeball” the portions of melted chocolate, and you’ll waste too much product if you try to scoop the chocolate into measuring cups. Weighing directly into a mixing bowl will yield equal portions and uniform layers.
In addition to a kitchen scale, you’ll need a double boiler or bain-marie to melt the chocolate (either of these is preferable to a microwave, as they’ll allow you keep the melted chocolate mass warm while you create the individual layers); a ladle (for scooping and portioning the melted chocolate); and a rubber spatula or small stepped palette knife, for spreading.
Recipe Tips and Tricks
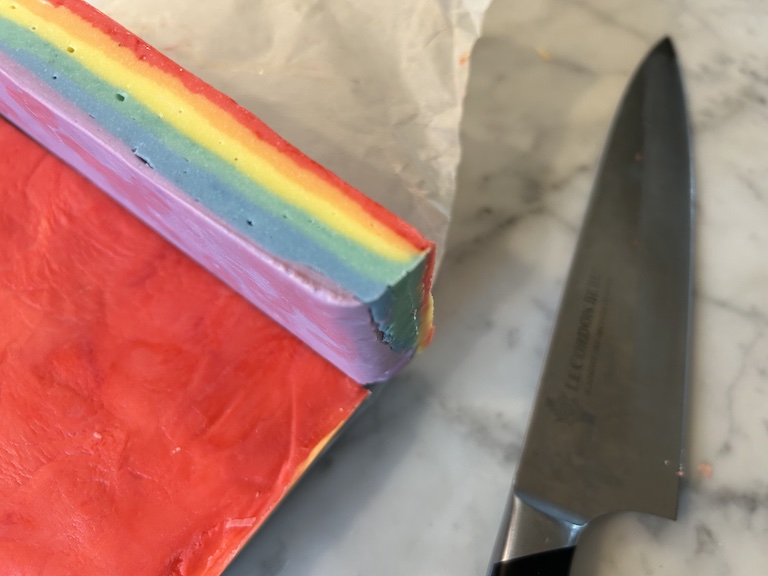
Use a hot knife. To cut the fudge slab, run a sharp chef’s knife under very hot water for 15-30 seconds before slicing. This will make it easier to cut through the layers, and will produce smooth, even cubes.

Keep the chocolate warm. Position the bowl of melted white chocolate over a pan of barely-simmering water to create a bain marie, and stir it periodically. This will keep the remaining chocolate mass fluid as you portion, tint, layer, and chill.
Make-Ahead and Storage Suggestions
Store rainbow fudge in an airtight container at room temperature for up to one week.
Other rainbow recipes you might enjoy:
Rainbow Rice Krispie Treats
Rainbow Cake Roll
Slice and Bake Rainbow Heart Cookies
Buttercream Rainbow Frosting
Rainbow Meringue Wreath
And if you do make these, or any of my recipes, don’t forget to tag me @bastecutfold or use the hashtag #bastecutfold on Instagram. I always love to see what you’re making!

Rainbow Fudge
- Total Time2 hours 40 minutes
- Yield8x8-inch tin 1x
A 4-ingredient rainbow fudge recipe featuring red, orange, yellow, green, blue, and purple layers of white chocolate flavored fudge.
Ingredients
Nonstick spray, for greasing tin
900 grams white chocolate chips (32 ounces; 4 1/2 cups)
600 grams sweetened condensed milk (21 ounces; about 7 cups)
1 tablespoon coconut oil or vegetable oil
Red, orange, yellow, green, blue, and purple oil-based food coloring
Instructions
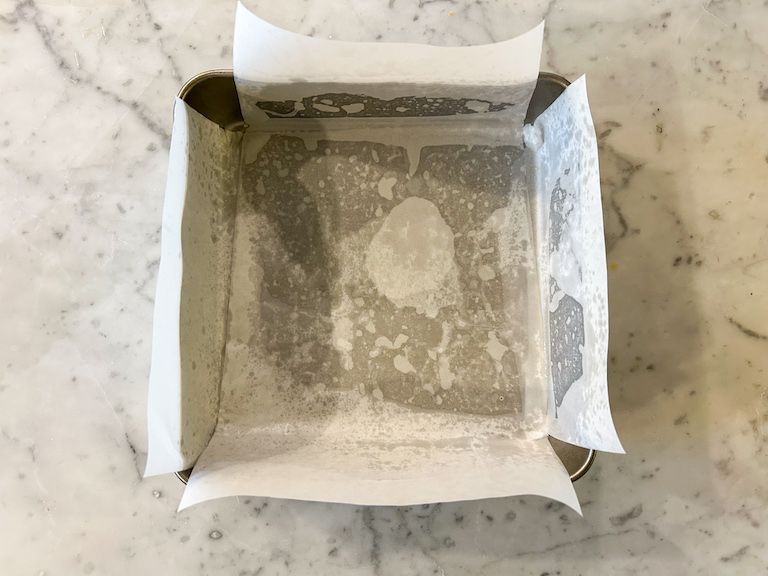
Line an 8×8-inch square tin with parchment in a criss-cross pattern, allowing a 1-inch overhang on all sides. Spray generously with nonstick spray. Set aside.
Add the white chocolate and sweetened condensed milk to the top of a double boiler, or sit a large metal bowl over a stock pot of simmering water to create a bain-marie.
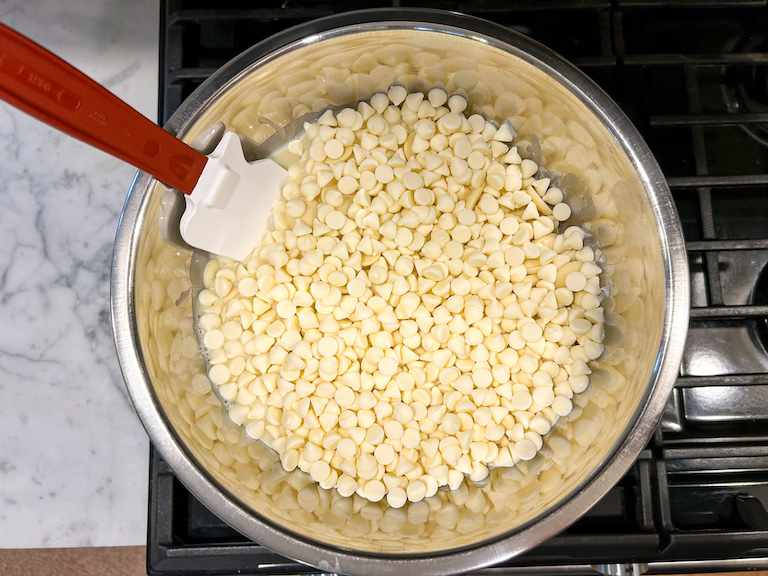
Melt chocolate, stirring periodically, until completely melted. Stir in the oil.
Weigh* 250 grams white chocolate into a smaller bowl. Tint with purple oil-based food coloring. Mixture will be sticky.
With a small stepped palette knife or flexible rubber spatula, spread purple chocolate across bottom of prepared pan. Freeze while you prepare the next layer.
Repeat the steps above, using blue, green, yellow, orange, and red food coloring.**
Loosely cover tin with aluminum foil or clingfilm/plastic wrap. Refrigerate 2 hours, or until set.
Lifting by the parchment, transfer fudge slab to a large cutting board.
With a sharp, hot*** chef’s knife, trim ends then slice into 6 x 6 rows.
Store rainbow fudge in an airtight container at room temperature for up to 1 week.


Notes
*While I provide volume measurements for most of my recipes, for this one you absolutely need to use a kitchen scale to weigh the melted chocolate; without a scale, there is no way to create perfectly even layers.
**For a more detailed explanation of the layering process, see my notes in the post above.
***Run knife under hot water to warm.
- Prep Time: 40 minutes
- Chilling Time: 2 hours
- Category: Candy and Confectionery
- Method: Stovetop