Cream Cheese Peppermints
This post may contain affiliate links. Please read the disclosure policy to learn more.
Thank you for supporting this blog!
An easy recipe for cream cheese peppermints in pretty tie-dye colors. Cream cheese, confectioner’s sugar, natural peppermint oil, and a pinch of salt make these the best cream cheese peppermint candies.
Why Make These Cream Cheese Peppermints?
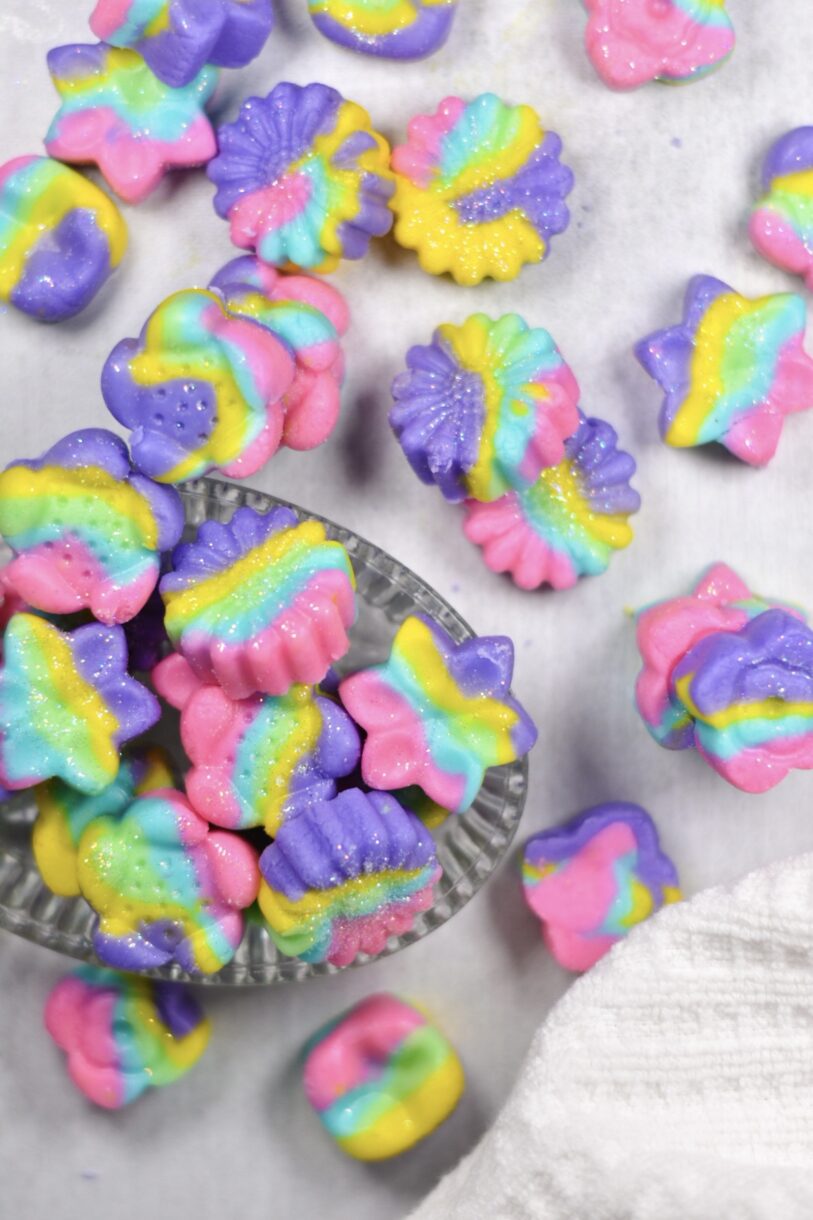
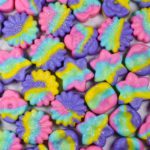
Made with soft cream cheese and natural peppermint oil, these pretty, pastel-colored mints have long been an Easter favorite in my family. Growing up, we always made a batch of cream cheese peppermints to serve alongside the Easter cookies and buttercream eggs.
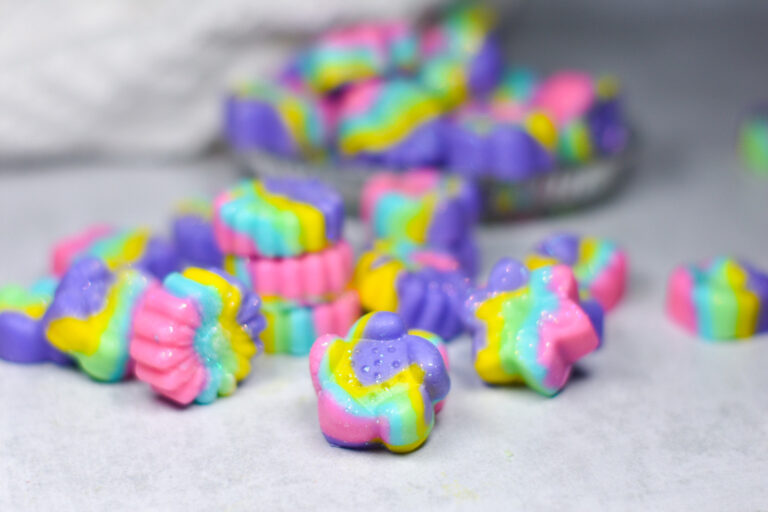
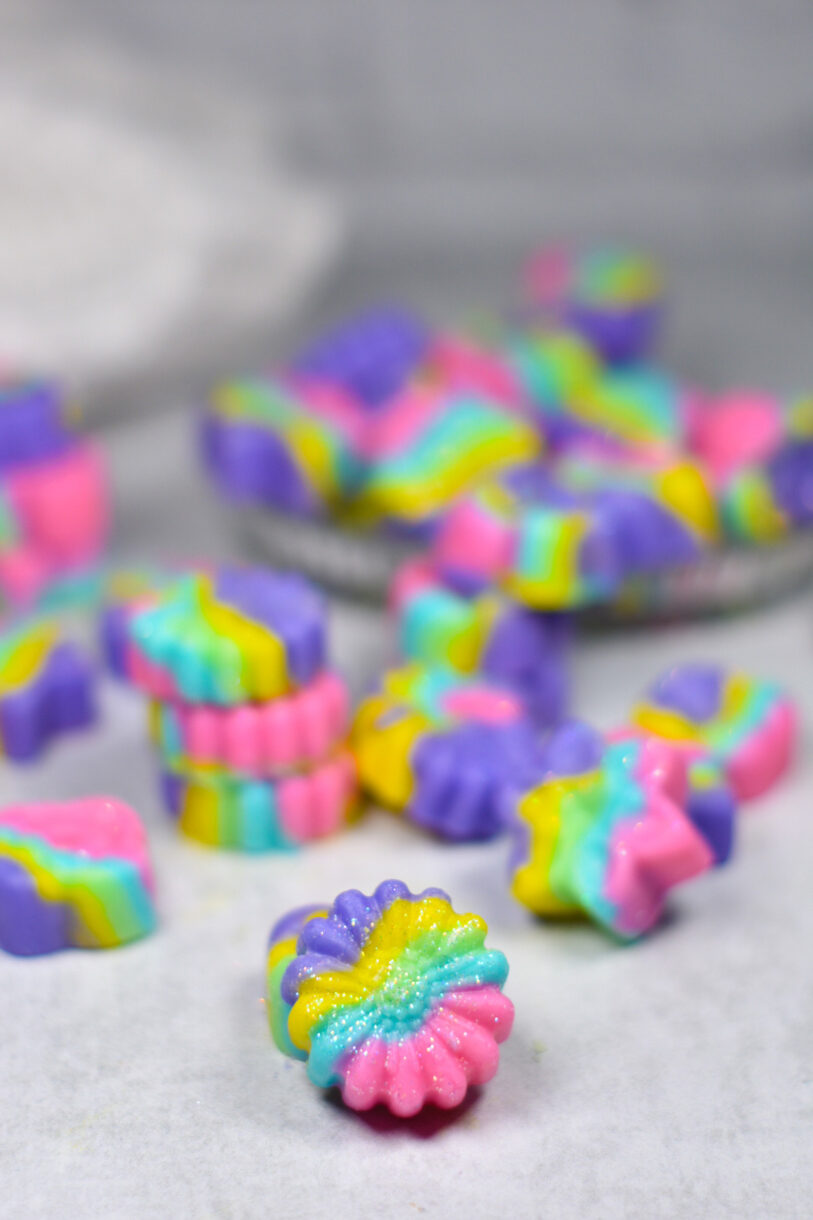
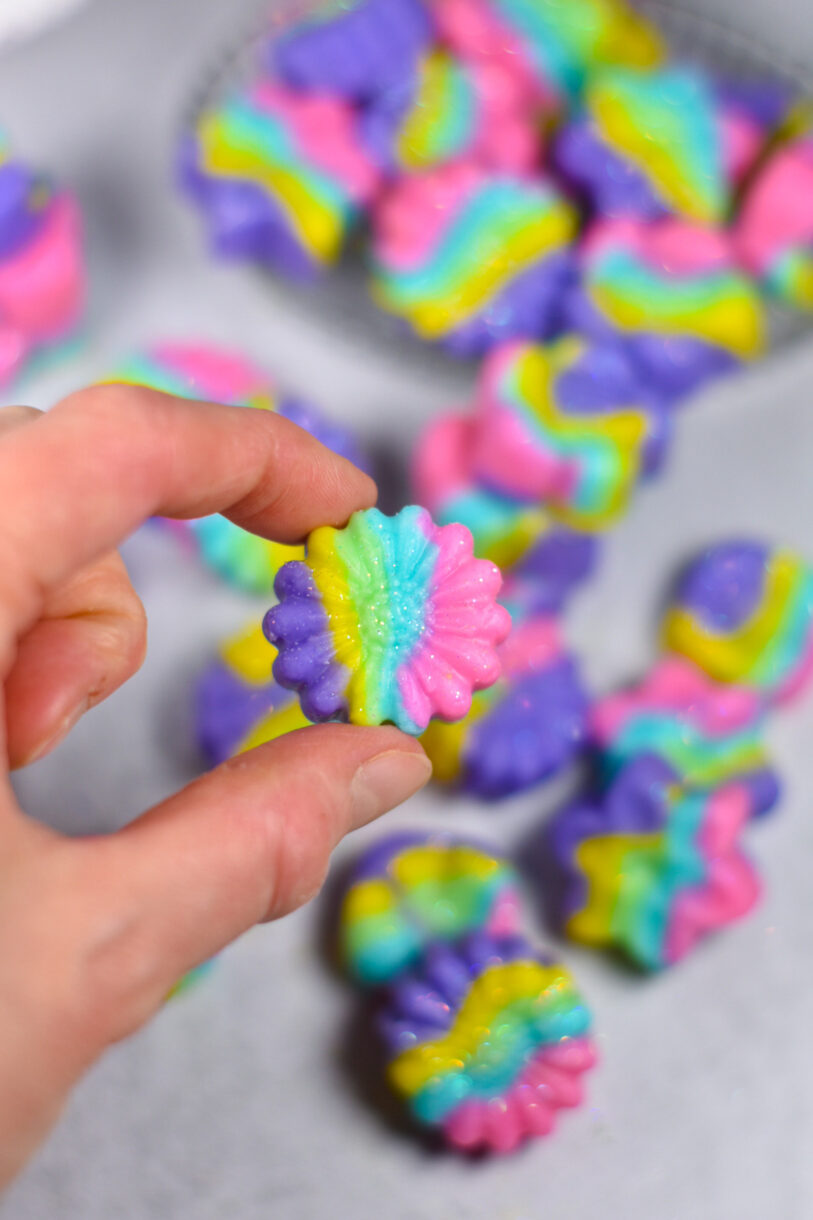
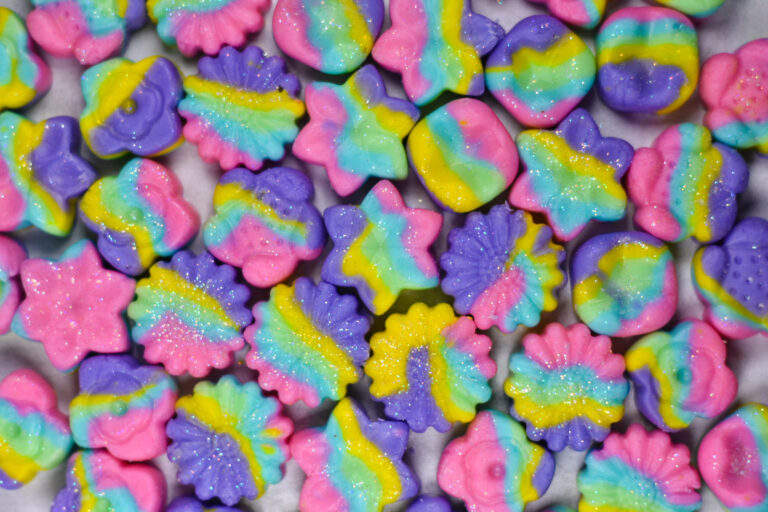
In our family, we always made these mints in solid colors, rolling each into a ball and topping it with a star of piped buttercream. Here I’ve given this recipe a bit of a modern upgrade, using silicone candy moulds and a swirl of gel coloring to create a tie-dye effect.
These tie-dye peppermints are sure to be a crowd pleaser at Easter, or any other time of the year. I love using pastel gel colors for these mints, but any color combination will work. (I’m already thinking of trying rainbow for my next batch!) Oh, and I brushed my mints with a bit of edible glitter, but it’s up to you rather you choose to add sparkles or not.
Cream Cheese Mint Recipe Ingredients
To make cream cheese mints, start by gathering the following ingredients:
- Cream Cheese – I tested this recipe with American-style cream cheese. I have not tested it with British cream cheese.
- Confectioner’s Sugar – A.k.a. icing sugar or powdered sugar. You’ll need 350 grams (about 2 1/2 – 2 3/4 cups) of confectioner’s sugar for the dough, plus more to adjust the consistency.
- Peppermint Oil – Start with 2-3 drops of peppermint oil, then taste and adjust as necessary. But don’t overdo it—natural peppermint oil is very strong!
- Kosher Salt – A pinch of fine kosher salt cuts the sweetness of the confectioner’s sugar.
- Gel Food Coloring – I prefer the Chefmaster brand of gel food coloring for tinting cream cheese peppermints.
- Edible Glitter – Totally optional, but I love dusting my mints with edible glitter for some extra sparkle!
Selecting a Candy Mold
Silicone candy molds are inexpensive, come in many shapes and sizes, and are easily purchased via Amazon, at a cake decorating or kitchen supply store, or a craft store. I recommend stocking your supply closet with a variety of mold options.
If you do not have a silicone mold, you can use gloved hands to roll the mints into balls instead. Or, roll the peppermint dough to about 1/2-inch thickness, then use a small metal cutter to cut the mints into fun shapes.
Cream Cheese Peppermint Tips & Tricks
It is best to use gel food coloring for this recipe, rather than liquid or powder. I chose pink, purple, blue, green, and yellow for my mints, but feel free to use any colors you’d like! If you don’t want to make “tie dye” mints, you can stick with solid colors, or even skip the food coloring and retain the natural white color of the dough instead.
I suggest using pure peppermint oil, rather than peppermint extract. (Lorann Oils is my go-to brand for food-grade oils). However, extract will work in a pinch; just remember that you’ll need a larger quantity, since extracts are less powerful than oils. I suggest taste-testing along the way. You want a robust, minty flavor, but not so strong that it overpowers the cheese.
Do not skip the freezing step in this recipe! Freezing will help the mints to retain their shape when removed from the mold. If the dough is too warm, it will stick to the silicone.
Make-Ahead and Storage Suggestions
Arrange cream cheese peppermints in an airtight container, layered between sheets of parchment or wax paper. Store in the refrigerator for up to one week.
Other Easter recipes you might enjoy:
Cadbury Mini Egg Cookies
Creme Egg Brownie Cups
Buttercream Easter Eggs
Peanut Butter Eggs
And if you do make these, or any of my recipes, don’t forget to tag me at @bastecutfold or use the hashtag #bastecutfold on Instagram. I always love to see what you’re making!
Cream Cheese Peppermints
- Total Time35-40 minutes
- Yield45 1 in / 2.5 cm mints 1x
An easy recipe for cream cheese peppermints in pretty tie-dye colors. Cream cheese, confectioner’s sugar, natural peppermint oil, and a pinch of salt make these the best cream cheese peppermint candies.
Ingredients
85 grams soft cream cheese, such as Philadelphia (3-ounce package)
350 grams confectioner’s sugar (about 2 1/2 cups)
2-3 drops peppermint oil, or to taste
Pinch kosher salt
Gel food coloring
Edible glitter, optional, for dusting
Instructions
In a large bowl, combine soft cream cheese and confectioner’s sugar. Use your hands to knead together until a soft dough forms.
Knead in peppermint oil and kosher salt.
Divide dough into five portions. Place each portion in a separate bowl and add a few drops of gel food coloring.** Knead to work color evenly into the dough.
Roll each color into a long, thin tube. Place the tubes next to each other and twist together into one big tube, allowing the colors to swirl and mix.
Using your hands, roll the tube to approximately 1 inch in diameter.
With a sharp chef’s knife, slice tube into small segments, then press each segment into one of the mold cavities.
Fill all cavities. Transfer mold to the freezer and freeze for 10-15 minutes, or until very cold to the touch.
Pop mints from mold. Dust with edible glitter, if desired.
Arrange cream cheese peppermints in an airtight container, layered between sheets of parchment or wax paper. Store in the refrigerator for up to one week.


Notes
**I used pink, purple, blue, green, and yellow, but feel free to choose any colors you’d like.
- Prep Time: 20 minutes
- Chilling Time: 15 minutes
- Category: Candy and Confectionery
- Method: No Cook
- Cuisine: Sweets