
Old-Fashioned Hard Candy Recipe
This post may contain affiliate links. Please read the disclosure policy to learn more.
Thank you for supporting this blog!
An old-fashioned hard candy recipe based on an old family recipe. My easy-to-make recipe requires just a handful of simple ingredients and a few special candymaking tools. With endless color and flavor options, this sugar-coated homemade hard candy keeps and ships well and is ideal for holiday gifting!

Why Do I Love This Old-Fashioned Hard Candy Recipe?
I based this old-fashioned hard candy recipe on a decades-old Frey family favorite. I’m not sure how long the recipe has been in our family, but growing up I can remember my mom making it every year for Christmas. There were different varieties, one of which was always cinnamon. (And for some reason, in our family the cinnamon flavor was traditionally yellow rather than red!) We would gift some of our homemade hard candy to friends and family, and save the rest to enjoy during the holiday season. And I’ve continued the tradition, making batches annually to gift to friends in London and NYC.

Key Ingredients for Making Old-Fashioned Hard Candy
- Corn Syrup – An invert sugar (such as corn syrup) prevents the sugar from crystallizing, leading to gritty or grainy candy. (In addition to hard candy, corn syrup serves the same purpose in other candies, and is useful for making everything from lollipops to homemade marshmallows.) In the US, I prefer the Golden Barrel brand. If you’re elsewhere in the world, or don’t have Golden Barrel in the cabinet, you can substitute another invert sugar.

- Flavorings – I chose fruit flavors in rainbow colors, but this recipe for old fashioned hard candy also works with non-fruity flavors. (Butterscotch, licorice, cinnamon, chocolate, root beer, and coconut are a few of my favorites.) I prefer the LorAnn Oils brand of extracts and flavor oils because they’re ultra-concentrated and designed specifically for candymaking and confectionery work. Avoid supermarket extracts—they’re weaker, so you’ll need a lot more product to produce a flavorful piece of homemade hard candy.
- Gel Food Coloring – You can choose any color you’d like. I enjoy color-coordinating my flavors and colors (yellow for lemon, pink for watermelon, etc.) You can also omit the gel food coloring for a natural look. I don’t recommend water-based grocery store food colorings; they’re not very concentrated, and you’ll end up using most of the bottle to achieve the vibrant colors shown here.
- Confectioner’s Sugar – Also known as icing sugar, or powdered sugar, for coating the cooled candy. (Don’t skip the powdery coating, or your candy pieces will stick together.) And save the rest! You can use it for coating other treats like puppy chow, chocolate truffles, or lemon drops.
Helpful Tools and Equipment
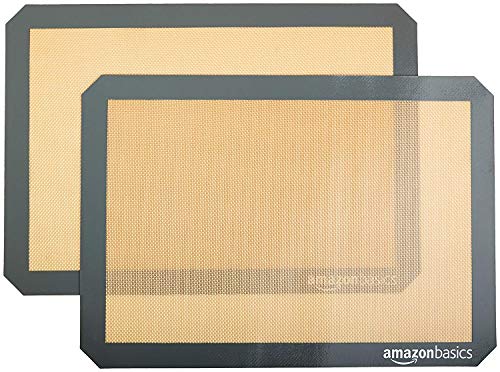
- Silicone Mat – If you don’t already own one, a silicone baking mat comes in handy for candy (ha!) Silicone baking mats perform well at high temperatures, make cleanup easy, and prevent molten sugar from sticking to your countertops.
- Digital Thermometer – My go-to is this Taylor Instant Read Digital Thermometer. but any good-quality candy thermometer will work. Because precise temperatures are important (if your temp is too high you’ll make brittle or caramel, if it’s too low your candy won’t harden), I do not suggest making this recipe without a thermometer.
- Heavy-Bottomed Pan – For cooking the hot sugar. Opt for a metal pan, not one with nonstick coating; the high heats required for cooking sugar can damage or discolor a nonstick pan. I use a medium saucepan for small (1/4 or 1/2) batches of candy, and a large stock pot when making the full hard candy recipe, or a double batch.
- Pastry Brush – You’ll need a natural-bristled pastry brush to periodically brush down the sides of the pan with water. This helps to prevent crystallization and burnt sugar.

How Much Candy Does This Recipe Make?
For this batch I made four colors and flavors of old-fashioned hard candy: Pink (watermelon), green (green apple), yellow (lemon), and orange (orange).


For each flavor I made 1/4 of the recipe, resulting in about 140-150 grams (5 ounces), or 1 US cup of hard candy pieces per flavor. A full batch in a single flavor will yield approximately 600 grams, or 4-5 cups of hard candy.


Tips and Tricks
- Use a silicone mat. For best results, pour the hot sugar mixture directly onto a silicone baking mat. Do not use wax paper; your candy mixture will stick to the paper, making it impossible to remove!
- Break in a bag. To break the cooled candy, I put the slab in a large food storage bag and crack it into small pieces with a kitchen mallet. This method is much easier than breaking the candy with your hands, and it prevents sharp, sticky shards of candy from flying all over your kitchen. Place a folded tea towel underneath the plastic bag to avoid damaging your countertops.


Old-Fashioned Hard Candy
- Total Time45 minutes
- YieldApprox. 600 grams (about 4-5 US cups)
An old-fashioned hard candy recipe based on an old family tradition.
Ingredients
400 grams granulated sugar (2 cups)
340 grams corn syrup (12 ounces; 1 cup + 1 tablespoon)
80 milliliters water (1/3 cup)
1/2 -1 teaspoon flavoring of choice (I use the LorAnn Oils brand)
1-2 drops gel food coloring
135 grams confectioner’s sugar (1 cup)
Instructions
Cover countertop or work surface with a silicone baking mat.

In a heavy-bottomed metal saucepan or stock pot, stir together granulated sugar, corn syrup, and water. (See notes on pan sizes, below.)

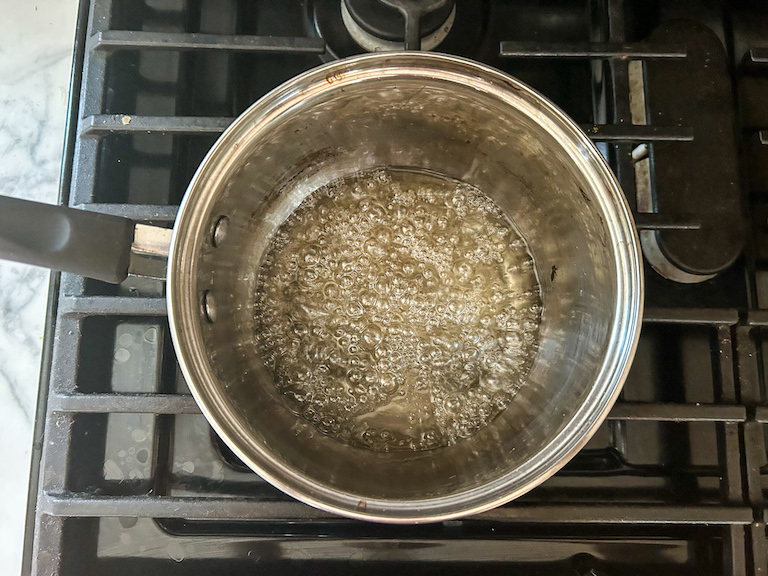
Cook over medium heat, stirring occasionally until sugar dissolves, then stop stirring

Cook, without stirring, until syrup reaches 300° F (150° C) on a candy thermometer, about 15 minutes. To prevent crystallization, periodically swirl the pan to keep the mixture moving, and frequently brush down sides of pan with a wet pastry brush.


Remove from heat. Stir in flavoring and gel food coloring.


Pour out onto prepared baking mat.

Cool completely, about15-20 minutes.

With your hands or a kitchen mallet, break the slab into small pieces.

With gloved hands, toss candy pieces in confectioner’s sugar.

Store old-fashioned hard candy in an airtight container at room temperature for up to 3 months.



Notes
Choose a stainless steel pan for this recipe. Avoid pans with nonstick coating. If making 1/4 or 1/2 batch, I use a medium saucepan; for a full (or double) batch, opt for a large stock pot.
Recipe can be doubled or tripled. Larger batches of sugar syrup will take longer to reach 300° F.
To break the candy, I suggest sealing the slab in a large food storage bag and using a mallet to crack it into smaller pieces. This prevents candy pieces from flying everywhere! Place a folded tea towel under the bag to avoid damaging the countertop.
- Prep Time: 5 minutes
- Cooling Time: 15 minutes
- Cook Time: 15 minutes
- Category: Candy and Confectionery
- Method: Stovetop

Make-Ahead, Storage, and Shipping Suggestions
Store old-fashioned hard candy in an airtight container at room temperature for up to three months. If storing for a longer period, you might find that you need to toss the pieces in additional confectioner’s sugar to keep them looking fresh.
This easy homemade hard candy ships well and stays fresh for months, so it’s ideal for holiday gift-gifting. (Plus the candy is already “broken,” so no worries about damaging the contents in transit!) If you are gifting locally, I suggest packaging your homemade hard candy in a cello bag or a pretty mason jar.
Other Homemade Hard Candy Recipes You Might Enjoy
Chocolate Peppermint Lollipops
Lemon Drops
Caramel Apple Lollipops
Root Beer Hard Candy
And if you do make these, or any of my recipes, don’t forget to tag me @bastecutfold or use the hashtag #bastecutfold on Instagram. I always love to see what you’re making!


I make this frequently. Put it in a glass jar and it is a pretty holiday gift!
Hi Becky
Can I make hard candies from fruit concentrates? Such as crab apple “jelly juice”? Or other fruits I have prepped for jelly flavors? Think I may be able to swap water for juice concentrate. Any and all help appreciated.
Hi Jen! I’ve used fruit juices for jelly candies, but I’ve never tried it for hard cardy. If you’re replacing the water with an equal quantity of concentrate, or a mix of concentrate and water, it should work from a recipe execution standpoint, but I’m not sure about flavor. The artificial extracts are extremely potent/concentrated, so you might find that hard candy made with fruit concentrate is not flavorful enough. If you do try this, I’d start with a very small test batch and see what happens.
Hi Becky,
Thank you for a great recipe.
I have 2 gallons of leftover snow cone syrup. I’m searching for a candy recipe to use the syrup.
Can your recipe be adjusted to use the snow cone syrup?
Thank you!
Hi Suzanne! I’m honestly not sure. Is corn syrup the primary ingredient of your snow cone syrup? If so, there is a chance it might work, but it’s hard to know without actually trying it. I’d suggest making a small batch as a test and see what happens!
What if the candy don’t get hard?
Hi Crystal! This most likely means that you didn’t get the sugar mixture quite hot enough. Make sure you’re using a good-quality candy thermometer, and that you allow your candy mixture to reach the “hard crack” stage (300 degrees Fahrenheit) before pouring it out to cool.