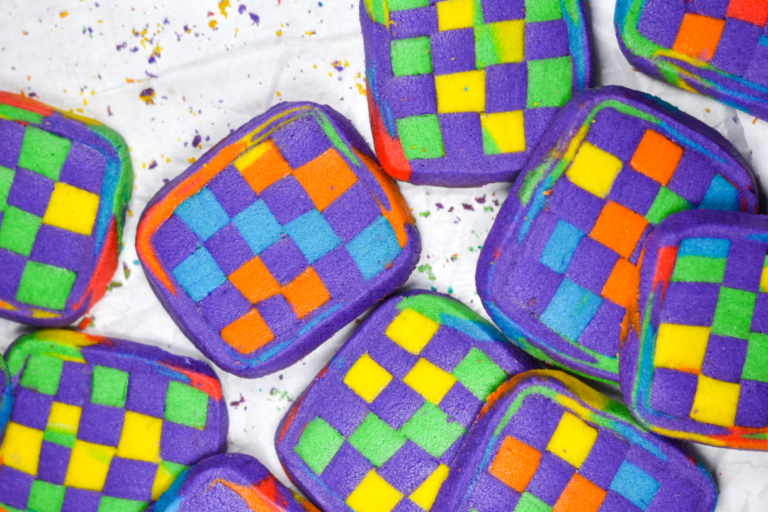
Rainbow Checkerboard Cookies
This post may contain affiliate links. Please read the disclosure policy to learn more.
Thank you for supporting this blog!
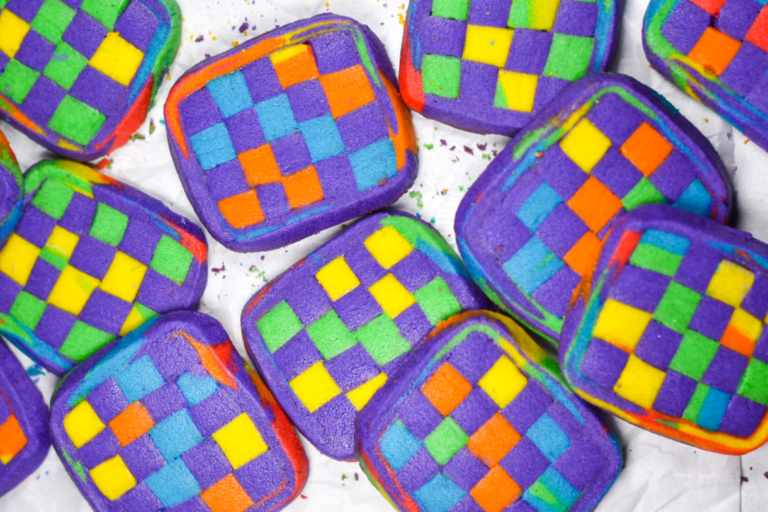
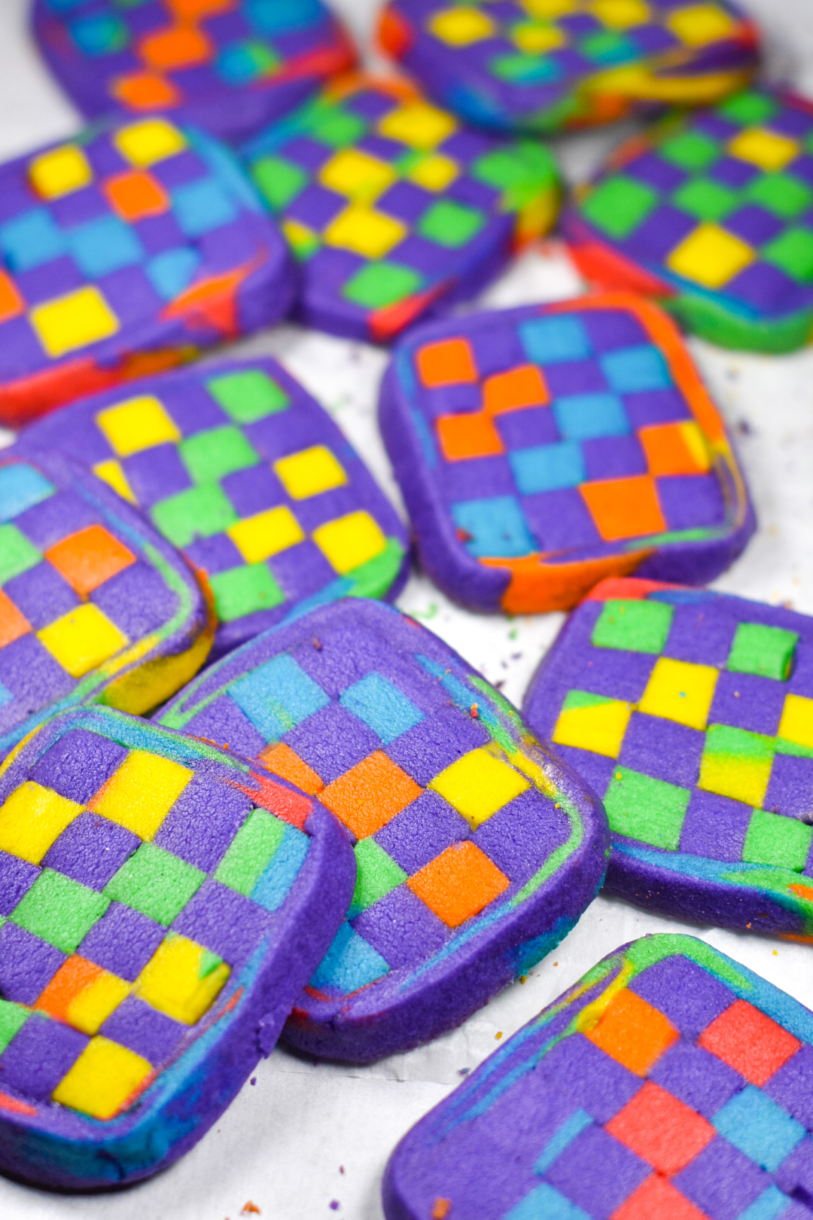
A play on the classic checkerboard sablé, these colorful, slice-and-bake rainbow checkerboard cookies are perfect for Pride month celebrations.
What Are Checkerboard Cookies?
I first made checkerboard cookies (known as sablés hollandais in French) during a Basic Pâtisserie lesson in petit fours at Le Cordon Bleu London. (Visit my pastry school diary to read more about our petit fours lesson in Basic Pâtisserie.) While the classic checkerboard cookie includes just a handful of staple ingredients (butter, icing sugar, eggs, flour, and salt), the intricate geometric pattern definitely elevates these to a next-level bake.
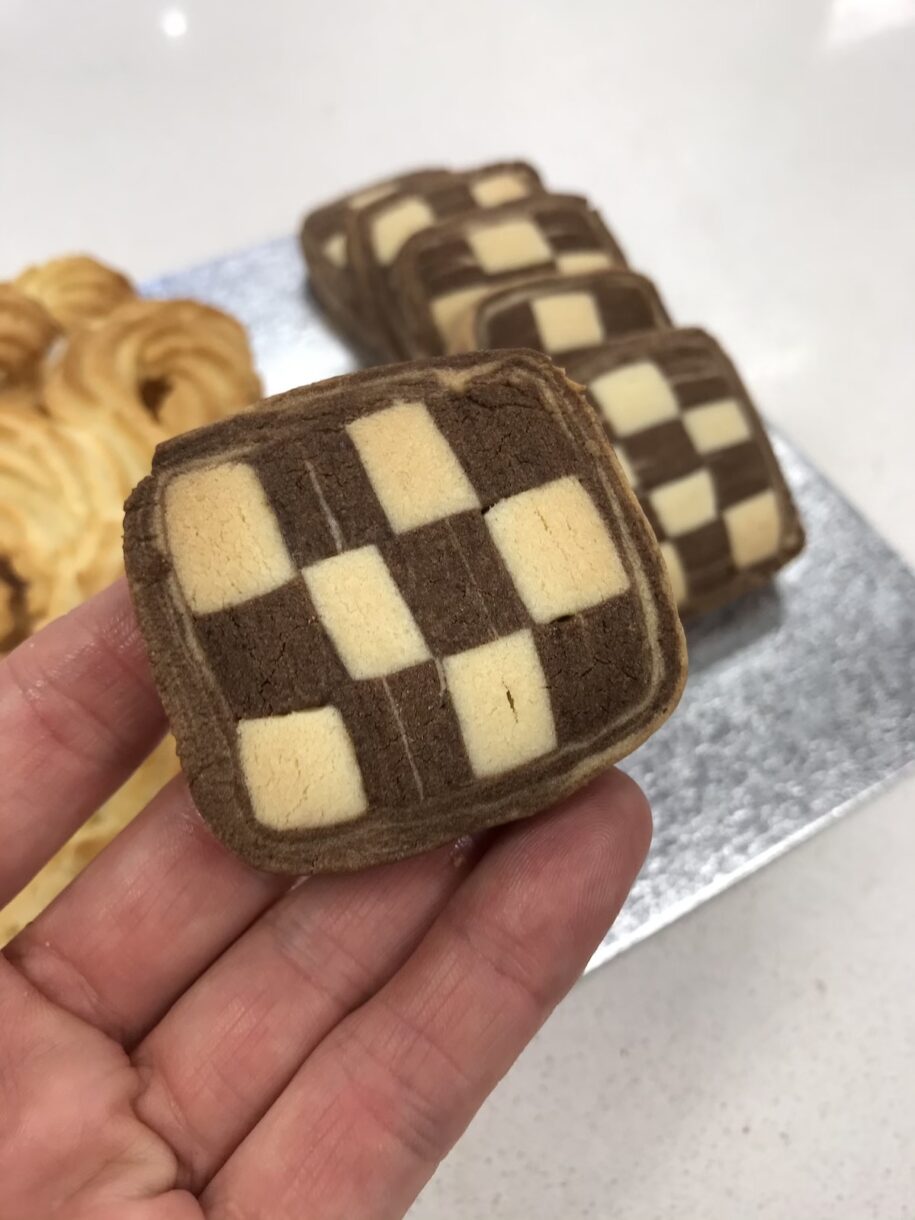
In pastry school, we made a checkerboard cookie using chocolate and vanilla doughs:
Why Make Rainbow Checkerboard Cookies?
For this checkerboard cookie recipe, I’ve adapted the classic sablés hollandais to feature a fun, rainbow-themed color scheme. This recipe does require time and patience (and a lot of gel food coloring) but I promise it’s worth the extra effort.
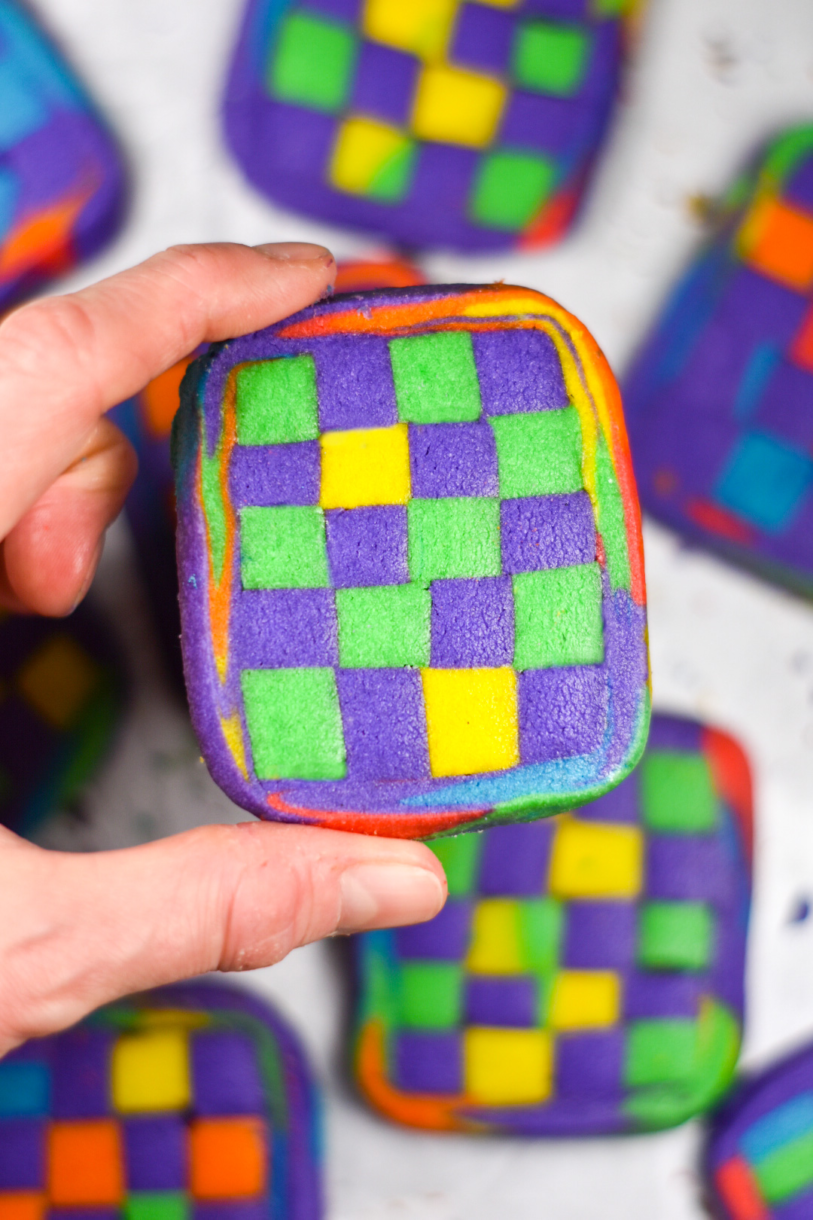
Serve these rainbow checkerboard cookies for a Pride celebration, birthday party, or other festive gathering. They also make a lovely addition to a rainbow-themed platter or rainbow cookie box.
Assembling The Rainbow Rectangle
The process of assembling the geometric rectangle (which you’ll wrap in a thin layer of dough created from your re-rolled scraps, then slice into pieces) is somewhat tricky. To help, I’ve included step-by-step photos of the assembly process in the recipe below.
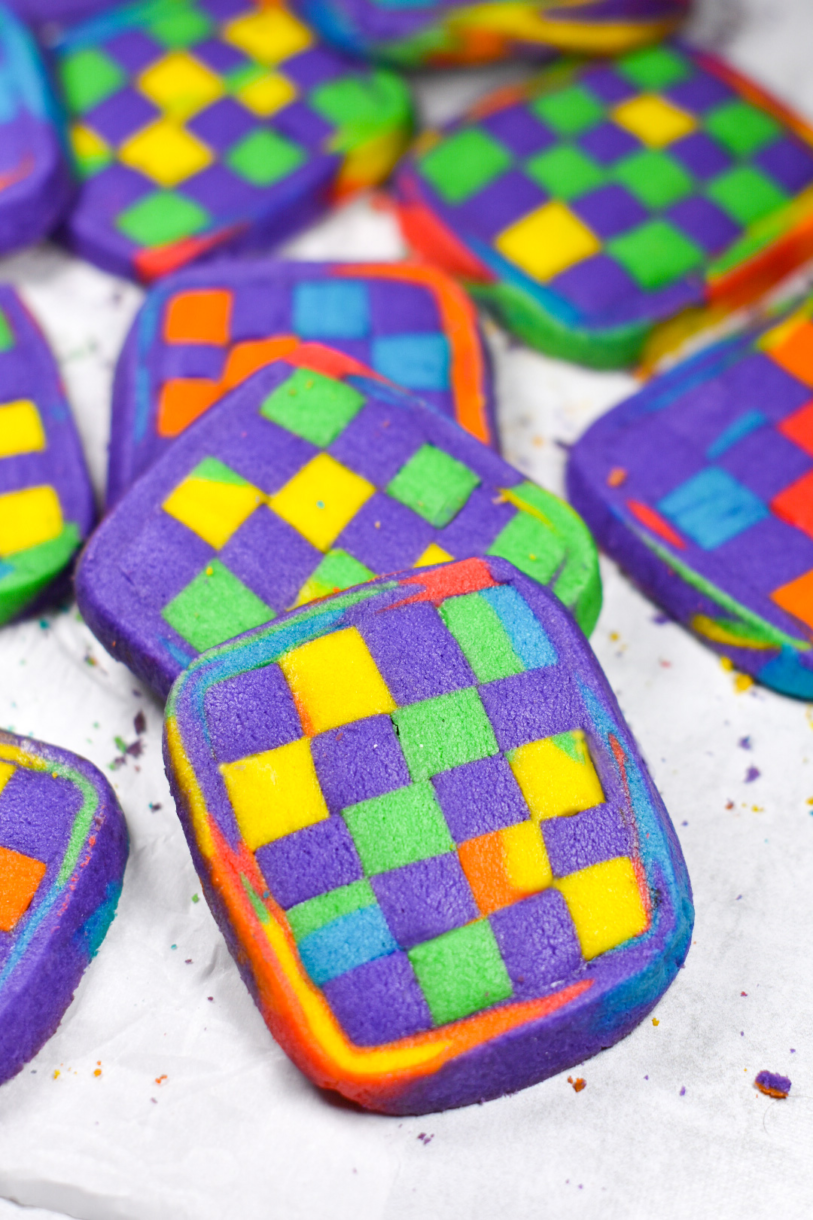
After slicing, check for any small gaps in the dough, and use your fingers to gently push the dough back together as necessary. If you don’t do this, the gaps will expand in the oven and your cookies won’t be quite as pretty. (Although they’ll be no less delicious, so don’t worry if you forget to to do this!)
Don’t skip the freezing step. Freezing the slices on the tray for 10-15 minutes before baking prevents the cookies from spreading too much in the oven, so they retain their rectangular shape.
Checkerboard Cookie Tips & Tricks
Choose gel food coloring for this recipe, rather than a water-based or powdered colorant. (The water-based colors found in most grocery stores are not concentrated enough to achieve bright, vibrant colors, and powders will dry out the dough.) I like the Chefmaster line of gels, but any good-quality brand of gel food coloring will work.
For easier cleanup, I strongly suggest wearing rubber gloves when kneading the food coloring into the dough. And be sure to work on a silicone mat (or line your countertop with parchment) to prevent staining.
I made my checkerboard cookies in rainbow colors, but you can easily adapt the color scheme for other holidays. Some suggestions include red, white, and green for Christmas; orange, yellow, and black for Halloween; or pastels for Easter.
Make-Ahead and Storage Suggestions
Checkerboard cookies will keep for about a week. Layer cookies between sheets of parchment and store in an airtight container at room temperature.
Checkerboard cookies also freeze well. To freeze, layer between sheets of parchment and freeze in an airtight container for up to three months. Thaw at room temperature.
For a make-ahead shortcut, prepare the rectangular log up to 24 hours in advance and refrigerate until you’re ready to slice and bake the cookies.
Other rainbow recipes you might enjoy:
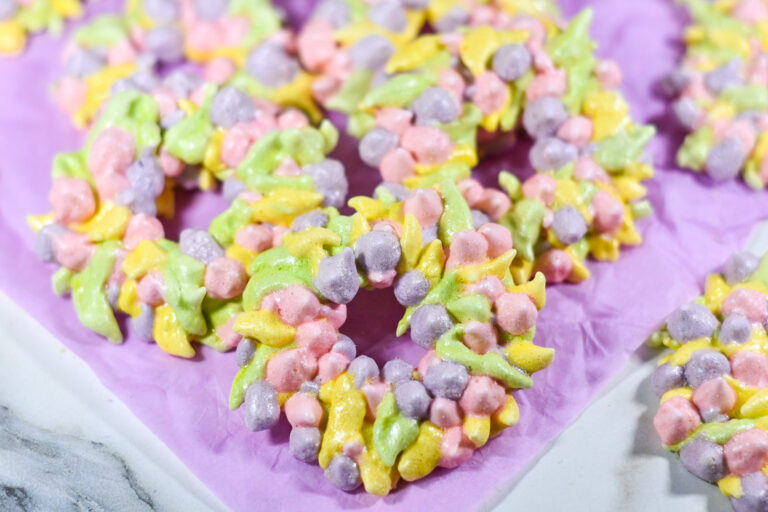
Donkey Piñata Cookies
Rainbow Rocky Road Bars
Rainbow M&M Peanut Butter Cookies
Rainbow Cake Roll
Rainbow Cookies
Rainbow Buttercream Frosting
And if you do make these, or any of my recipes, don’t forget to tag me @bastecutfold or use the hashtag #bastecutfold on Instagram. I always love to see what you’re making!
Print
Rainbow Checkerboard Cookies
- Total Time1.5 hours (including chilling time)
- Yield14-16 cookies 1x
With a fun rainbow twist, this play on the classic checkerboard sablé cookie is perfect for Pride month celebrations.
Ingredients
270 grams all purpose flour (2 1/8 cups)
100 grams confectioner’s sugar (3/4 cup)
220 grams unsalted butter, cold and cubed (2 sticks / 1 cup)
2 egg yolks
1/2 teaspoon vanilla bean paste
Pinch salt
Gel food coloring (red, orange, yellow, green, blue, purple)*
1 egg white, lightly beaten
Instructions
In a large mixing bowl, sieve the flour with a pinch of salt.
Add the cubed butter to the bowl, and use your hands to combine, making sure to break up all of the large pieces of butter. (The mixture will resemble breadcrumbs.)
Add the confectioner’s sugar and egg yolks, and continue using your hands to knead until a soft dough forms.
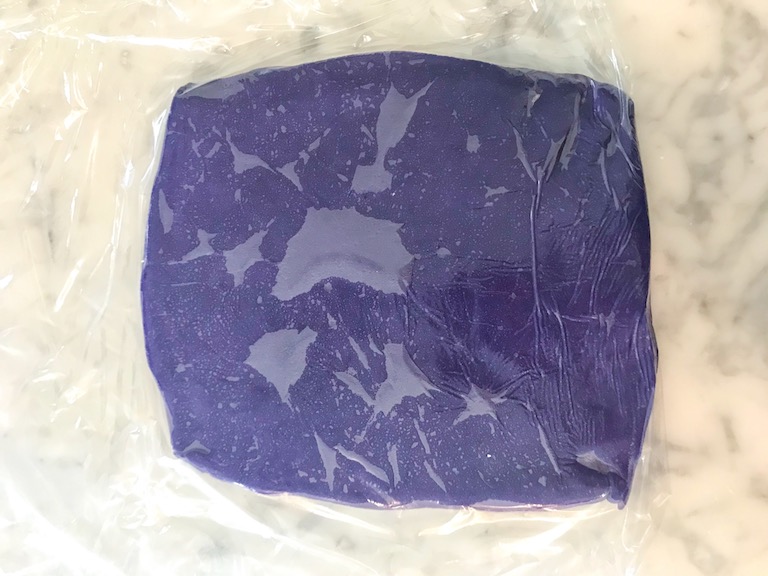
Divide the dough into two equal portions. To one portion, add purple food coloring until the desired shade of purple is reached. Flatten purple dough into a rectangle and roll to approximately 11/4 centimeters / 1/2 inch thickness. Wrap in clingfilm/plastic wrap, and transfer to the freezer to chill for at least 15 minutes.
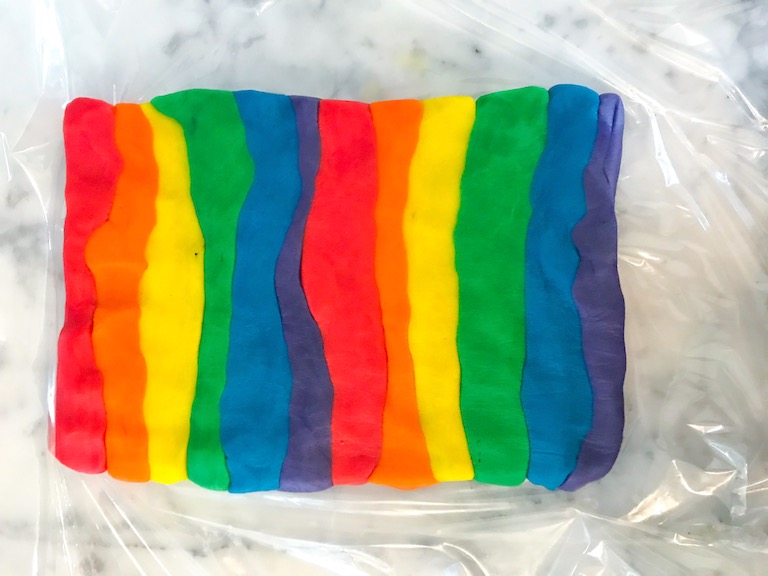
Divide the other portion into six equally-sized balls. Add a different rainbow color to each, using your hands** to knead until the gel is mixed evenly into the dough, and the desired color is reached.
Roll each colored dough into a tube, then put the tubes together to form a rainbow-shaped rectangle.

Flatten the rectangle with your hands, making sure the colors have blended together, then roll to approximately 1 1/4 centimeter / 1/2-inch thickness. Wrap the rectangle in clingfilm and transfer to the freezer to chill for at least 15 minutes.
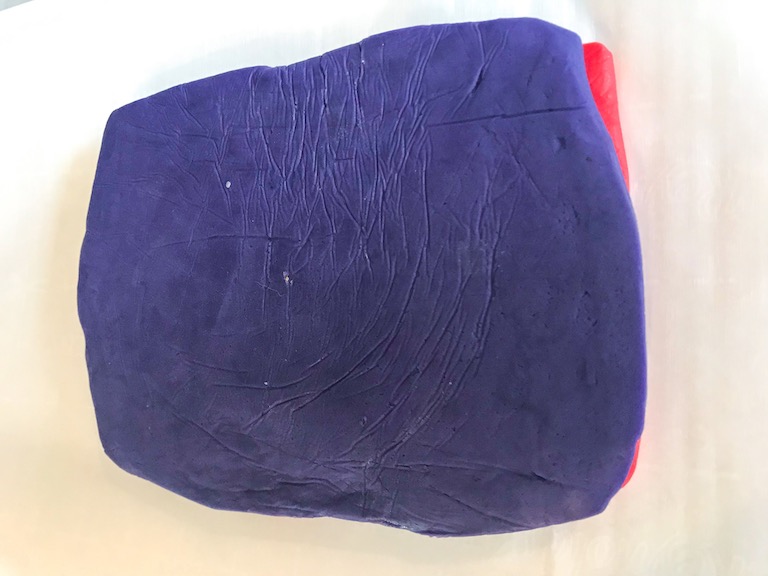
Once chilled, remove both rectangles from the refrigerator and unwrap. Brush the rainbow rectangle with egg wash, then place the purple rectangle on top.
Using a sharp chef’s knife, cut the slab into two equal portions.
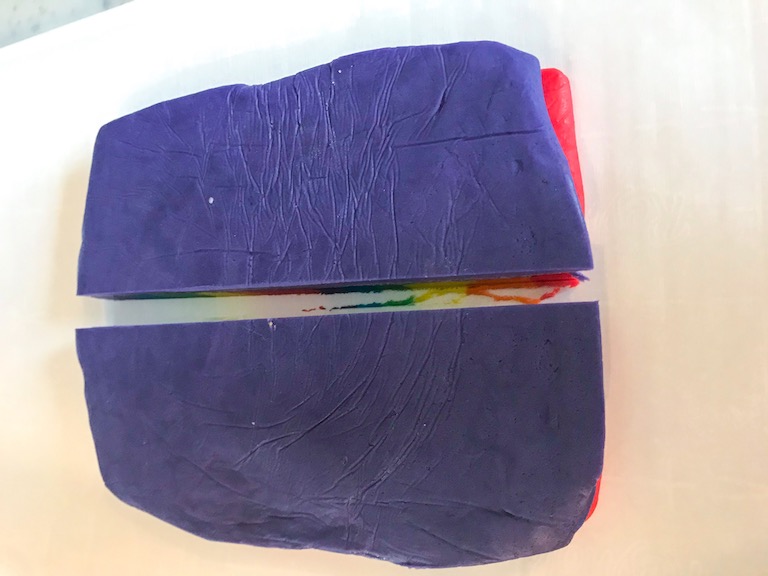
With a pastry brush, brush one of the halves with egg white, and place the second half on top.
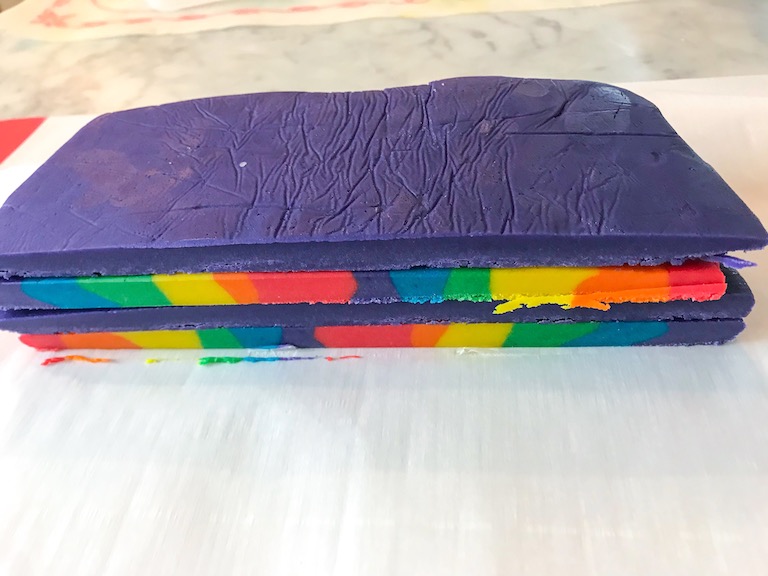
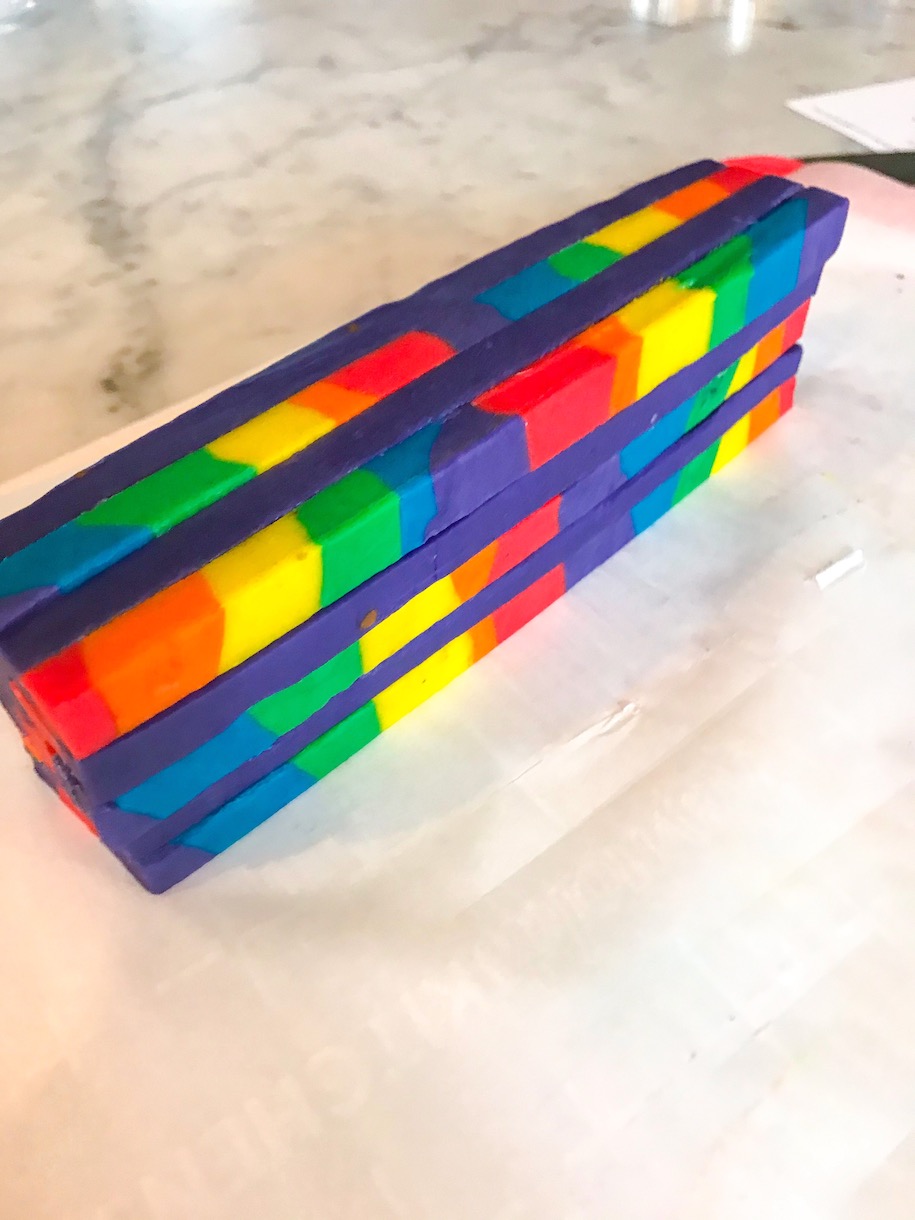
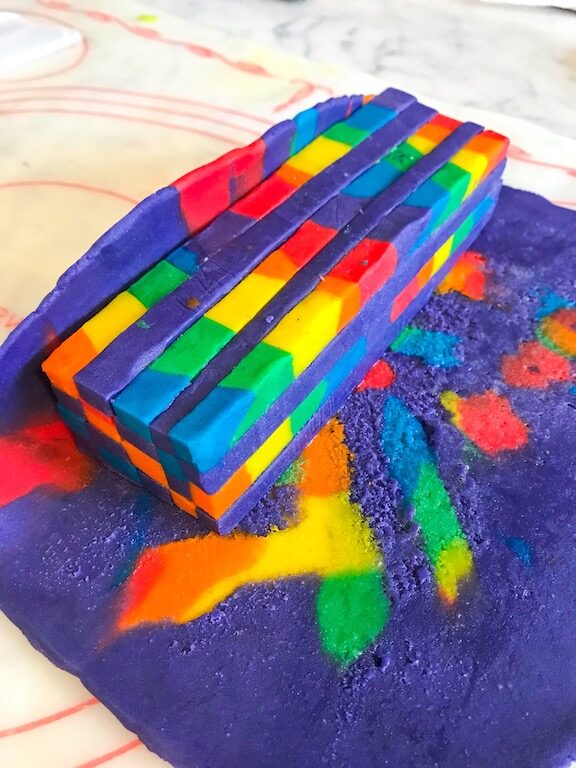
Trim all edges, creating an even rectangle. (Be sure to reserve all of the trimmings. You’ll need them later!) Then, slice the rectangle into strips, about 1 1/4 centimeter / 1/2-inch thick.

Brush the strips with egg white, then carefully layer them on top of each other to create the geometric pattern.
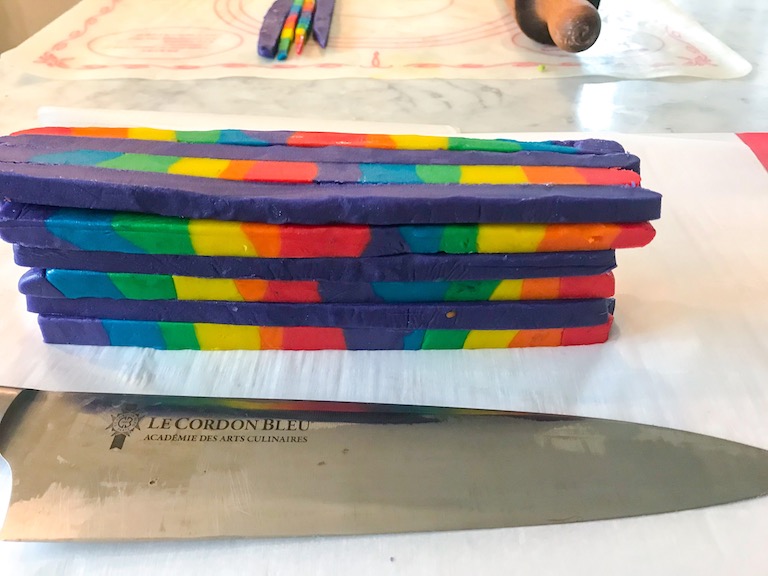
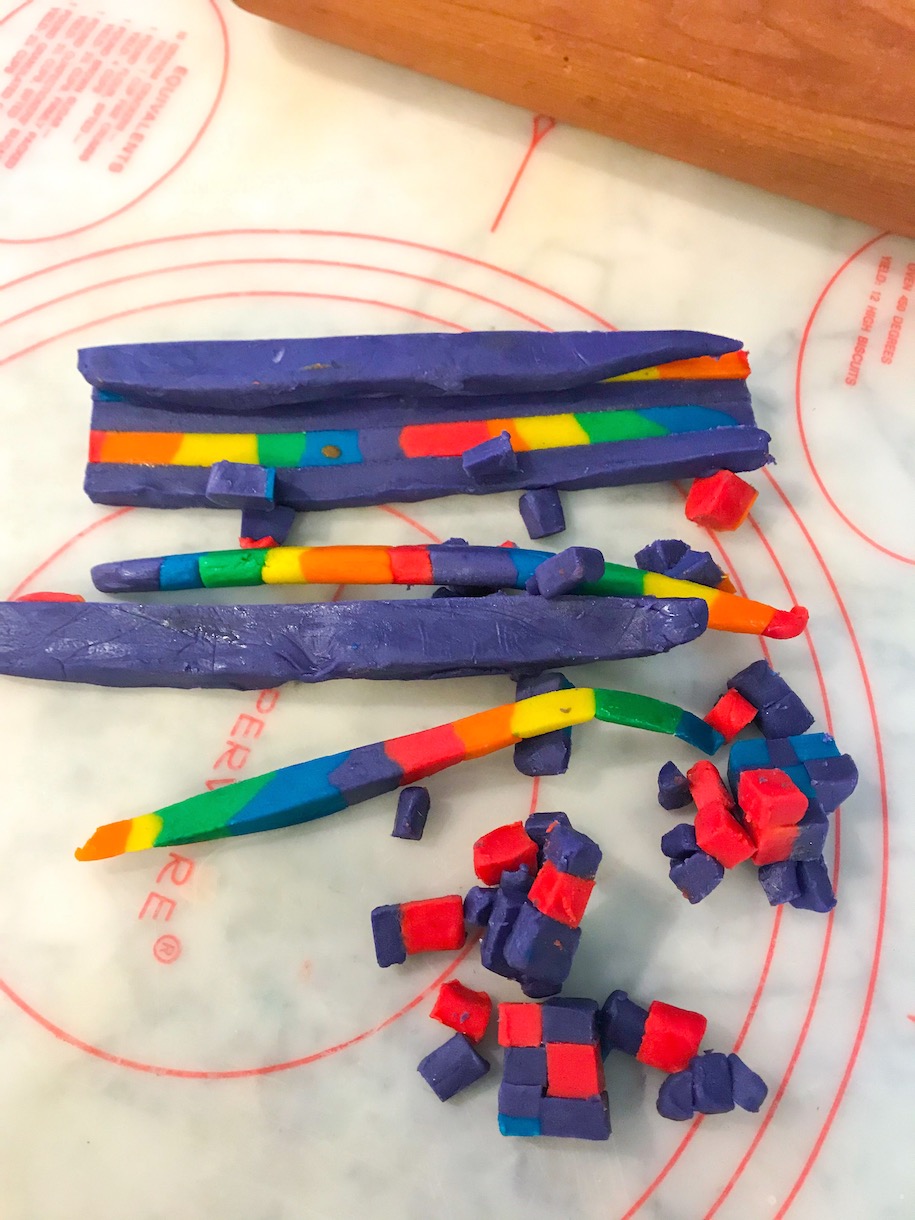
Trim the ends, once again making sure to reserve all trimmings for later. Place the trimmed rectangle on a parchment-lined tray and transfer to the refrigerator to chill.
Meanwhile, gather all of the ends and trimmings. Use your hands to squash all of the little pieces together, then form into a rectangle shape.
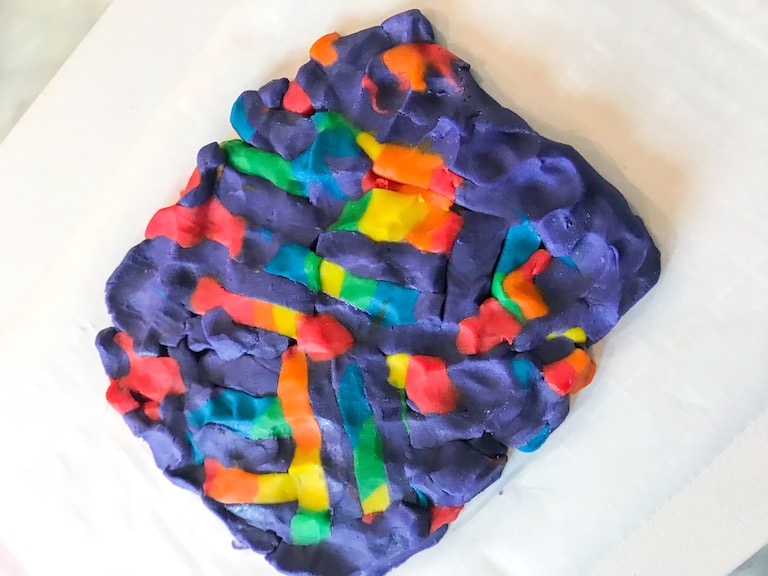
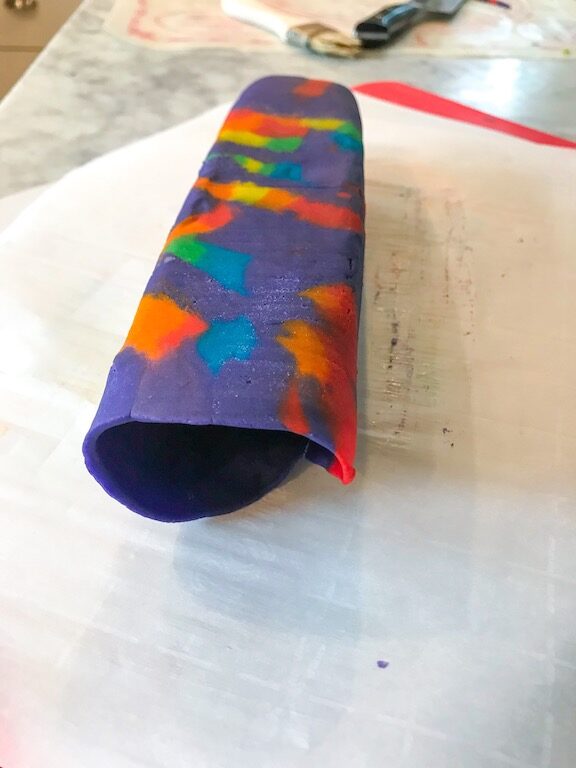
Place the rectangle between parchment and roll to about 3 millimeters / 1/8 inch thickness.
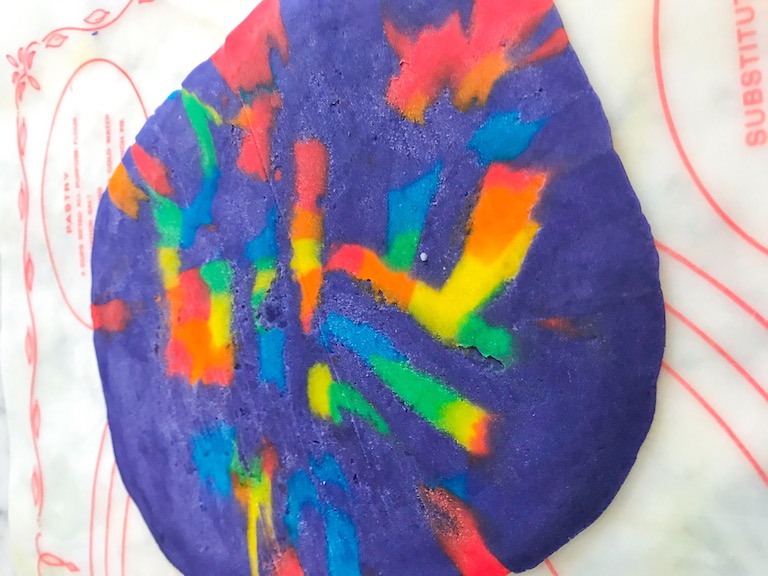
Brush with egg white, then remove the chilled rectangle from the refrigerator and place it on top. Working slowly, roll the thinly rolled piece around the rectangle, turning it until all sides are covered.
Trim away the excess dough, then return to the fridge to chill, at least 15 minutes. While chilling, preheat the oven to 350° F / 175° C. Spray a large baking tray with nonstick cooking spray and set aside until ready to use.
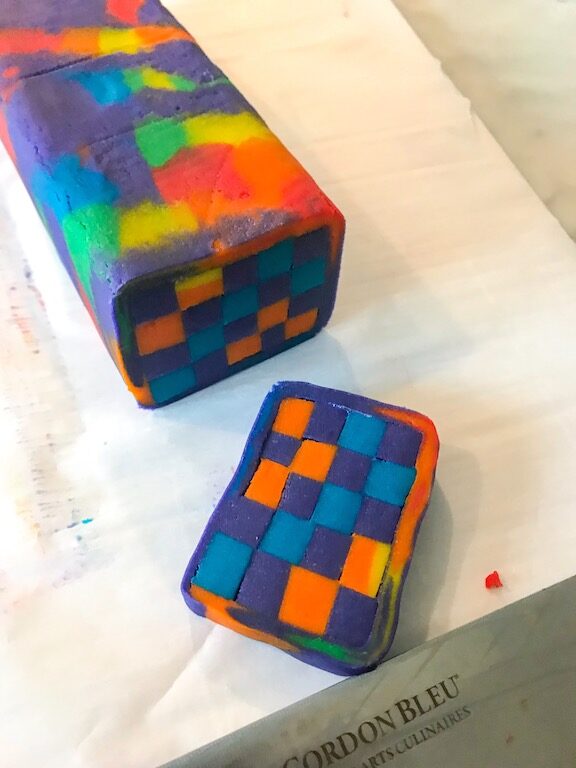
Once chilled, remove covered rectangle from the fridge. Using a sharp chef’s knife, slice into 1 1/4 centimeter / 1/2-inch slices. Place slices on prepared baking tray. Freeze on tray for 10 minutes.
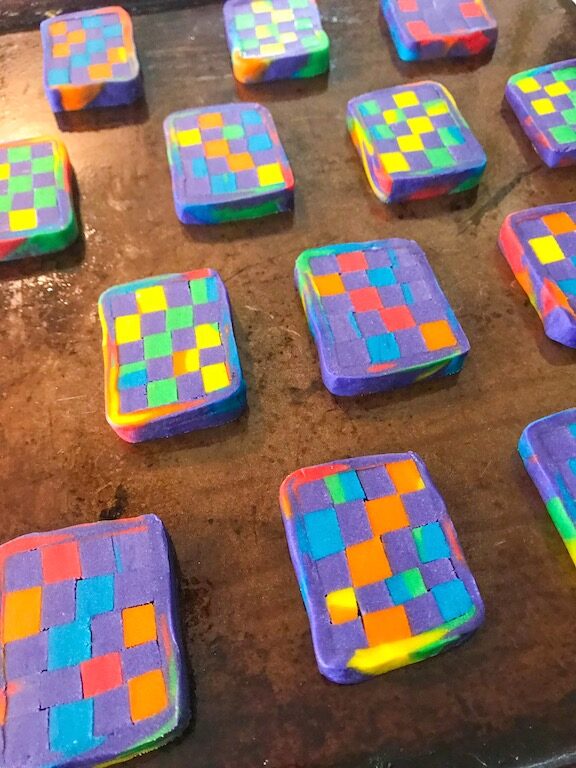
Bake in preheated oven for 12-15 minutes. Transfer to a wire rack to cool completely.
Store rainbow cookies in an airtight container at room temperature for up to one week.


Notes
*Be sure to choose gel food coloring for this recipe, rather than water-based or powder. Water-based colors (like the kind found in most grocery stores) are not concentrated enough, and the powders will add to much dryness to the cookie dough.
**I strongly suggest wearing rubber gloves for this step!
This recipe was adapted from a sablés hollandais recipe I learned at Le Cordon Bleu. Visit my pastry school diary to read more about our petit fours lesson in Basic Pâtisserie.
- Prep Time: 30 minutes
- Chilling/Freezing Time: 40 minutes
- Cook Time: 12-15 minutes
- Category: Biscuits and Cookies
- Method: Oven
- Cuisine: Dessert