
Homemade Mallo Cups Recipe
This post may contain affiliate links. Please read the disclosure policy to learn more.
Thank you for supporting this blog!
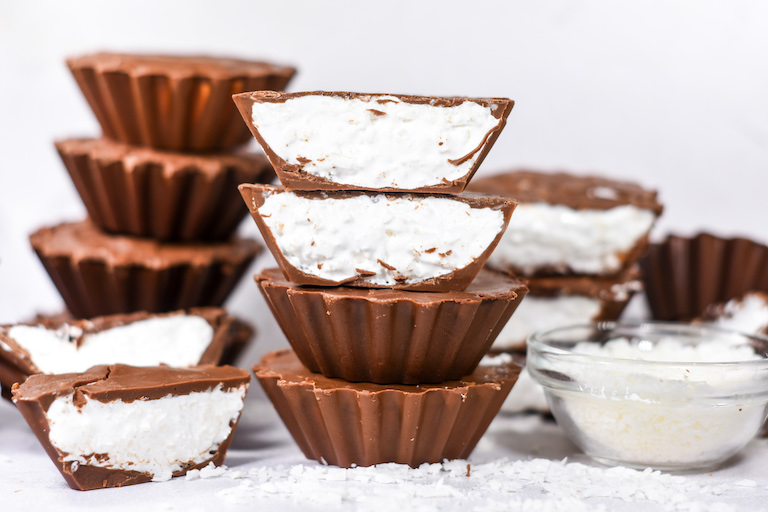
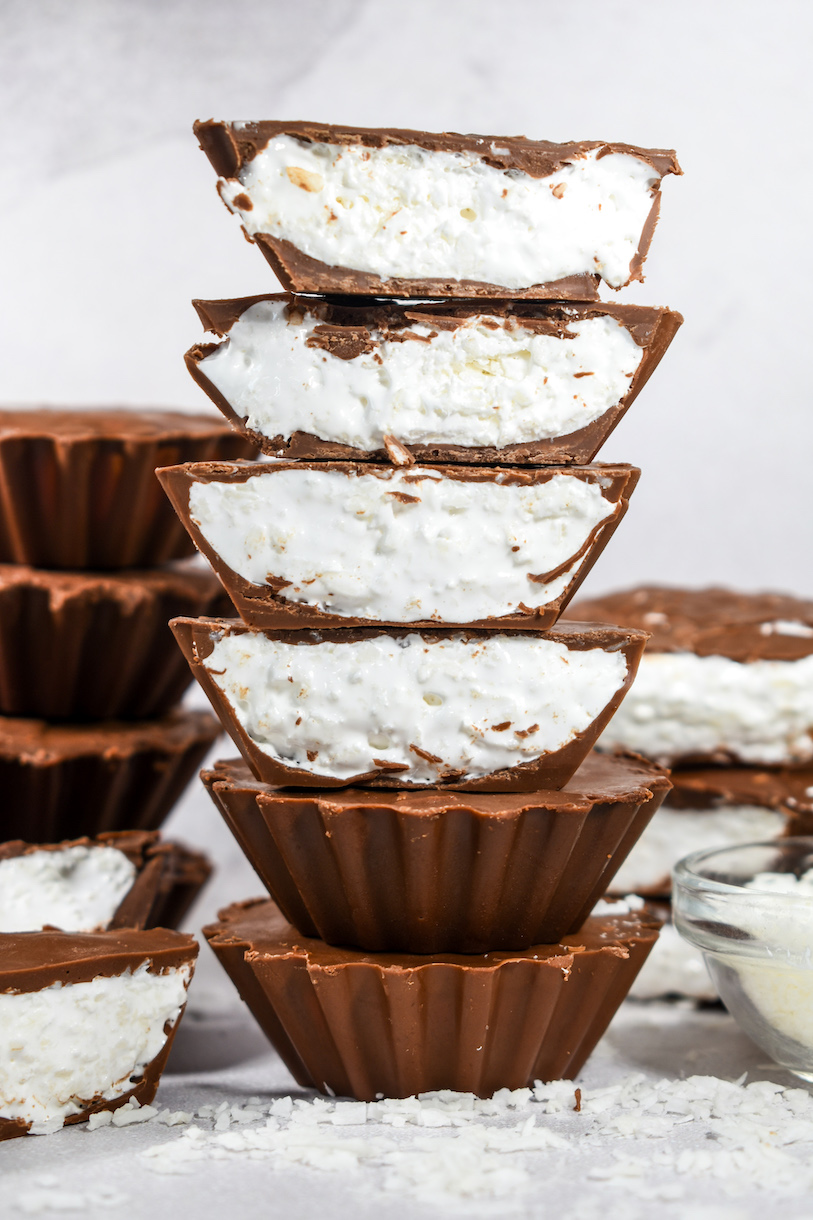
Learn how to make homemade Mallo Cups with this easy copycat recipe, featuring the classic Mallo Cup ingredients: milk chocolate, marshmallow, and coconut!
Why Make Homemade Mallo Cups?
I’ve always loved Mallo Cups. Every Halloween, I was that weird kid who bypassed the Snickers, Twix, Milky Way, and homemade chocolate bark in favor of these tasty, old-fashioned marshmallow treats.
Maybe it’s my central Pennsylvania upbringing, since Boyer Candy, based in Altoona, PA, manufactures these sweet treats. Or, maybe it’s because of my undying love of things coconut. (See also, my coconut truffles, coconut ice cream, and homemade coconut whipped cream!) Either way, nothing beats this combination of gooey marshmallow and crunchy coconut, contained inside a fluted milk chocolate cup and packaged in a bright yellow wrapper.
Yet sadly, when it comes to classic candies, Mallo Cups are chronically underappreciated. (They fall second perhaps only to the 100 Grand bar which, like the Mallo Cup, proves difficult to find at any time of the year other than Halloween!)
In New York City, I’ve only ever managed to locate Mallo Cups at specialty candy stores like Dylan’s Candy Bar and Economy Candy, while in London, Mallo Cups just plain don’t exist. So whenever I find myself craving Mallo Cups, I make my own at home. And I swear, they taste almost as good as the real thing!
Mallo Cup Ingredients
These homemade Mallo Cups require just four ingredients. You’ll need:
- Marshmallow Fluff – You’ll need one jar (213 grams or 7 1/2 ounces, depending on the country!) of store-bought marshmallow fluff to make this recipe. If you’re feeling ambitious, you can also prepare these chocolate marshmallow cups using homemade marshmallow fluff.
- Shredded Coconut – Use unsweetened coconut for this recipe, not dessicated coconut or sweetened coconut. You also do not want to use “flaked” coconut. Ideally, select a brand of shredded coconut with tiny bits/pieces, rather than long shreds. Let’s Do Organic or Bob’s Red Mill will both work well.
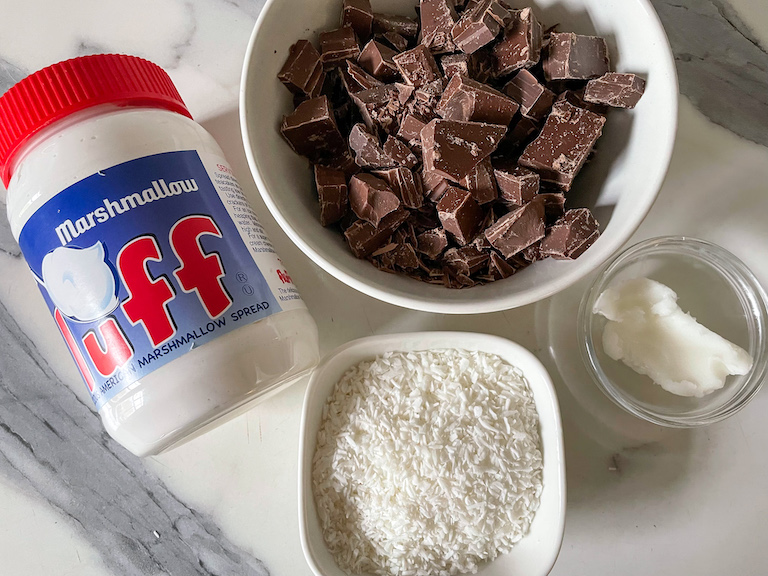
- Milk Chocolate – You will need a good-quality, good tasting milk chocolate to make the cups. If desired, you can use dark chocolate instead.
- Coconut Oil – Coconut oil helps to add fluidity to the chocolate, and enhances the coconut taste. Be careful not to add too much, or your melted chocolate will be overly thin, causing the cups to melt quickly in your hands.
How to Make Mallo Cups
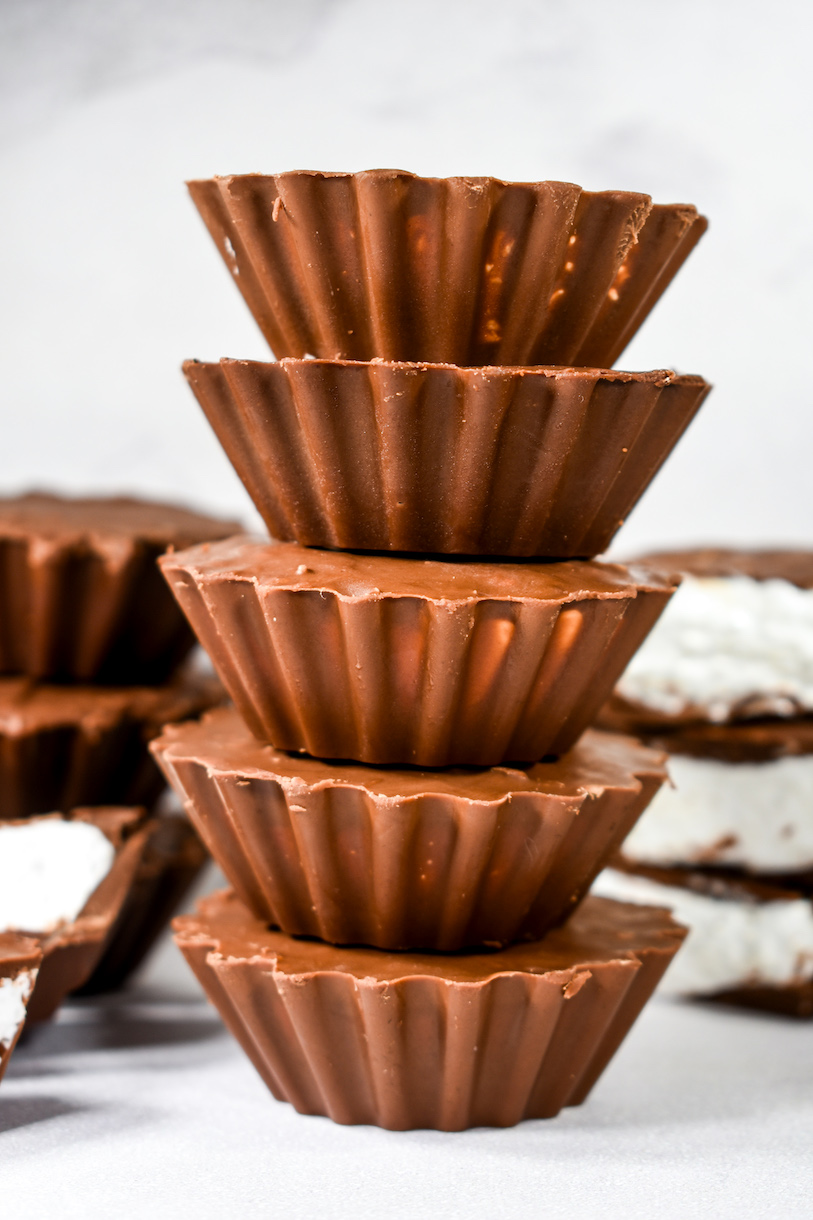
To make homemade Mallo Cups, you’ll begin by melting chunks of milk chocolate over a bain-marie (hot water bath), and stirring in a little bit of coconut oil. Then you’ll brush the chocolate into a silicone tartlet mould and chill, creating the fluted “cup” portion of your homemade Mallo Cups.
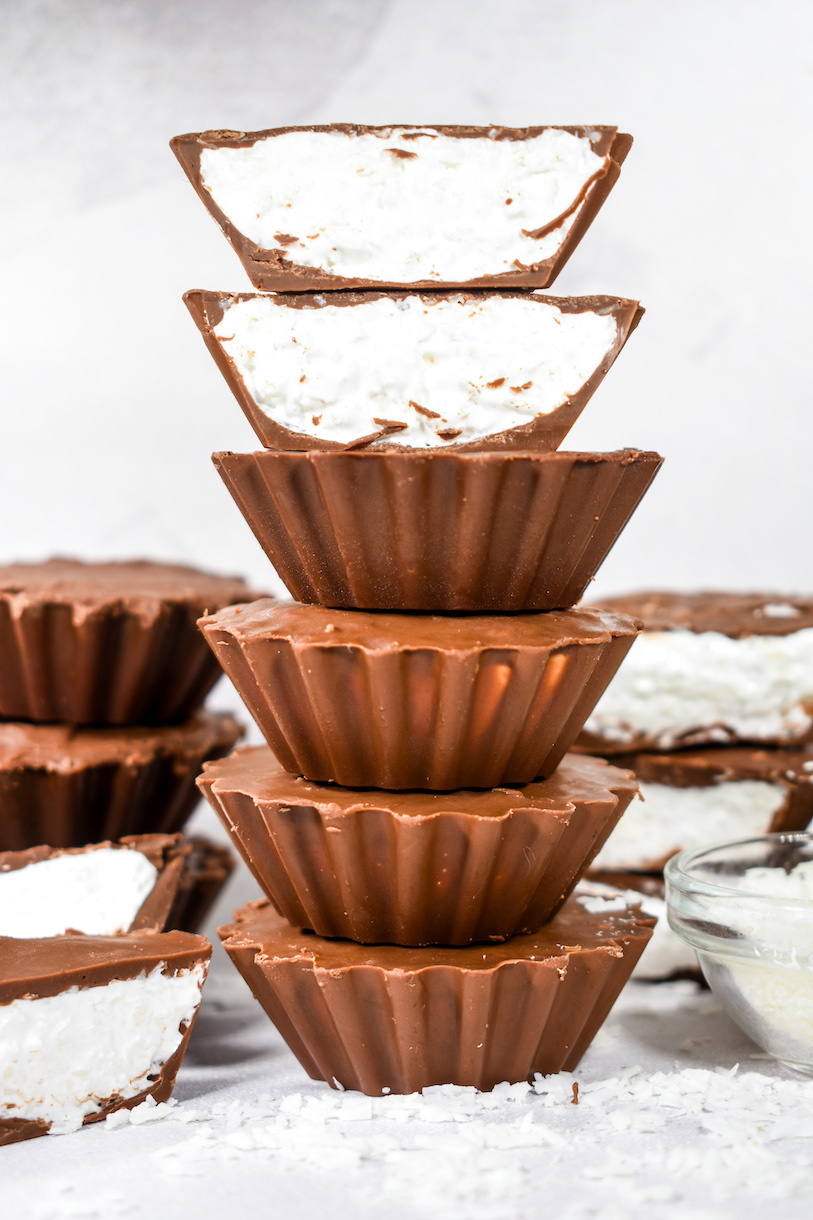
Then, you’ll pipe in a mixture of marshmallow fluff and shredded coconut, and smooth more melted chocolate over the tops of the cups. Finally, you’ll freeze the mould for a few minutes (for easy removal) before using your hands to ‘pop’ each homemade mallo cup from the mould. And voila! Gooey, coconut-ty homemade Mallo Cups.
This recipe requires a bit of a time commitment (mostly due to the inclusion of several chilling/freezing steps) but as long as you’re patient, homemade Mallo Cups are actually surprisingly easy to make, and they taste very much like the real thing.
Notes on Tempering
Because I wanted this to remain simple enough for anyone to make, I have opted not to temper the chocolate. (Tempering is the process of stabilizing chocolate by heating and cooling chocolate to specific temperatures.) The untempered chocolate means that these Mallo cups are best stored in the refrigerator, and that the chocolate shells won’t set quickly at room temperature. They’ll also lack the “shine” and “snap” of tempered chocolate.
If you feel comfortable with tempering, you can temper the milk chocolate and store your finished Mallo cups at room temperature. If tempering, omit the coconut oil. Also remember that you will need to keep the bowl of chocolate in temper during the chilling steps.

Equipment for Making Homemade Mallo Cups
To make these chocolate marshmallow cups, you’ll need a few pieces of special equipment. These include:
- Silicone Tartlet Mold (or peanut butter cup mold) – I used a 12-cup silicone mould, with each cup measuring about 2 inches in diameter. With this size mould, the recipe will yield 12 Mallo Cups. You can use a bigger or smaller size, but recipe yield will vary accordingly.
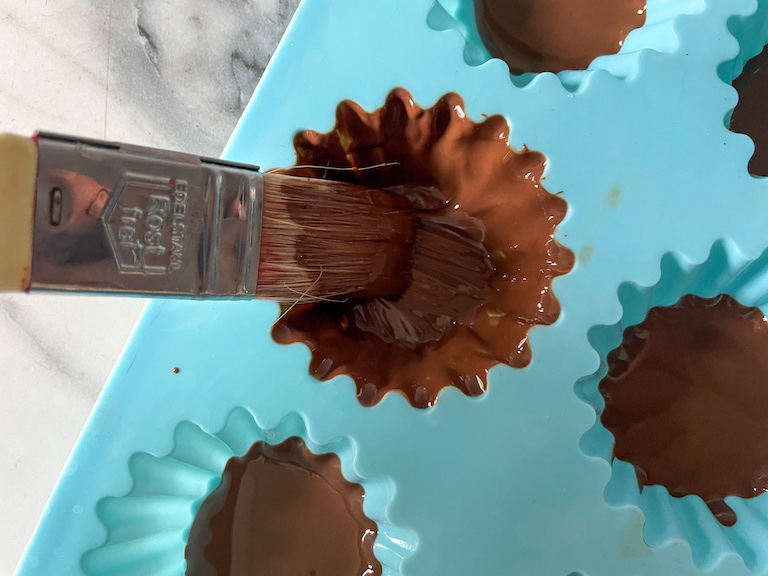
- Pastry Brush – You’ll need a pastry brush to brush the chocolate into each cavity. I prefer a natural-bristled brush, about one inch wide.
- Double Boiler or Bain-Marie – For melting the chocolate and keeping it warm as you work. If you’re not familiar with the process of making a hot water bath, see my instructions on how to make a bain marie.
- Small Stepped Palette Knife – For smoothing the marshmallow, as well as the chocolate. If you don’t already own a mini palette knife, I highly recommend buying one—it’s such a handy tool to have in your kit!
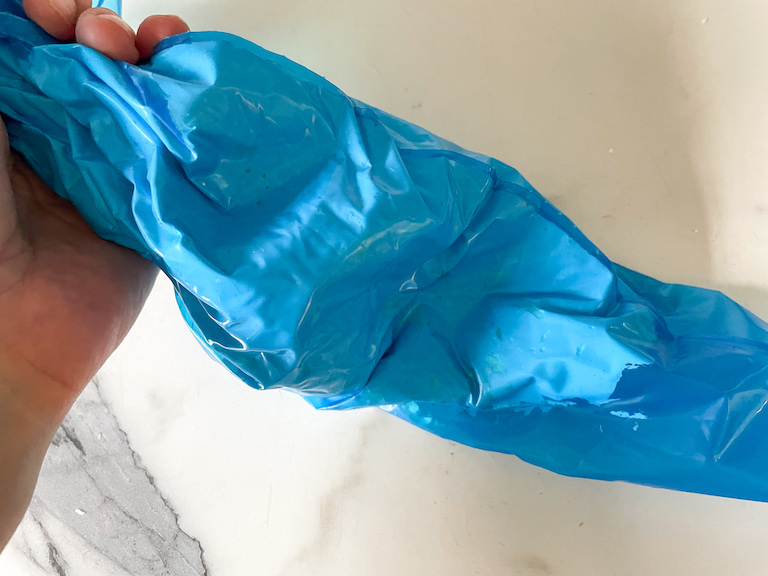
- Piping Bag – For mixing and piping the marshmallow-coconut mixture. Definitely opt for a disposable piping bag for this recipe—cleaning sticky marshmallow from a reusable bag seems like a giant pain! And you don’t really need a piping tip; just snip the tip of the piping bag with kitchen shears.
Mallo Cup Recipe Tips and Tricks
Mix in the bag. I suggest mixing the marshmallow fluff and shredded coconut directly in the piping bag, as described in the recipe below. Marshmallow fluff is extremely sticky, and you’ll waste too much product if you try to stir it together in a bowl.
Use a dry mold. Make sure your silicone mold is completely dry. Water and chocolate do not mix!

Make a bain-marie. If your chocolate begins to set in the bowl while you’re chilling the cups, rewarm it gently over a bain marie, or hot water bath.
Place your mold on a small tray. Because silicone is flimsy, a quarter sheet tray will make it much easier to maneuver back and forth between the refrigerator and the countertop while chilling your cups.
Other homemade candy recipes you might enjoy:
Homemade Candy Corn
Chocolate Covered Cherries
Rose Marshmallows
Rainbow Gummy Bears
Oreo Marshmallows
Caramel Apple Lollipops
Homemade Butter Mints
And if you do make these, or any of my recipes, don’t forget to tag me @bastecutfold or use the hashtag #bastecutfold on Instagram. I always love to see what you’re making!
Print
Homemade Mallo Cups
- Total Time1 1/2 hours (including chilling/freezing time)
- Yield12 2-inch round cups 1x
A recipe for homemade Mallo Cups, featuring the classic Mallo Cup ingredients: milk chocolate, marshmallow, and coconut. Learn how to make Mallo Cups with this copycat recipe.
Ingredients
60 grams unsweetened shredded coconut (3/4 cup, divided)
213 grams marshmallow fluff (213-gram / 7 1/2-ounce jar)
300 grams chopped milk chocolate (10 1/2 ounces, or about 2 1/3 cups)
13 grams coconut oil (1 tablespoon)
Instructions
Measure out 10 grams (2 tablespoons) of the shredded coconut. Set aside.
In a large disposable piping bag, add remaining shredded coconut and marshmallow fluff in alternating layers.
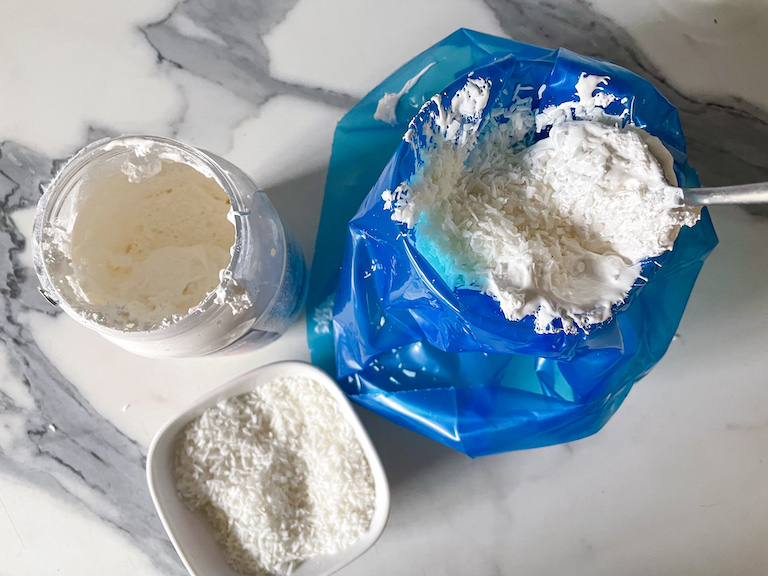
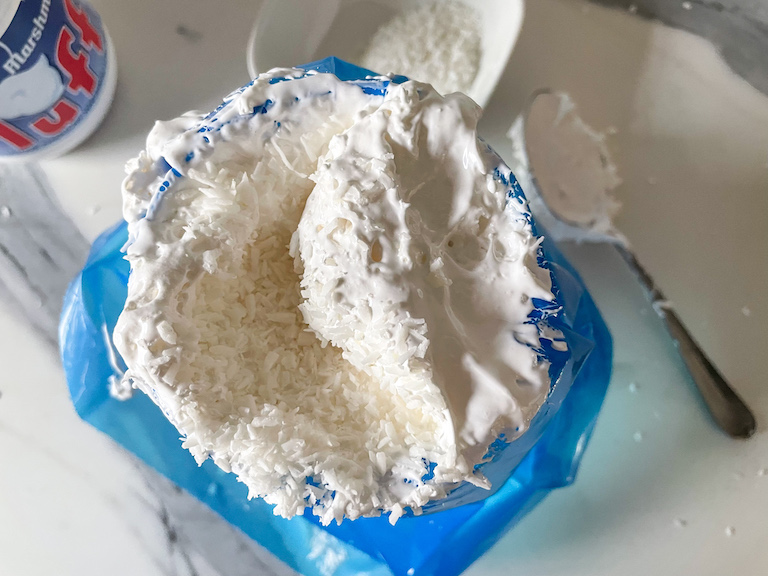
Secure the open end of the piping bag and use your hands to knead, working the coconut into the fluff. Set aside.
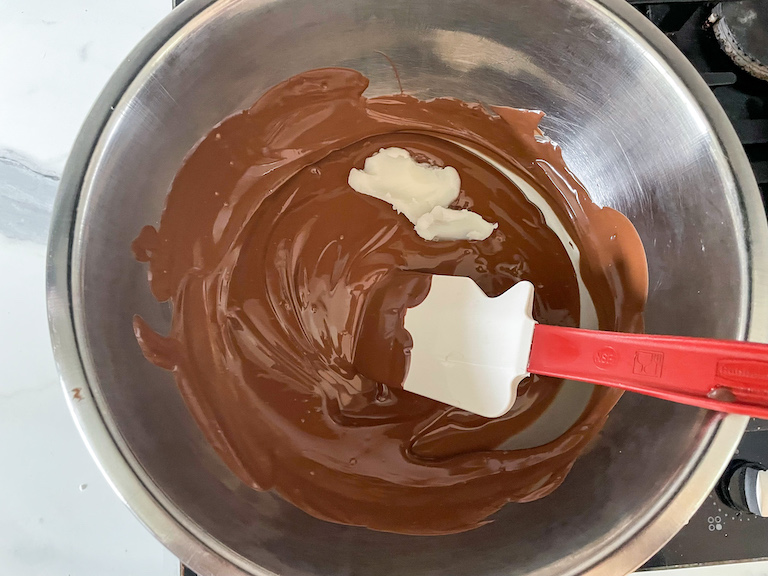
Melt the chopped milk chocolate over a bain marie or double boiler.
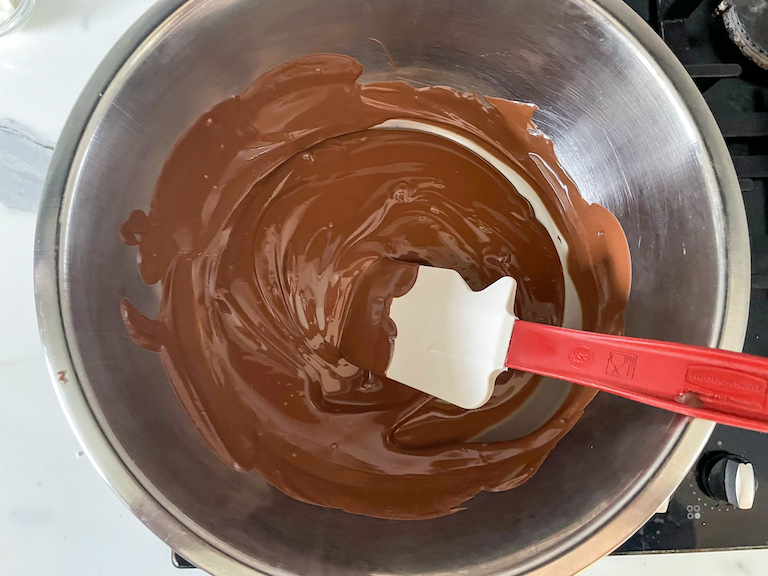
Once chocolate has melted, stir in the coconut oil. Continue stirring until completely melted, then remove from heat.

Place 1 teaspoonful of melted chocolate into each cavity of a 12-cup silicone tartlet mould.
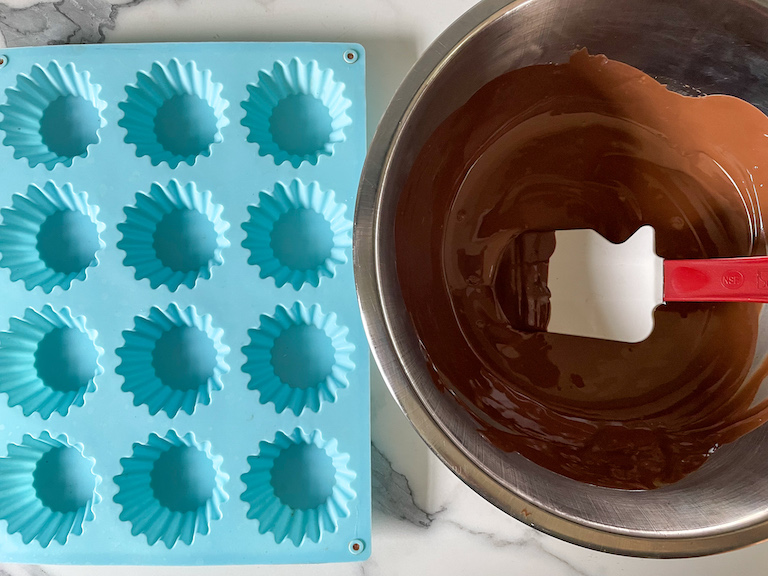
Tilt to distribute the chocolate evenly around each cup, then use a pastry brush to coat the sides. (If you notice a large amount of chocolate pooling in the bottom of the cups, spoon a small amount back into the bowl. Otherwise, the bottoms of your cups will be too thick.)
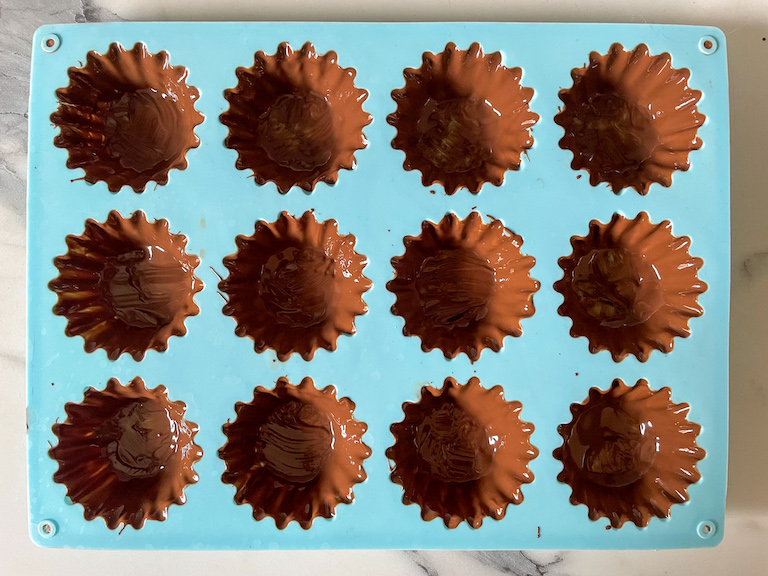
Transfer mould to the refrigerator to chill for 10 minutes, or until chocolate sets.
With a pastry brush, apply a second coat of chocolate to each cup.
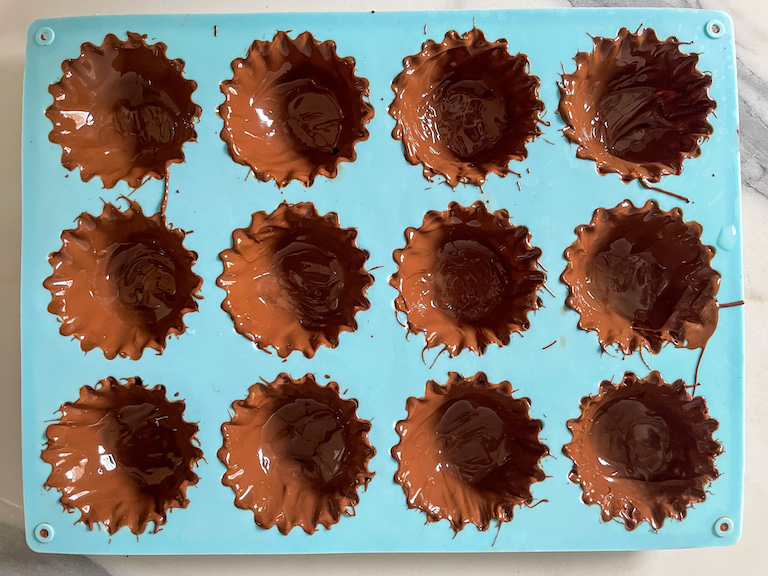
Chill for 10 minutes more, or until chocolate sets.
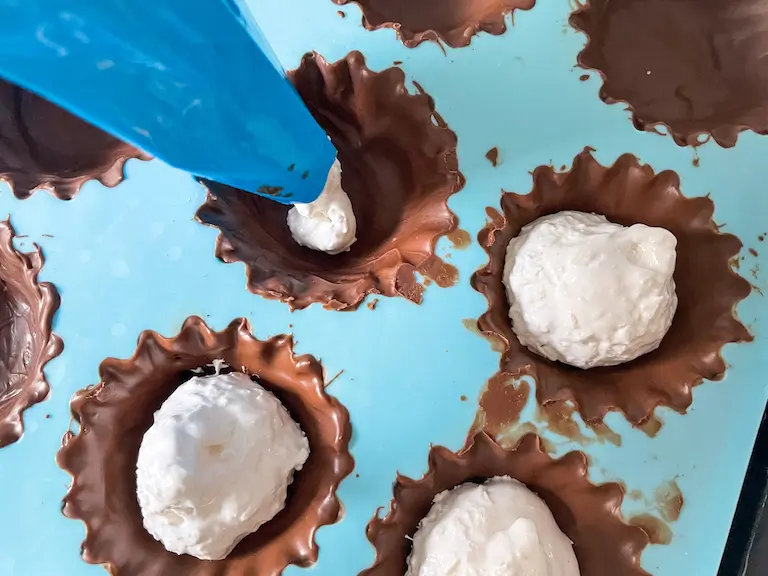
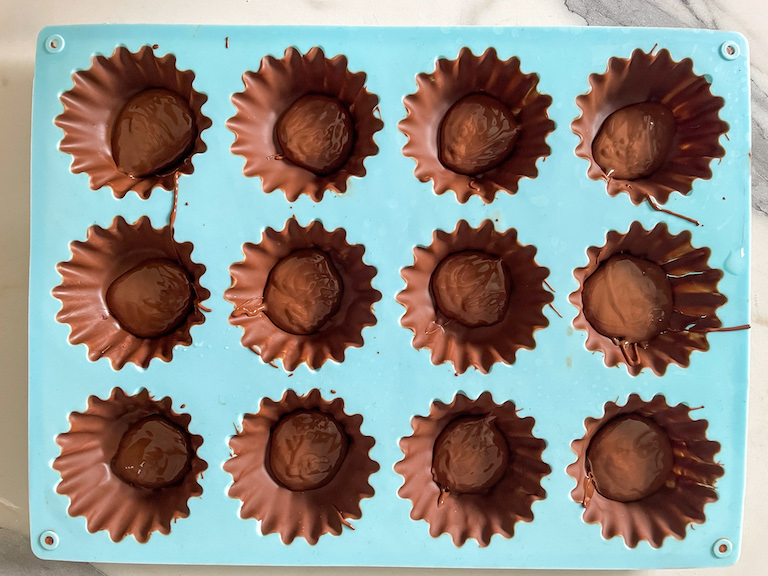
Pipe marshmallow mixture, dividing it equally between the cups and allowing about 1/4 inch of space at the top.

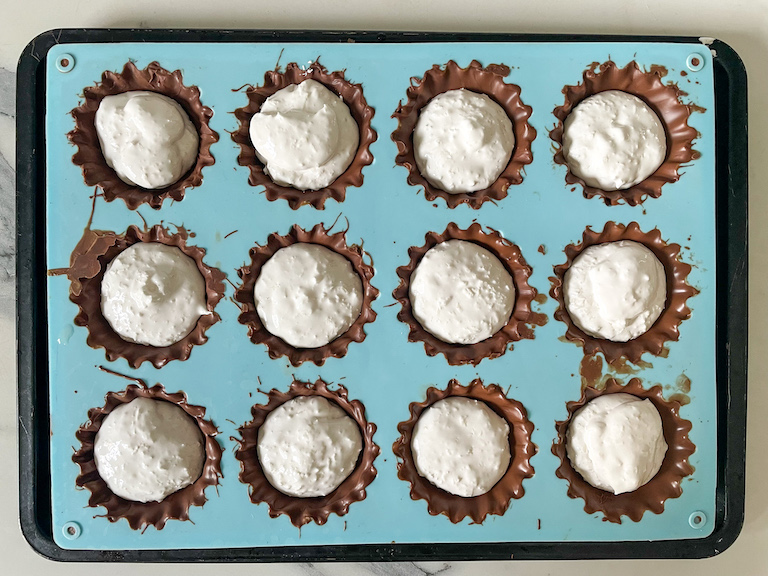
Use a small stepped palette knife to smooth the marshmallow. (If necessary, coat the knife in coconut oil to prevent the marshmallow from sticking.)

Sprinkle with the reserved coconut, using your fingertips to pat it into the marshmallow.
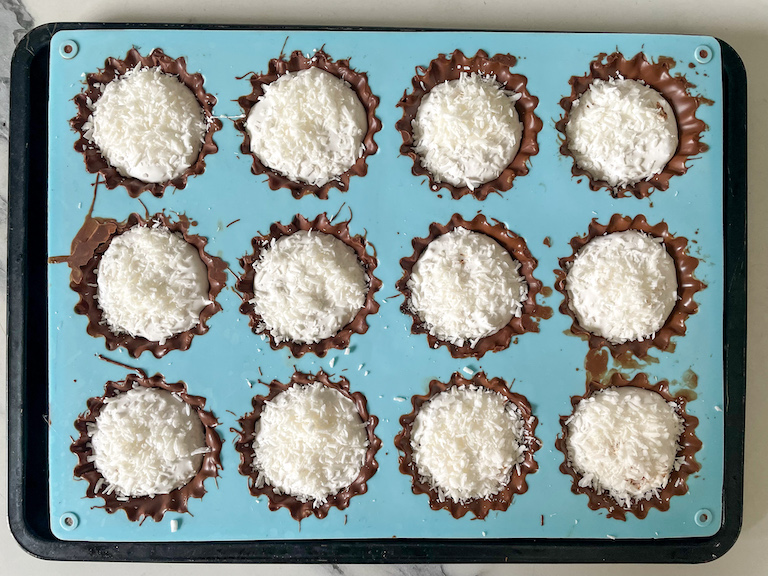
Return mould to the refrigerator and chill for 10 more minutes.
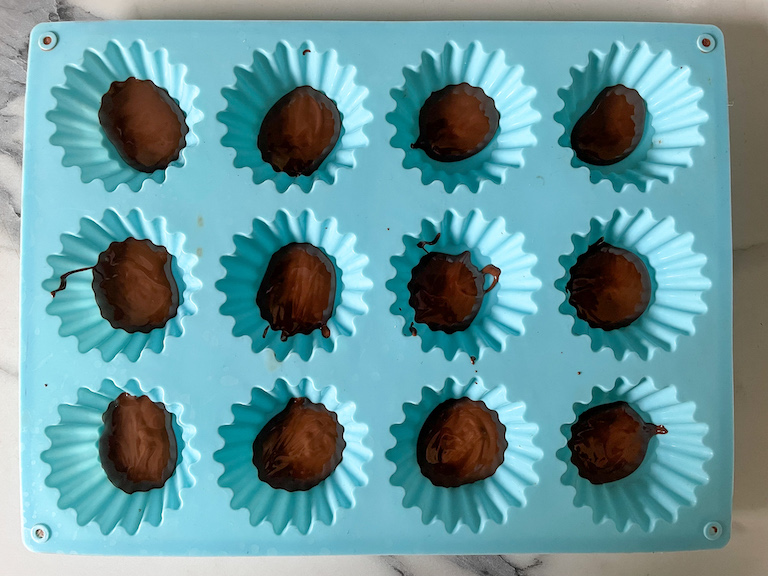
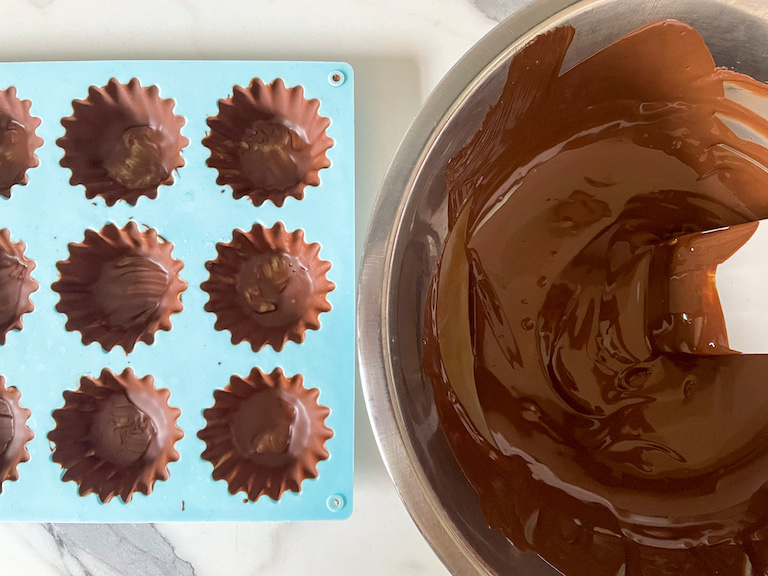
Spoon remaining chocolate on top of the marshmallow.
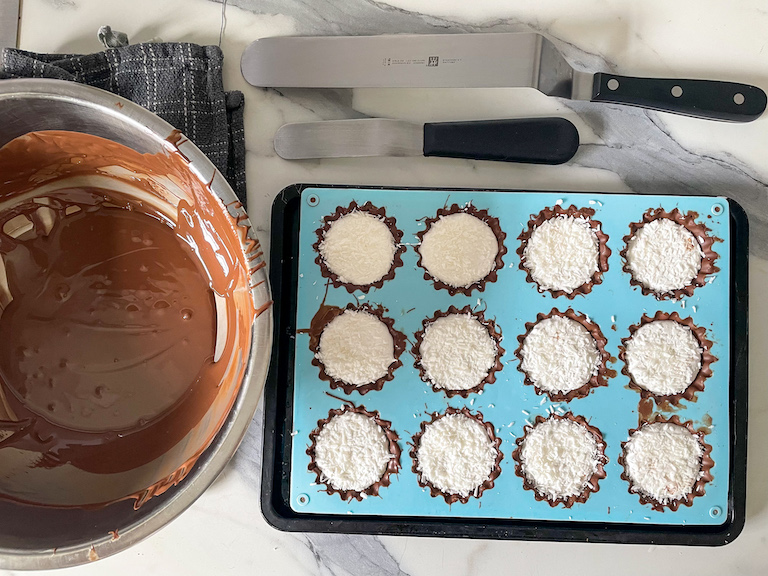
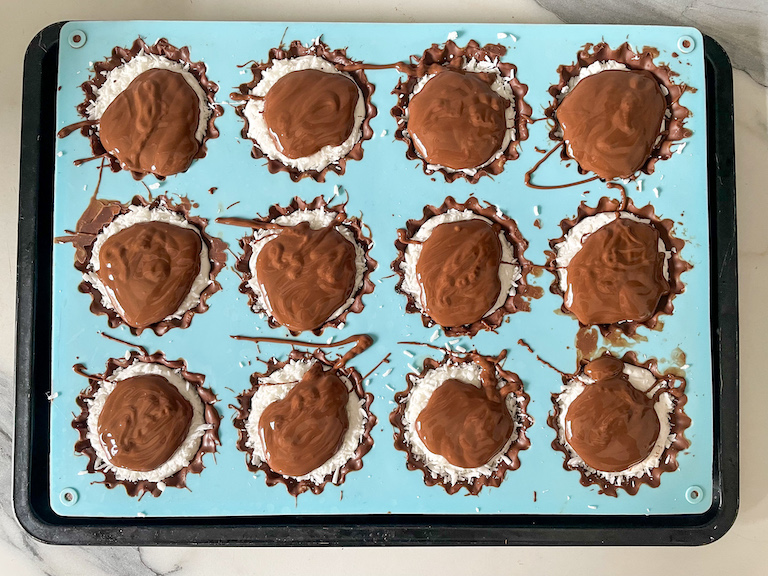
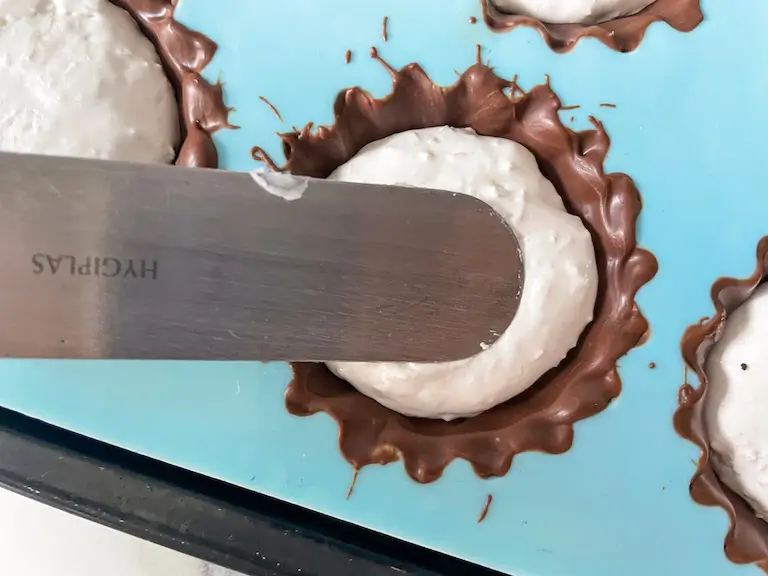
Use a palette knife to smooth the chocolate over the marshmallow. You can also use the palette knife to clean up the edges of the mould, or to scrape any excess chocolate back into the bowl.
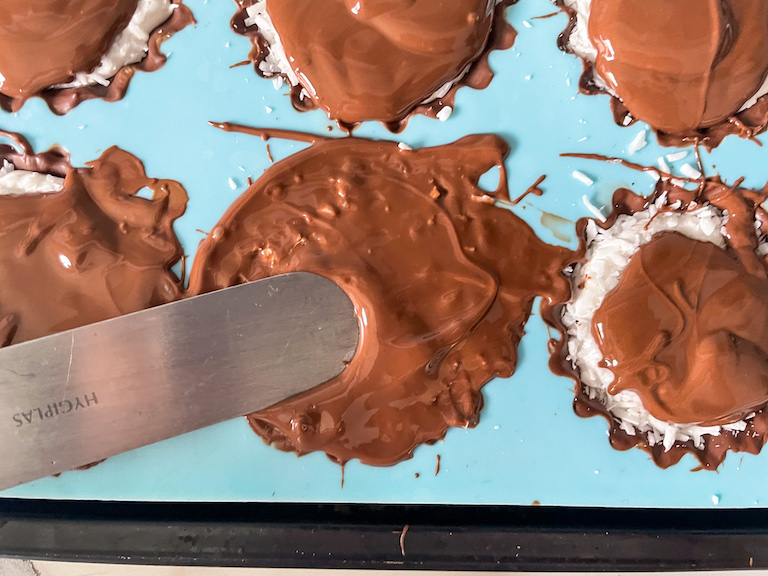
With a small stepped palette knife, “repair” the cups by adding additional melted chocolate. It’s okay to see the coconut texture (after all, this is how real Mallo Cups look) but make sure there are no white bits of marshmallow peeking through.
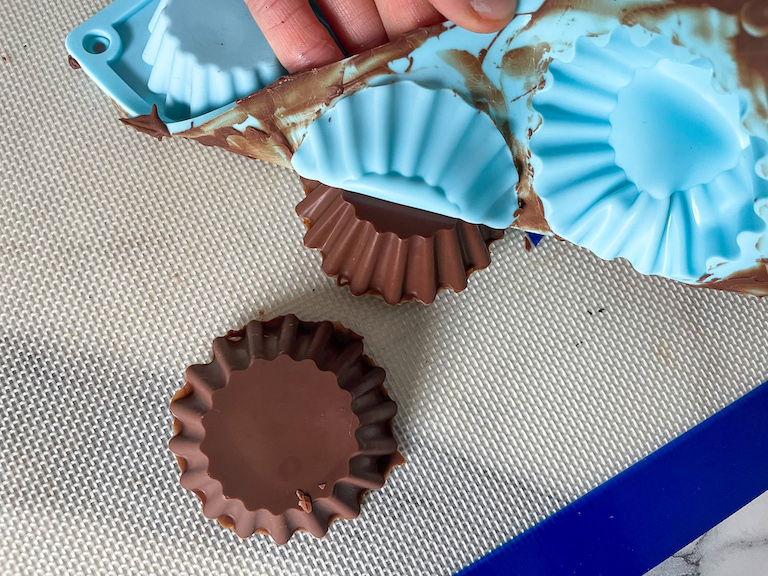
Place mould in the freezer and freeze for 10 minutes, or until firm.
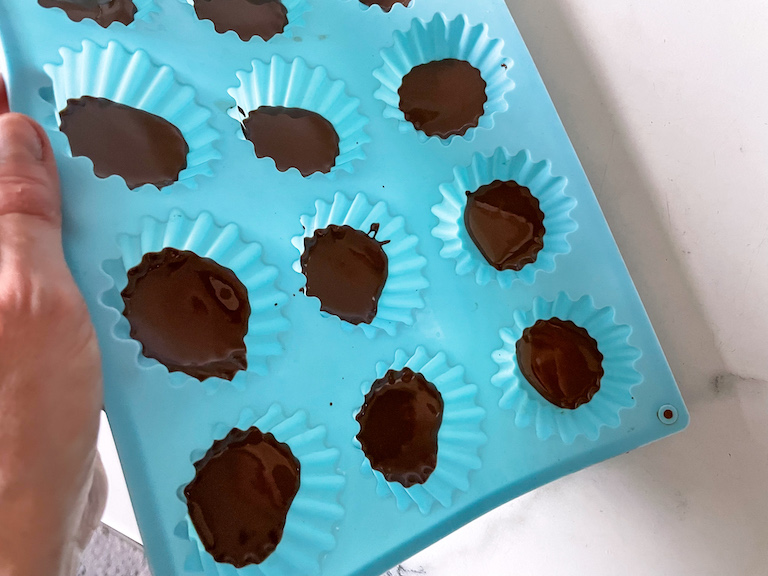
Pop the finished cups from the mould onto a sheet of wax paper or parchment, or a silicone mat.
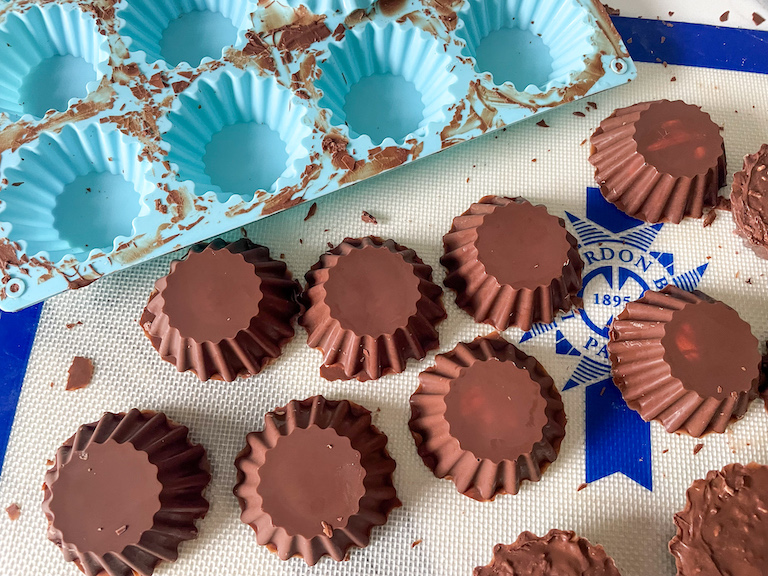
Layer homemade Mallo cups between sheets of parchment. Store in an airtight container in the refrigerator for up to three weeks.


I haven’t tried this recipe yet, but I also have loved these candy cups forever! The thing is, I remember the MINCED coconut was in the chocolate! Doesn’t matter however you do it as the combo of these flavors are delicious together. I’ll be making these tonight and can’t hardly wait!