How to Make a Gingerbread House
This post may contain affiliate links. Please read the disclosure policy to learn more.
Thank you for supporting this blog!
Want to learn how to make a gingerbread house? Read on for step-by-step instructions for making and decorating a miniature a-frame gingerbread house with fondant and royal icing piping.
Learn How to Make a Gingerbread House
If you’ve been following my baking adventures for awhile now, you’ll know that I absolutely love working with gingerbread, so I thought I’d share my tried-and-tested tips for how to make a gingerbread house and how to decorate it with royal icing and fondant. (Plus I’ve included an option for making a homemade gingerbread house with light-up windows, too!)
A few years ago during the Covid-19 lockdown (when my beloved Broadway went dark for well over a year) I spent weeks recreating the New York Theatre District in gingerbread and royal icing. I paid attention to every detail, shaping teeny tiny stage doors, fire escapes, street signs, and marquees.
In fact, some days I really wish I had this guy’s job. I just love making gingerbread houses.
A Miniature A-Frame House
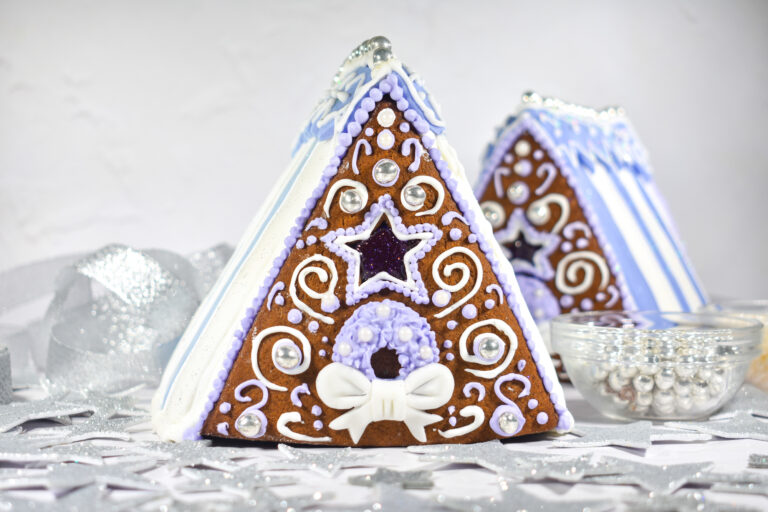
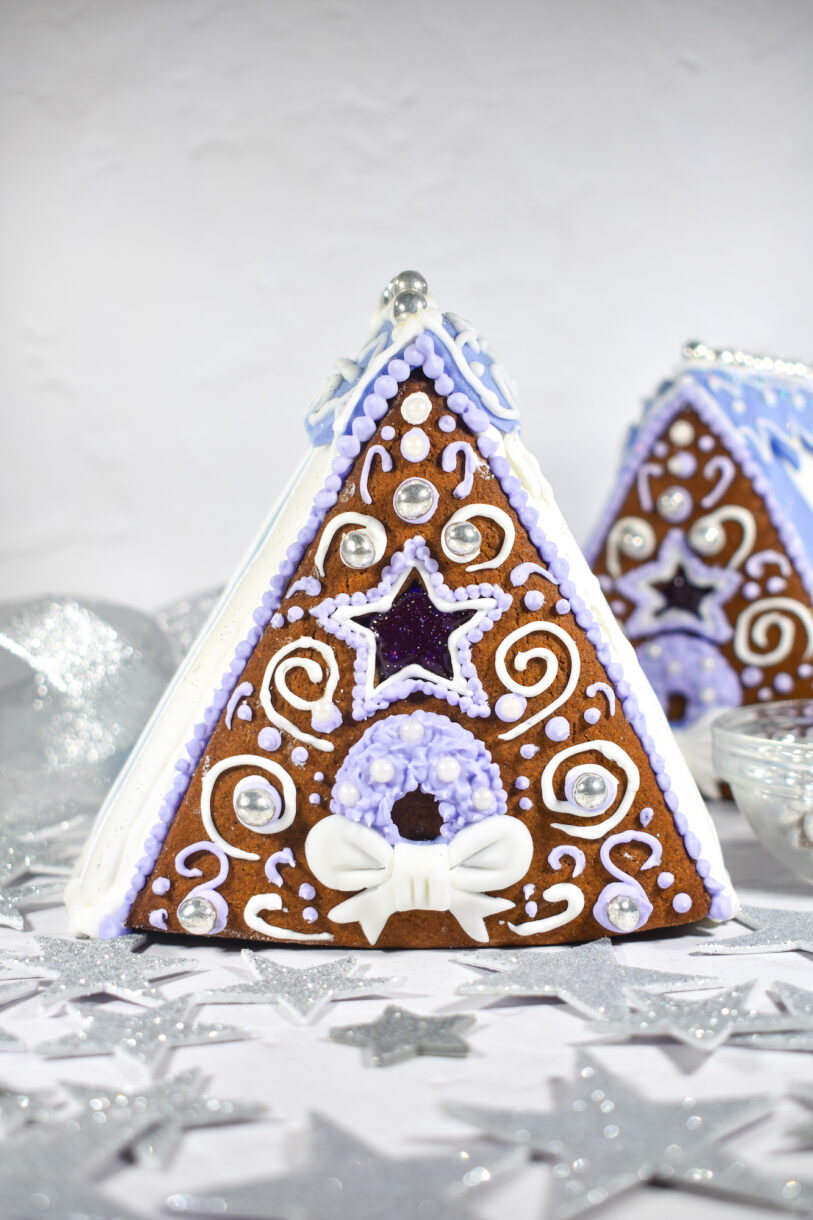
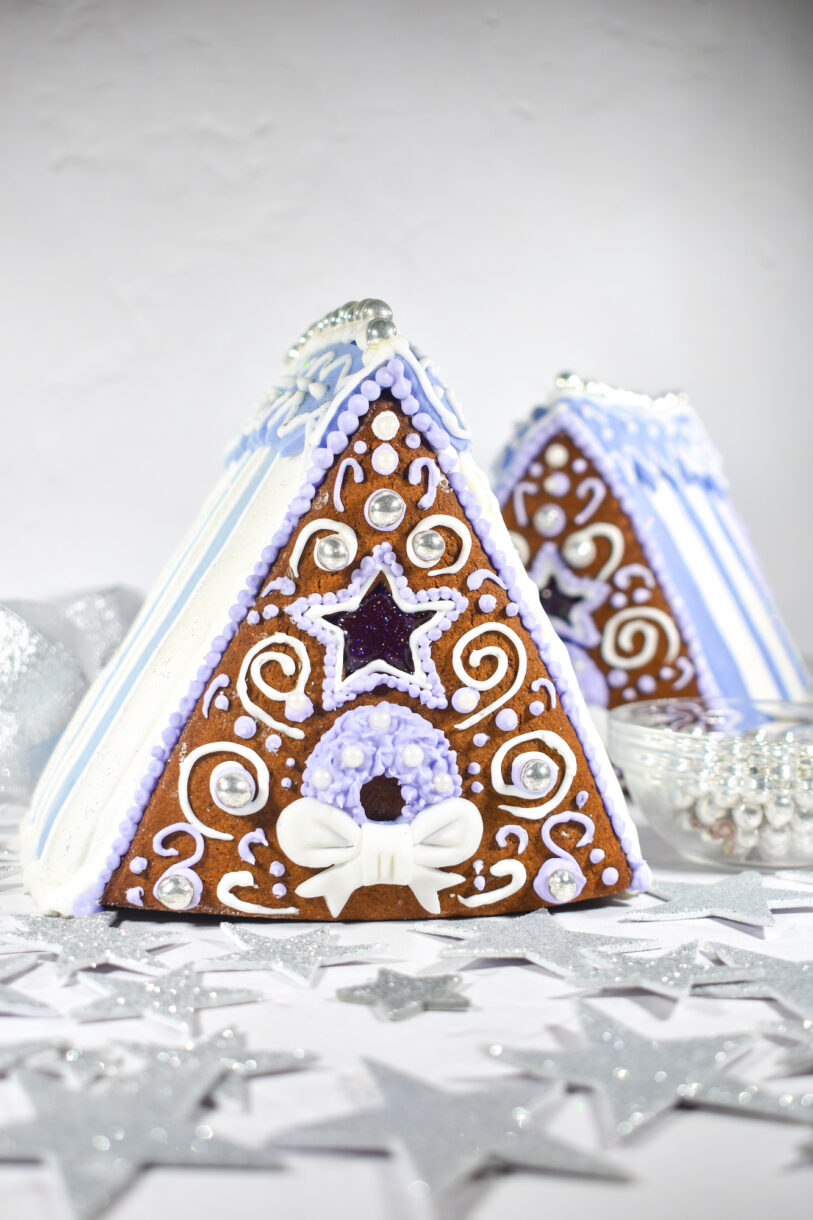
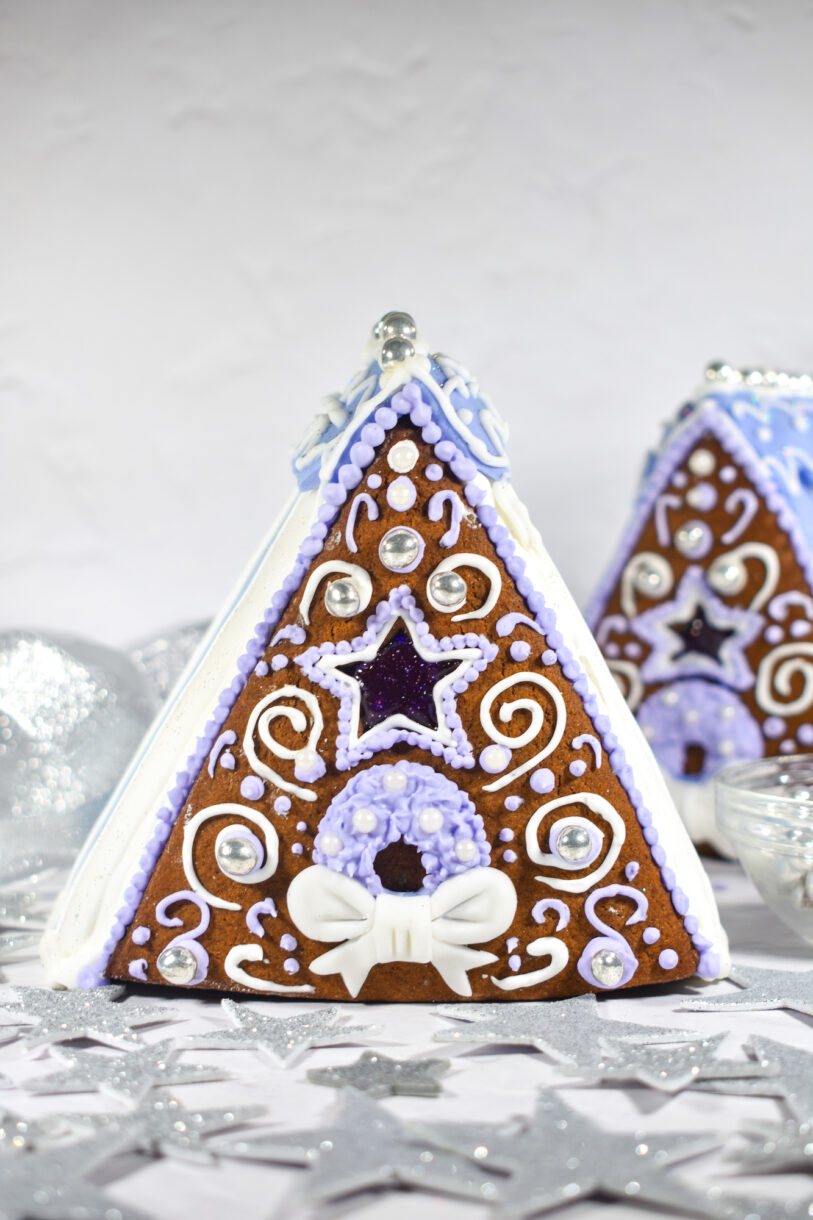
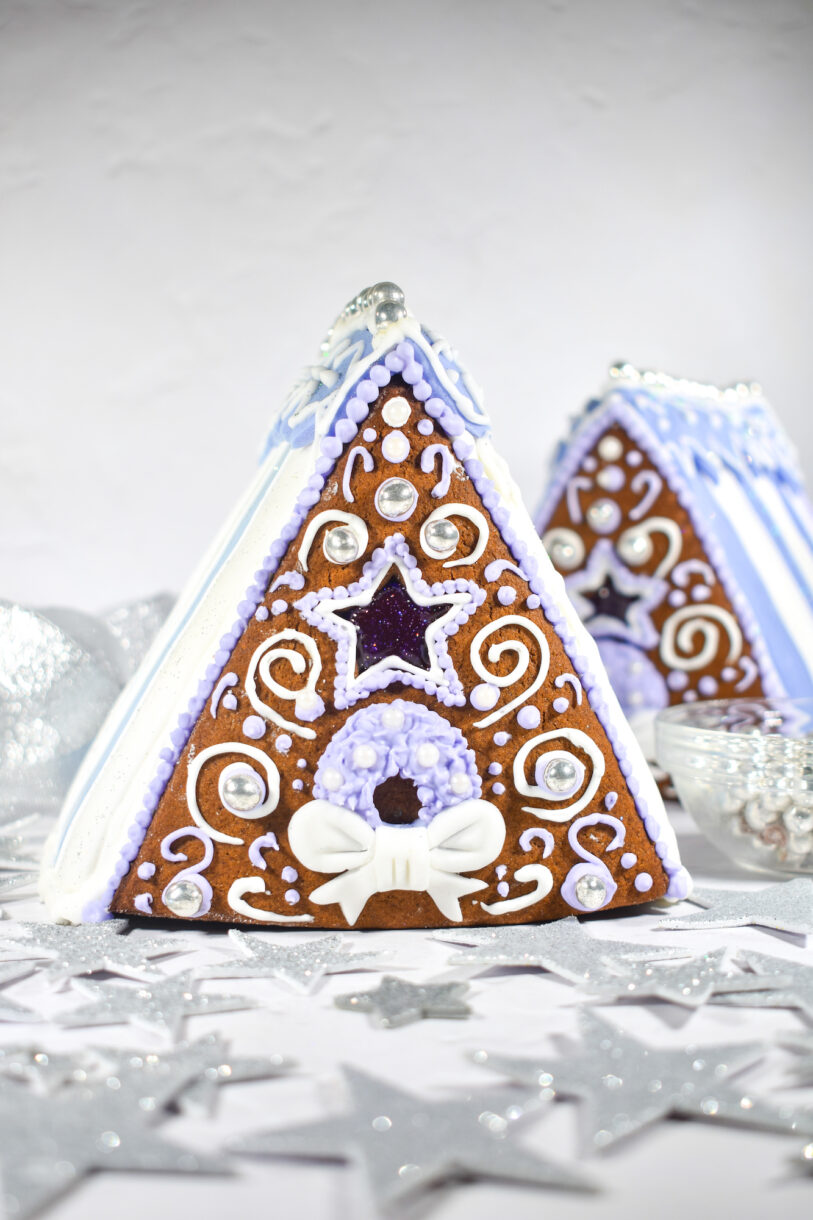
In the past I’ve made much bigger gingerbread creations, but this year I decided to go micro instead. This miniature A-frame gingerbread house measures just over 5 inches tall!
The piping requires a bit more effort (and teeny tiny piping tips!) but the smaller scale makes this project easy to finish in a day or two, rather than the weeks it takes to create large gingerbread houses. And because of the small scale, it’s also much easier to transport this house if needed. (It would make a fun centerpiece or table decoration for a party or holiday event!)
Below you’ll find step-by-step instructions (with photos) for how to make a gingerbread house like this one. Don’t feel that you need to stick to any of this too precisely; feel free to express your creativity with the piping and decorations. There is no “wrong” way to decorate a gingerbread house.
Helpful Tools for Making a Homemade Gingerbread House
When making this miniature gingerbread house, you’ll find it helpful to have a few special tools handy. These include:
- Toothpicks or Cocktail Sticks – I use toothpicks to correct tiny errors in the piping.
- Fondant Tools – A set of fondant tools works great for creating fondant details, or correcting mistakes.
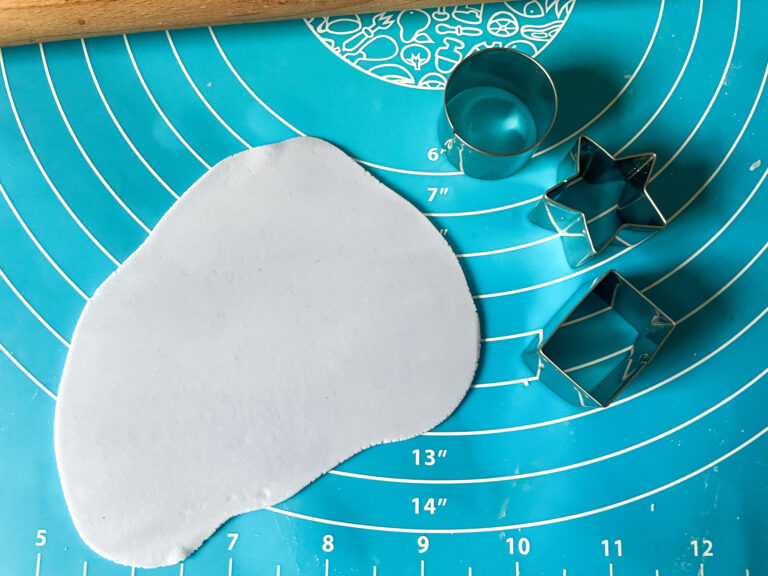
- Miniature Cookie Cutters – A set of miniature cookie cutters allows you to create fun fondant decorations.
- Chef’s Knife – You’ll want to have a sharp chef’s knife available for slicing the gingerbread, and a smaller paring knife for cutting the fondant.
- Kitchen Scissors – For cutting the pattern pieces.
- J-Cloth – I place a wet j-cloth on top of my bowl of royal icing, to prevent it from drying as I work.

- Mini Palette Knife – I love my small stepped palette knife for lifting pieces from one location to another.
- Rolling Mat and Rolling Pin – You’ll need a rolling mat and rolling pin for rolling the gingerbread dough.

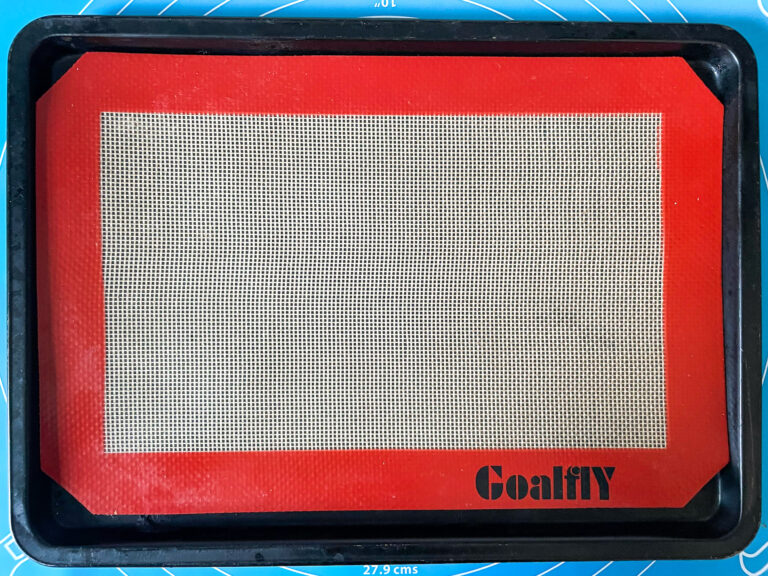
- Silicone Baking Mats – Silicone baking mats make flat gingerbread house pieces. I don’t recommend using parchment, which can make wrinkles in the dough.
- Piping Tips and Piping Bags – Piping tips and piping bags are a must for royal icing piping.
Gingerbread House Decorating Ideas
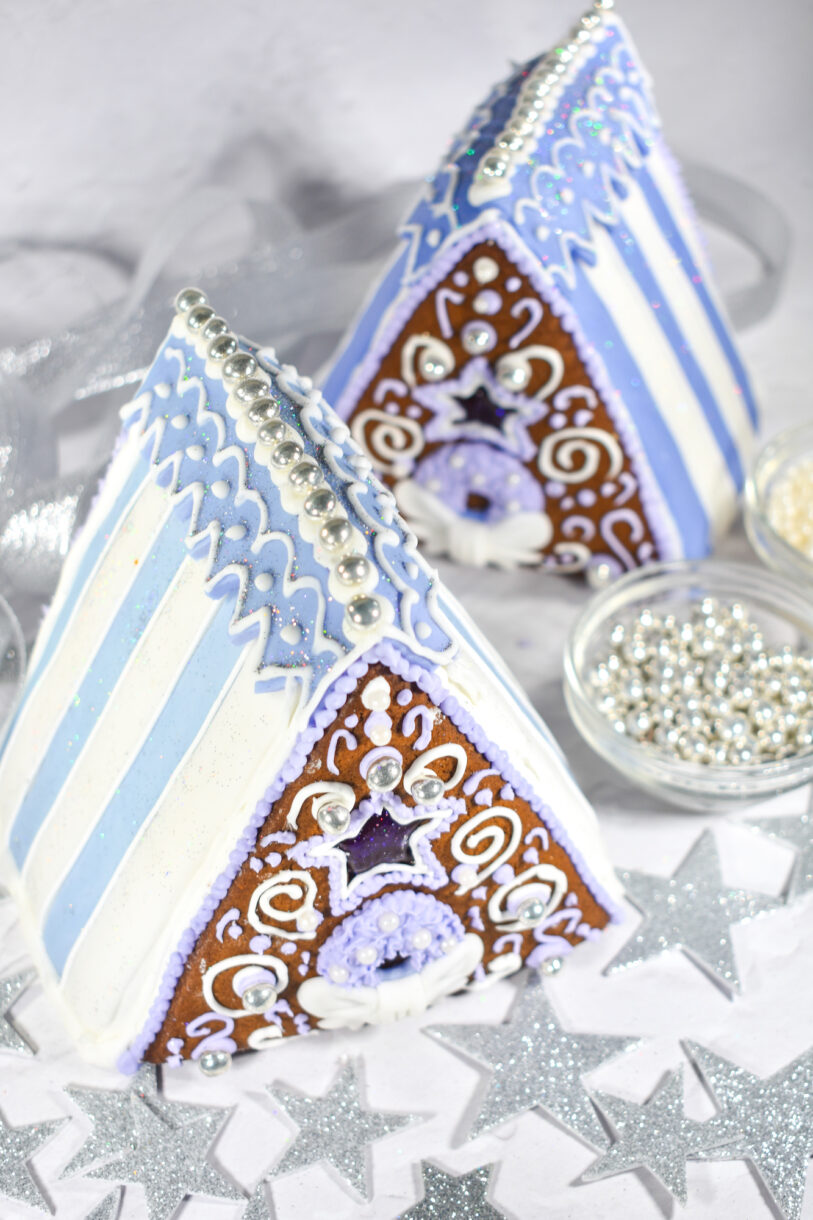
For my gingerbread house, I chose white and purple fondant and royal icing, plus edible sugar pearls and silver balls. I also added a dusting of edible glitter to make the house sparkle.
However, there is no right or wrong way to decorate a gingerbread house! Use any fondant and icing colors you’d like. Vary the sizes of your piping tips, or add different fondant shapes (hearts, candy canes, stars, etc.)
Some decorating options include edible foil stars, edible silver leaf, Christmas sprinkles (or homemade sprinkles!) miniature candy canes, Christmas M&Ms, or a dusting of edible glitter.
How to Make a Gingerbread House: Helpful Tips and Tricks
Take your time. Take the time to cut out paper pattern pieces, rather than attempting to “eyeball” or freehand these. Precision is important, and will make it much easier to fit the pieces together after baking.
Don’t skip the chilling steps. Chilling the dough, and the cut gingerbread pieces, will prevent the gingerbread from spreading and losing its shape as it bakes.
Use a silicone mat. Although I use parchment for many baking projects, for gingerbread houses I recommend a silicone baking mat instead. The parchment can make small ridges or wrinkles in the gingerbread, while the silicone ensures a flat (and therefore smoother, and much prettier) gingerbread house surface.
Make-Ahead and Storage Suggestions
Making a gingerbread house is a time-consuming project, so it can be helpful to split the work into two or three days.
You can prepare the gingerbread dough up to two days in advance. Flatten the dough into a disc, wrap it in clingfilm/plastic wrap, and refrigerate until ready to use.
The gingerbread pieces can also be baked up to two days in advance, then stored in an airtight container between layers of parchment until ready to use.
For my gingerbread houses, I made the dough on day one, baked the pieces on day two, then decorated the houses on the third day.
Display your gingerbread house, uncovered, at room temperature for as long as you’d like. Do not put it in the refrigerator!
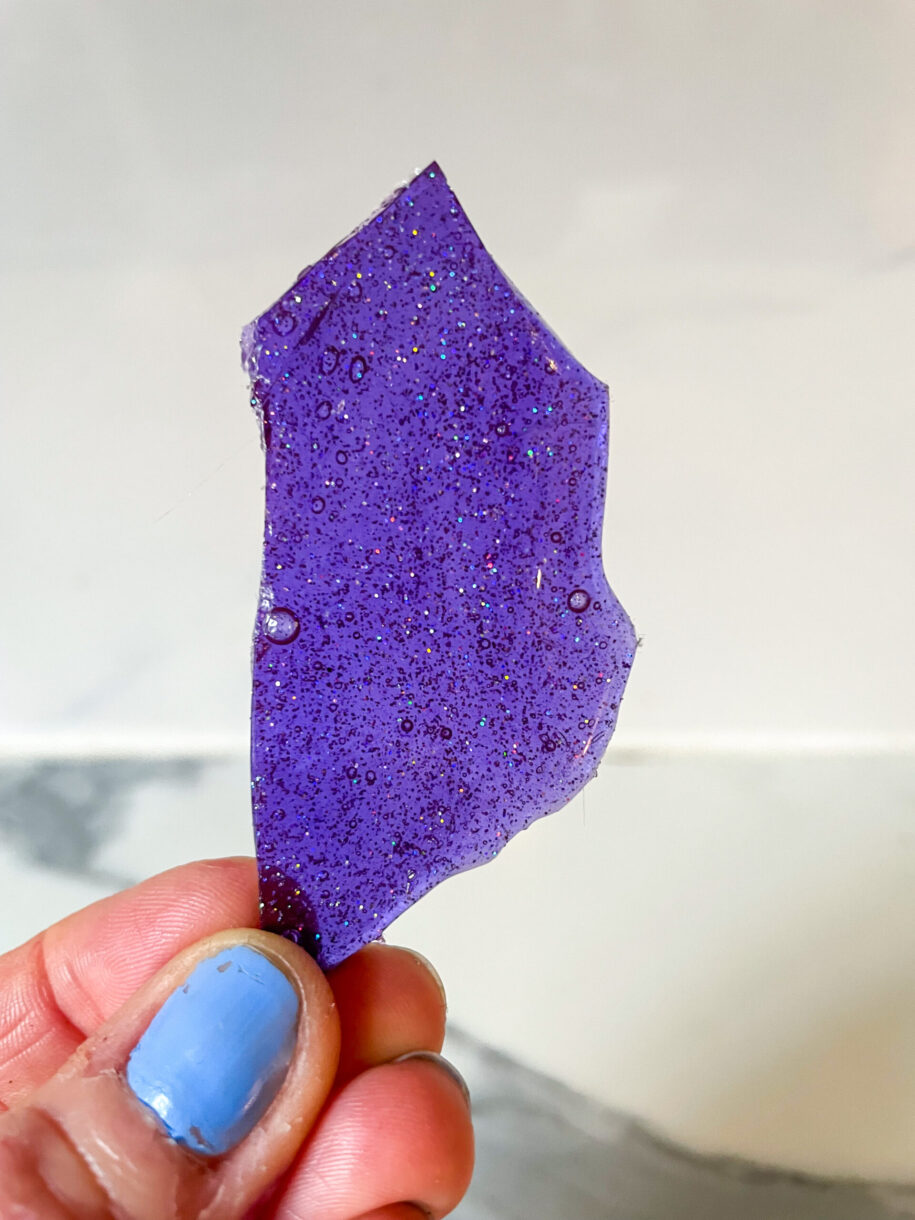
Notes on Sugar Windows
The hard candy windows add a fun element to this gingerbread house. They aren’t difficult to make, and require just a few ingredients (sugar, corn syrup, water, and food coloring). I also added edible glitter to my windows for a fun shimmer effect.
The recipe below will fill six approximately 1-inch gingerbread house windows, with a little bit left over for extra decorations. If you’ve created a lot of cutouts in your house, you might want to double the recipe.
Molten sugar is very hot. While kids can definitely help with decorating, the sugar step should be reserved for adults only.
If, when pouring, you drip some sugar on the house, wait until it cools completely. Once hardened, it should be easy to scrape or crack off without damaging the gingerbread.
Have a toothpick/cocktail stick handy to guide your sugar syrup into all corners of your cutouts. (This is especially necessary if using a star or triangle shape!)
The hot sugar will harden very quickly, so pour immediately!
If you’re short on time or don’t want to mess with hot sugar, you can skip this step and use fondant or royal icing to add “windows” to your gingerbread house instead.
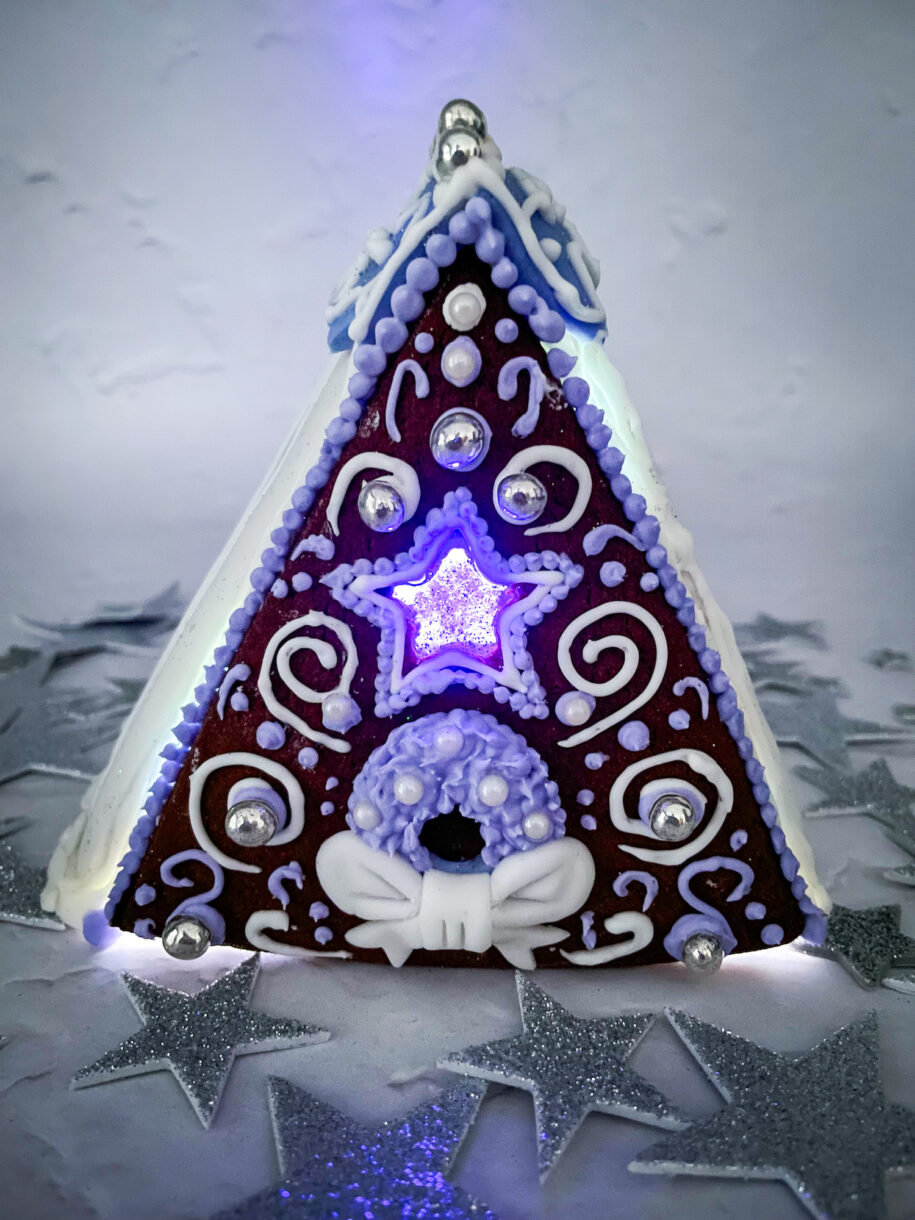
Making a Light-up Gingerbread House
The fun thing about adding sugar windows is that you can turn your gingerbread house into a light-up gingerbread house! To do so, I suggest using small LED tea lights, or any other small LED light (I found small touch lights similar to these for £1 in a local shop). A tiny flashlight might also work.
Do not under any circumstances use a real candle. Not only will this create a fire hazard, but the heat will melt the fondant and the royal icing. Stick to LED lights instead!
More gingerbread recipes you might enjoy:
Gingerbread Cookie Recipe
Gingerbread Hot Chocolate Recipe
Gingerbread Christmas Simmer Pot Recipe
Gingerbread Wreath
Gingerbread Dip
And if you do make these, or if you make any of my recipes, don’t forget to tag me @bastecutfold or use the hashtag #bastecutfold on Instagram. I always love to see what you’re making!
Print
How to Make a Gingerbread House
- Total Time8 hours (including chilling time)
- Yield3 5-inch tall gingerbread houses 1x
Step-by-step instructions for learning how to make a gingerbread house and decorate it with fondant and royal icing piping. Plus a light-up option, too!
Ingredients
Gingerbread Dough:
113 grams unsalted butter, softened (1/2 cup / 1 stick)
150 grams dark brown sugar (3/4 cup, packed)
100 grams black treacle (1/3 cup) or substitute molasses
1 egg
2 teaspoon whole milk
320 grams all-purpose flour (2 1/2 cups), plus more for dusting countertop
1 tablespoon ground ginger
2 teaspoons ground cinnamon
1 teaspoon baking soda
1/4 teaspoon ground cloves
1/4 teaspoon ground nutmeg
1/4 teaspoon kosher salt
Sugar Windows (optional):
50 grams granulated sugar (1/4 cup)
50 grams corn syrup or substitute liquid glucose
15 milliliters water (1 tablespoon)
Gel food coloring
Edible glitter
Royal Icing:
200 grams confectioner’s sugar (1 1/2 cups)
1 egg white, at room temperature
1-2 tablespoons lemon juice, to adjust consistency
Gel food coloring
To Decorate:
200 grams fondant (2 tennis ball-sized pieces)
Silver cake decorating balls
White sugar pearls
Edible glitter
Gel food coloring
Instructions
Gingerbread Dough:
In a large mixing bowl or the bowl of a stand mixer, cream butter and brown sugar until light and fluffy.
Beat in the black treacle (or molasses), followed by the egg and milk.
In a separate bowl, whisk flour, ginger, cinnamon, baking soda, cloves, ntmeg, and kosher salt.
Add dry ingredients to the butter mixture. Mix on medium-high speed until just combined.
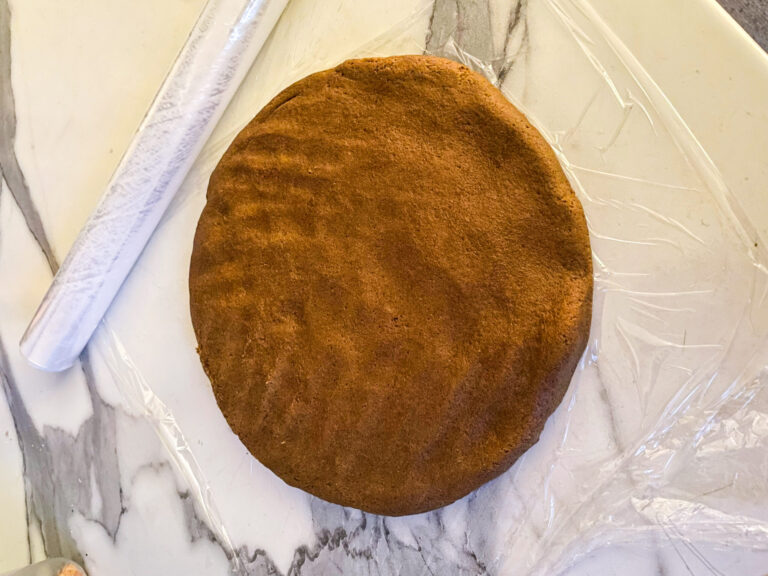
Flatten dough into a large disc. Wrap in clingfilm/plastic wrap and transfer to the refrigerator to chill, at least four hours and up to two days.
Gingerbread House Pattern:
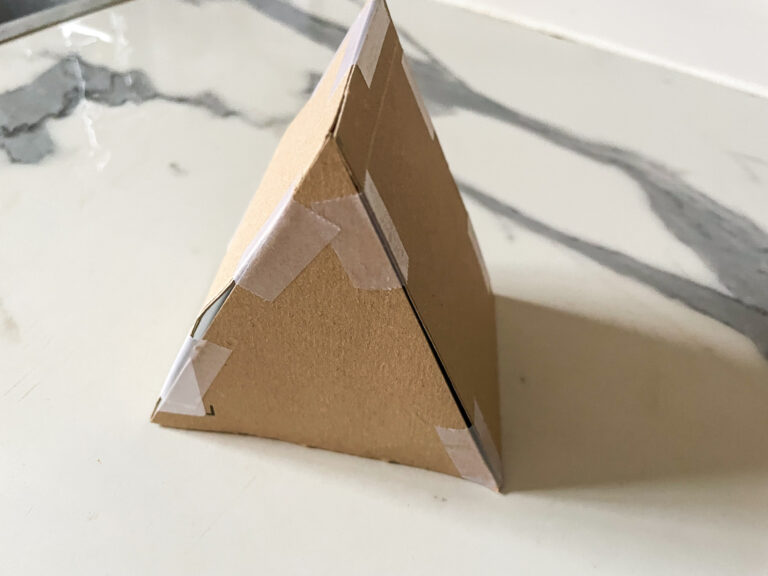
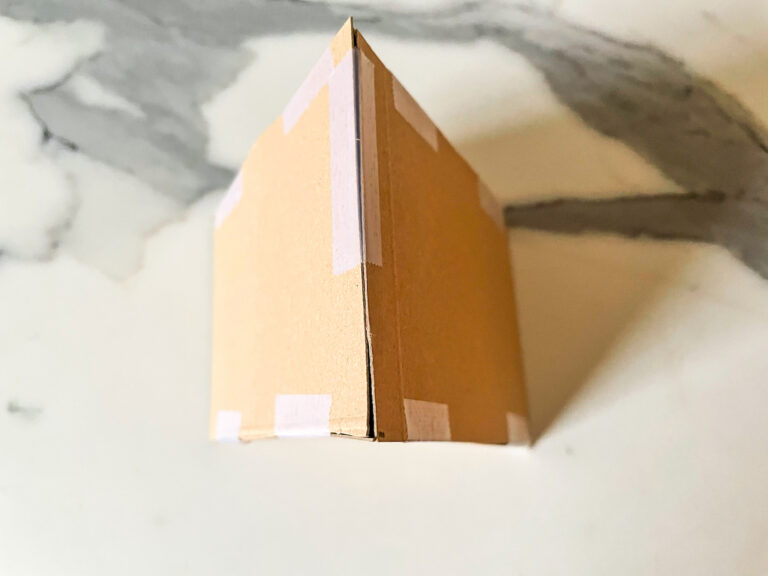
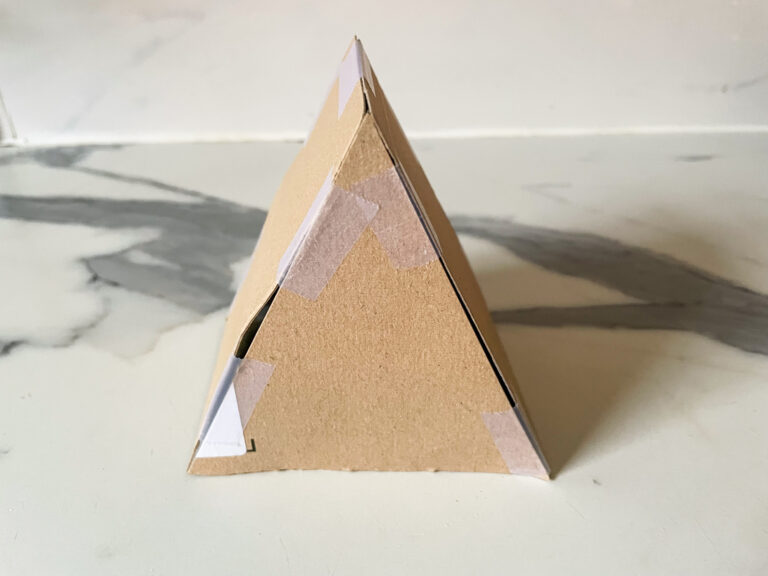
On a piece of paper or baking parchment, draw two pattern pieces: A 3-inch x 4 1/2-inch rectangle, and a 4-inch x 4 1/2-inch x 4 1/2-inch triangle.
Trace two of the rectangle pieces and two of the triangles onto a piece of cardboard. Cut out, then use tape to secure the pieces together, forming a gingerbread house shape. (Don’t worry if it’s not pretty. The purpose of the cardboard house is to serve as a guide/support during assembly, and to double-check that your pieces fit together. Nobody will see the cardboard!)
Cutting and Baking:
Line baking trays with silicone mats. (I used six small trays, but one or two large trays will work, too. Just make sure the trays will fit in your refrigerator.)
Unwrap the chilled dough and cut into quarters.

Dust countertop or a silicone rolling mat with flour. Place one quarter on the floured surface, and return the rest of the dough to the refrigerator.
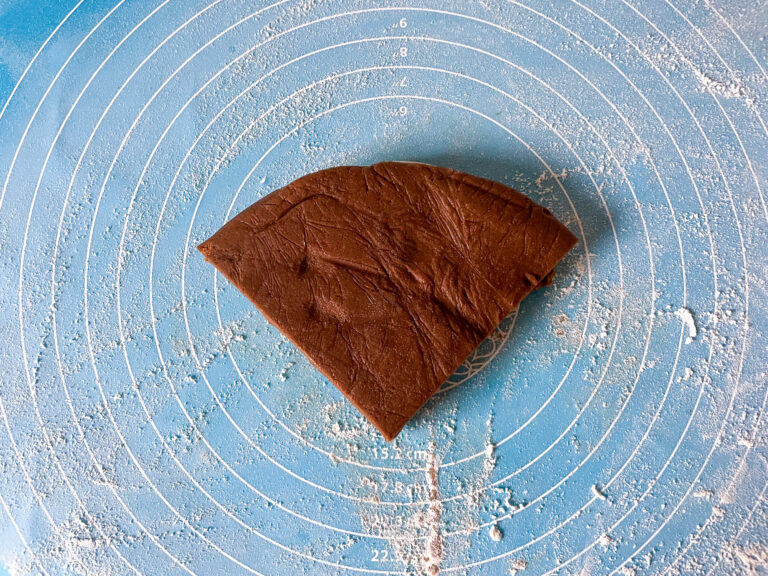
Roll the dough to approximately 1/4-inch thickness. When rolled, it should be large enough to accommodate the paper rectangle and triangle pattern pieces.
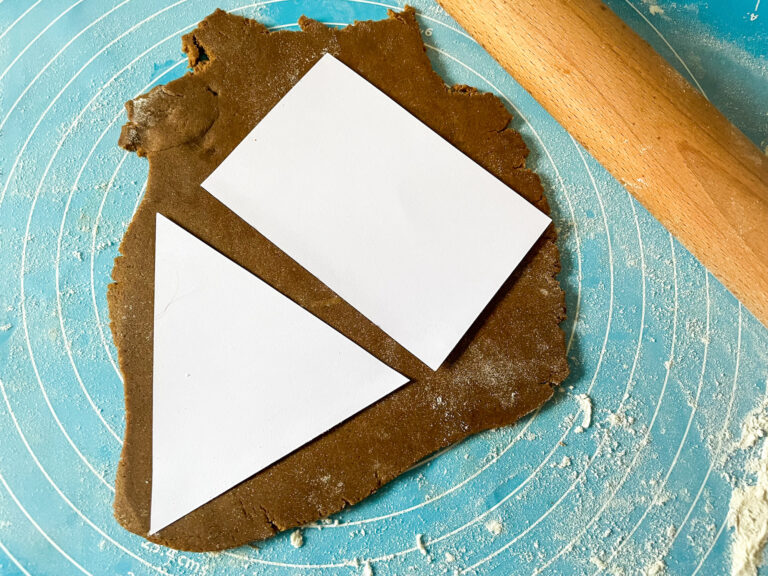
With a sharp knife, cut one of each shape.
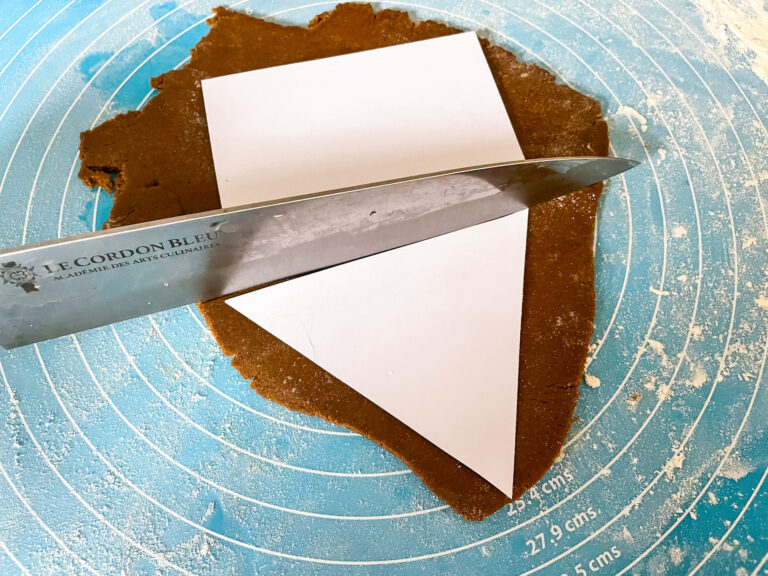
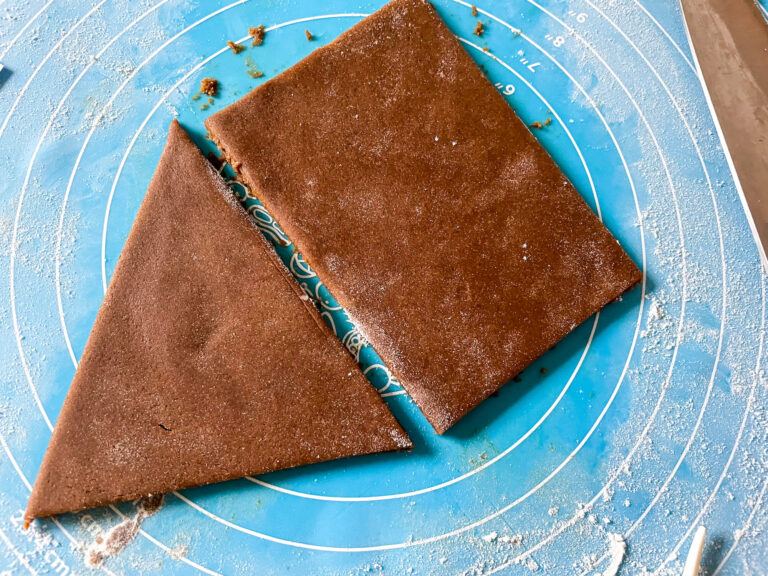
Repeat with the remaining dough quarters, then re-roll the gingerbread dough scraps. When finished, you should have six of each shape.
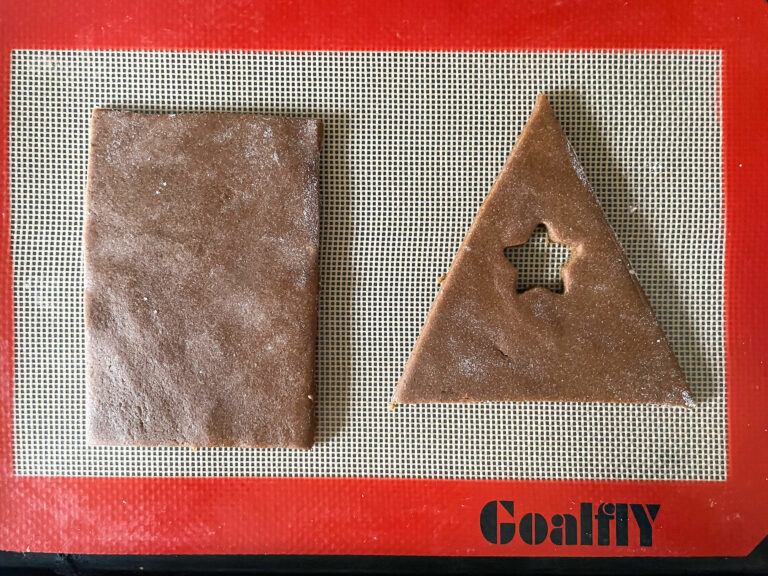
Transfer pieces to prepared trays.

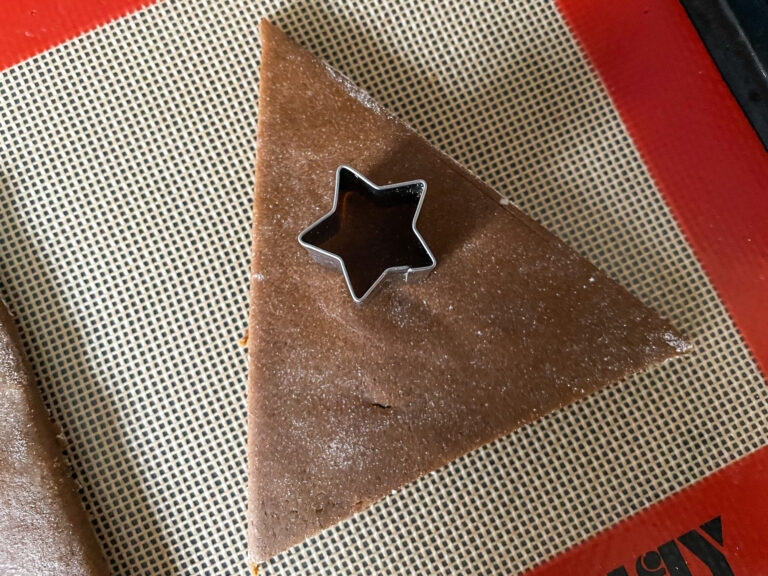
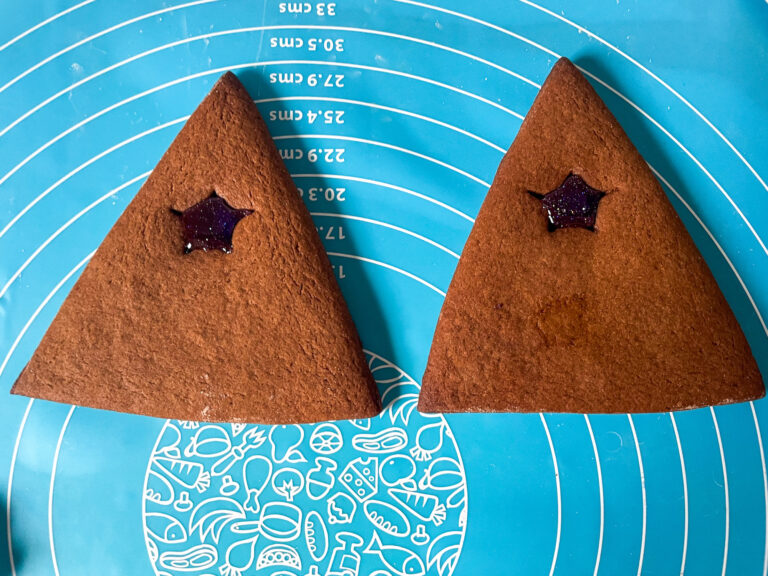
If desired, use a small metal cutter (I chose a star) to create cutout shapes on the triangular pieces. You can skip this step if you prefer a window-less gingerbread house.
Transfer trays to the refrigerator and chill for 30 minutes. While dough chills, preheat oven to 350° F / 176° C.
Bake in preheated oven, one tray at a time, for 15 minutes per tray or until pieces are just beginning to darken around the edges.
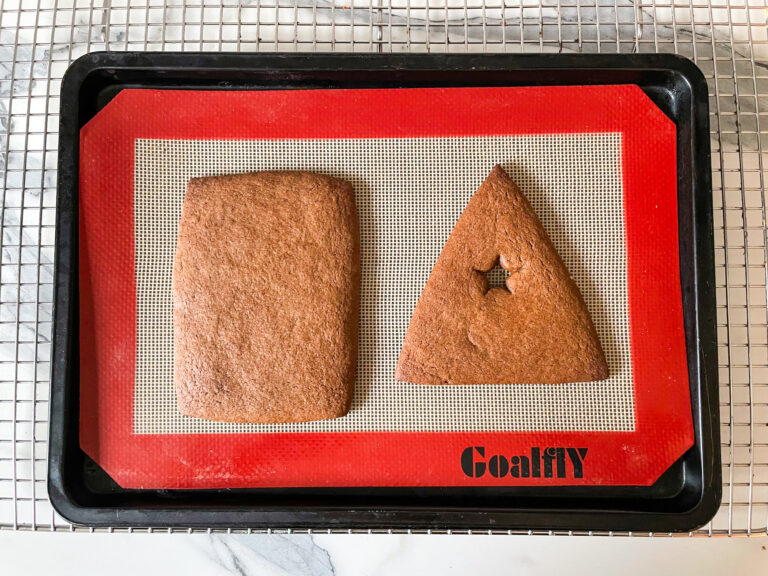
Cool gingerbread on tray for ten minutes, then transfer pieces to a wire rack to cool completely.
Sugar Windows (optional):
Place baked triangular gingerbread pieces on trays lined with silicone mats.
In a small saucepan, stir together sugar, corn syrup, and water.
Bring mixture to a boil over medium-high heat. Cook until the syrup reaches 300° F / 149° C on a digital candy thermometer.
Remove from heat. Stir in food coloring and edible glitter.
Immediately pour hot syrup into cut-out window shapes.
Allow to cool completely. Sugar will harden as it cools.
Royal Icing:
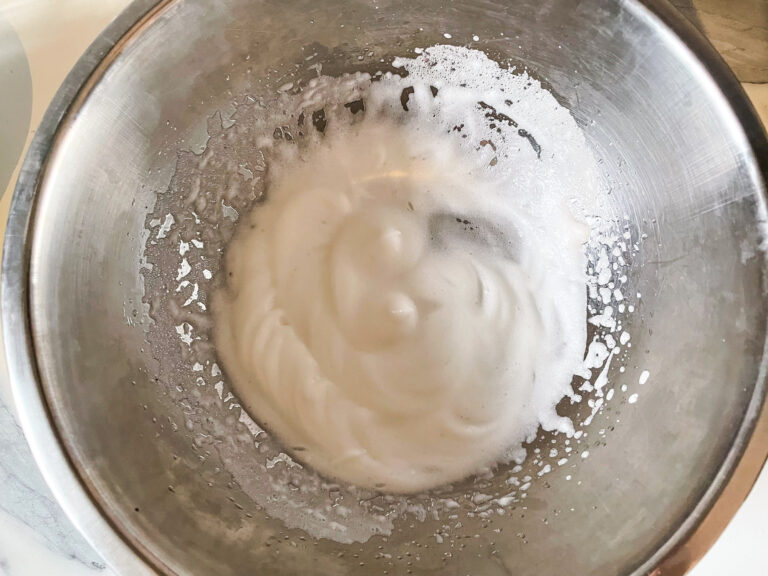
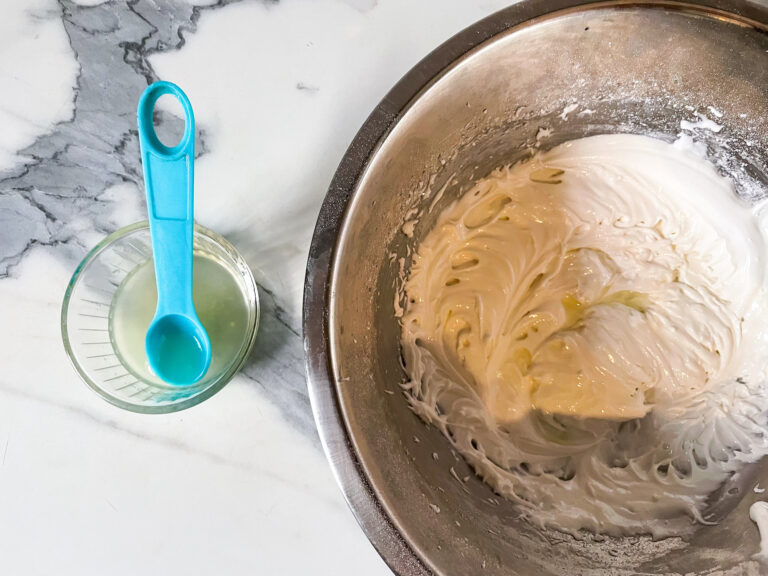
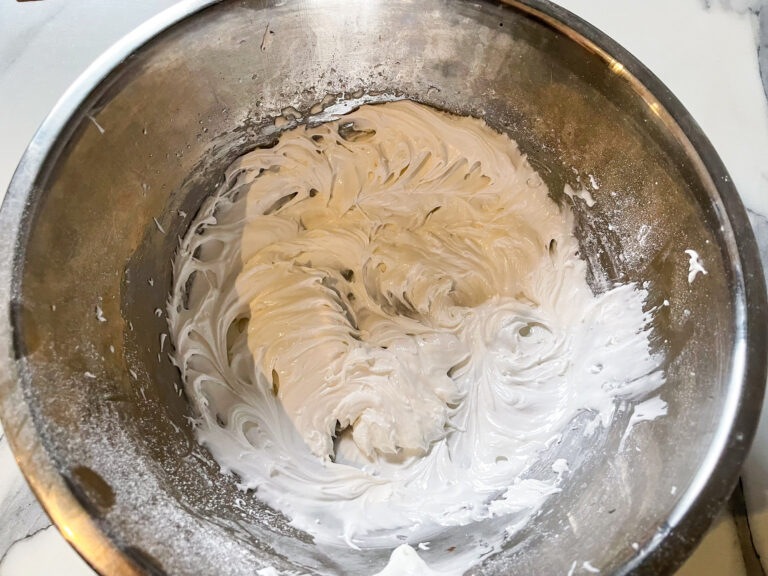
In a large mixing bowl or the bowl of a stand mixer, whip egg white to soft peaks.
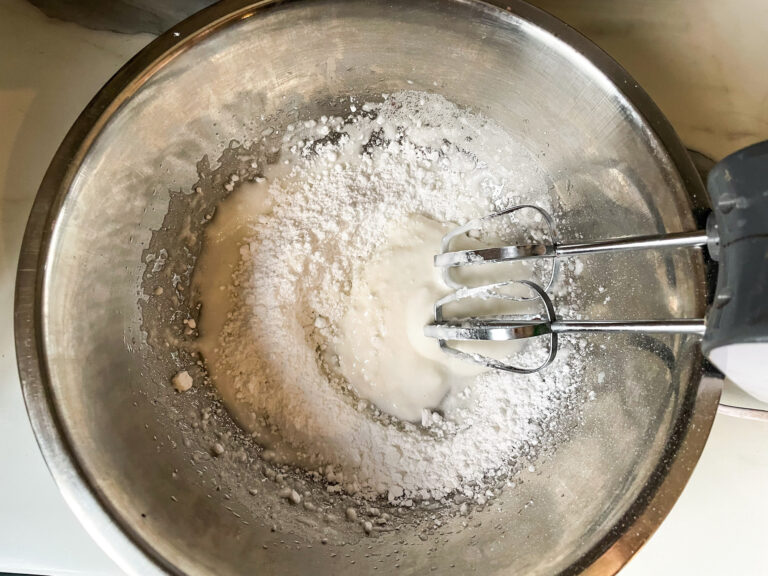
Add confectioner’s sugar, 1/2 cup at a time, and mix on high speed until all sugar has been incorporated and meringue is thick and glossy, with stiff peaks.
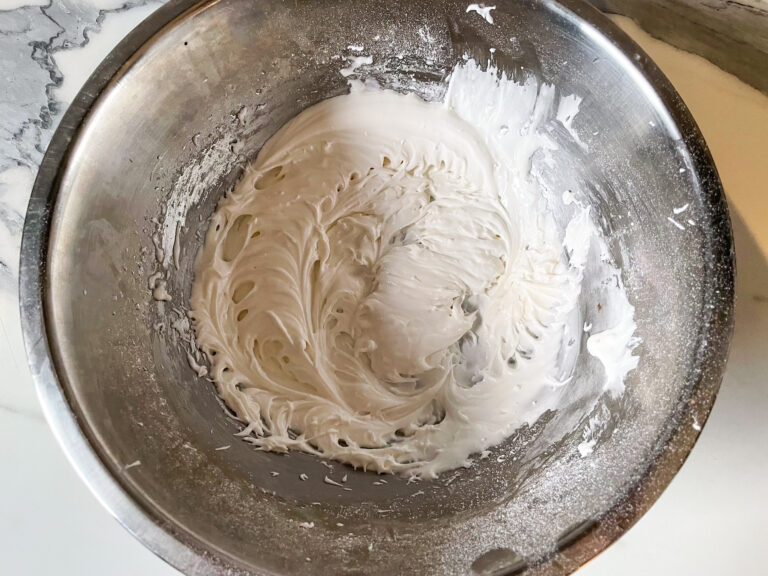
If necessary, add lemon juice (1 teaspoon at a time) to adjust consistency. The royal icing should be pipeable, but not thin or runny.
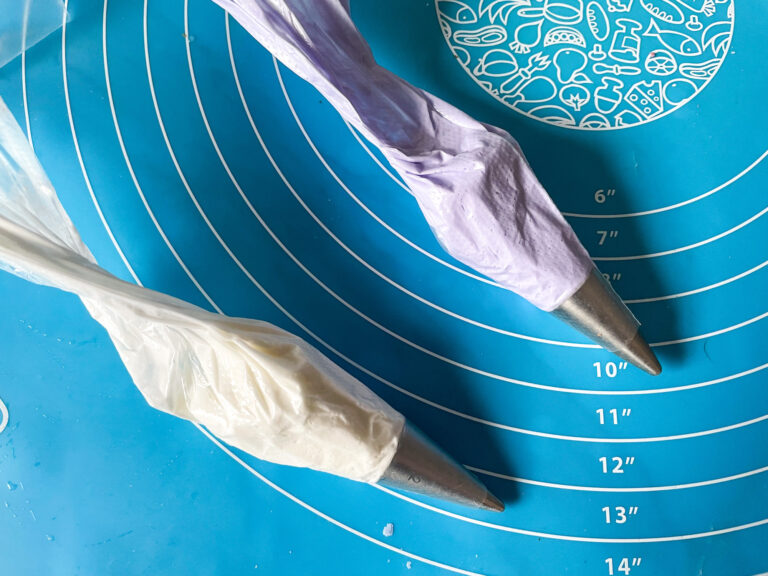
If desired, separate royal icing into bowls and tint with gel coloring. I used white and purple, but you can add more colors if you’d like. You can also use white royal icing only.

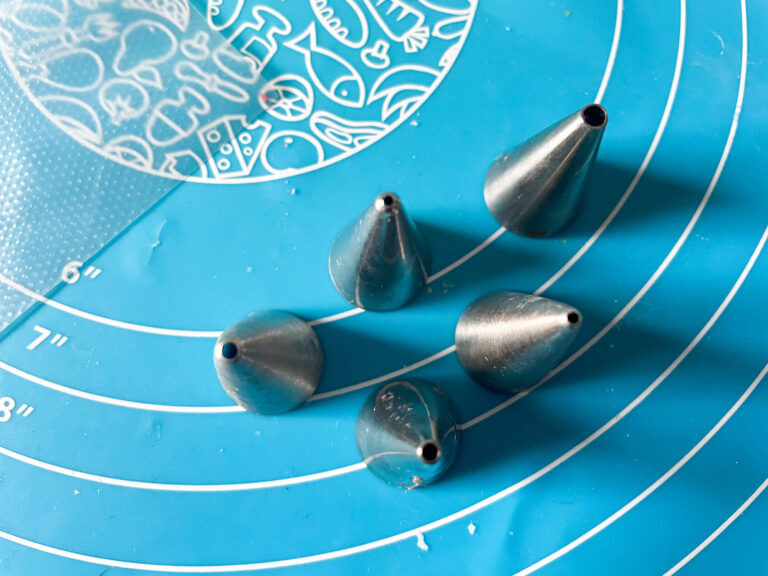
Transfer royal icing to piping bags fitted with very small round tips. You’ll also need one slightly larger (about 1/4-inch) tip to pipe the royal icing when joining the house pieces.
If reserving some of the royal icing for later, cover it with a wet j-cloth or tea towel. This will prevent the royal icing from solidifying in the bowl.

Decoration:
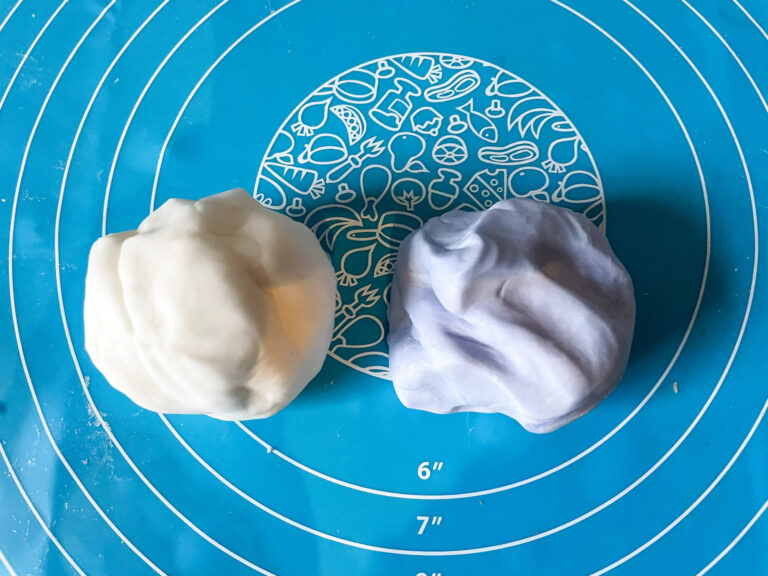
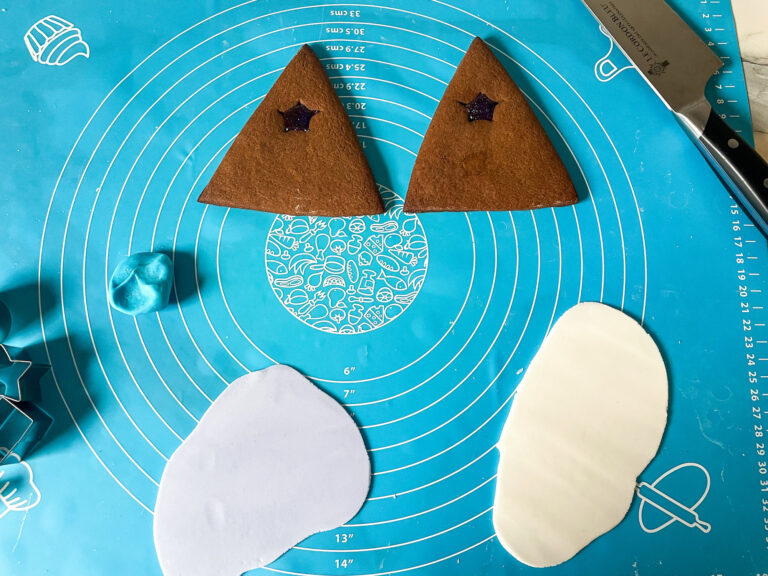
With gel food coloring, tint fondant into desired colors. (For each gingerbread house, I used two tennis ball-sized balls of fondant (about 100 grams each), one purple and one white.
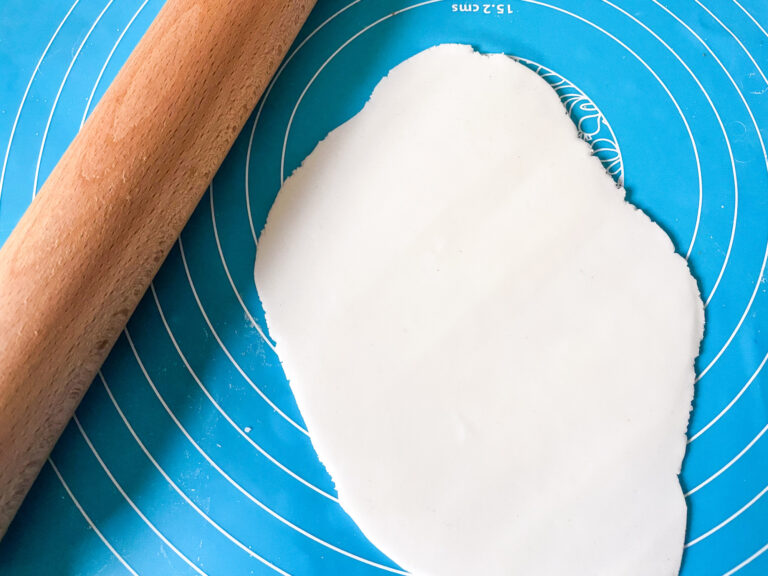
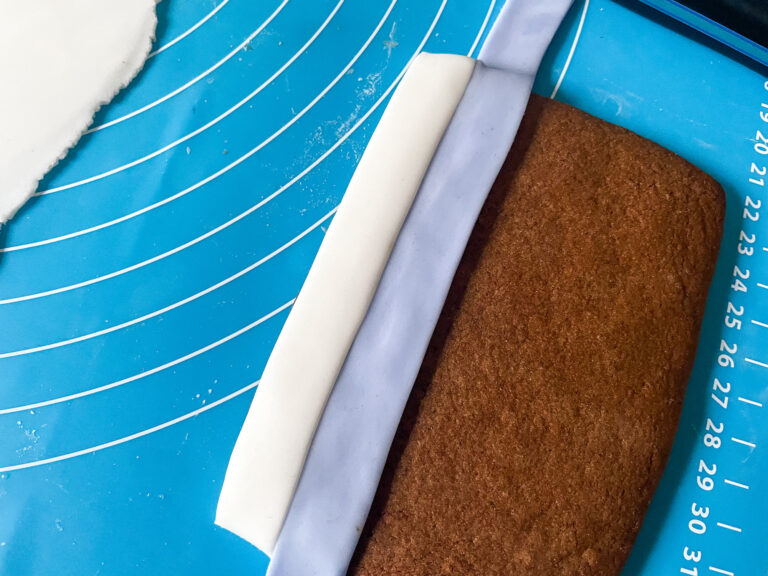
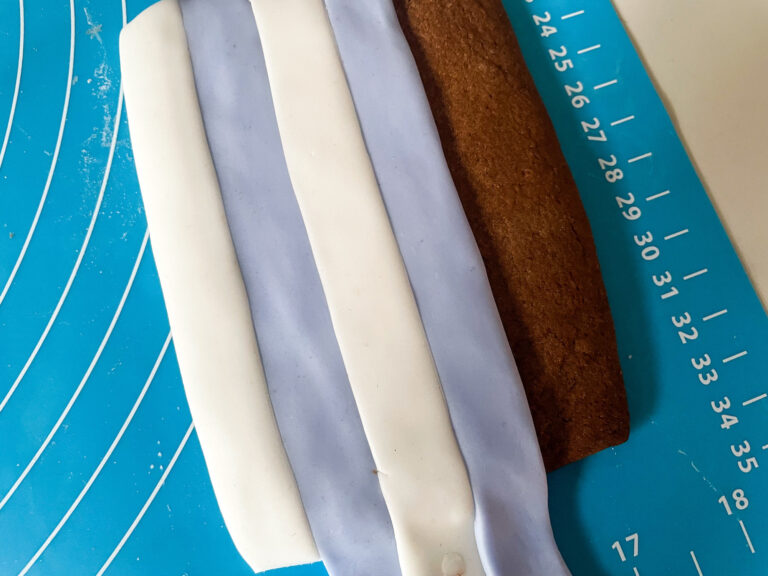
With a rolling pin, roll the fondant to about 1/8-inch thickness.
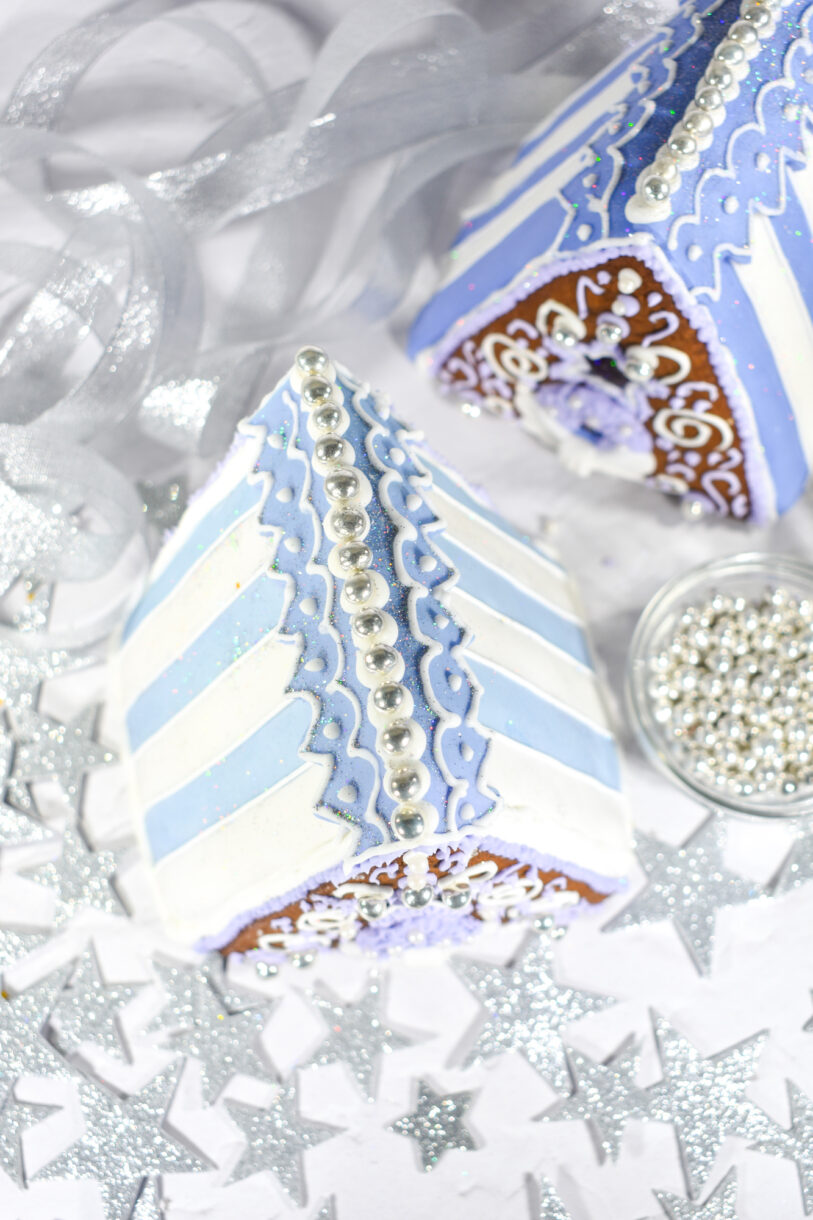
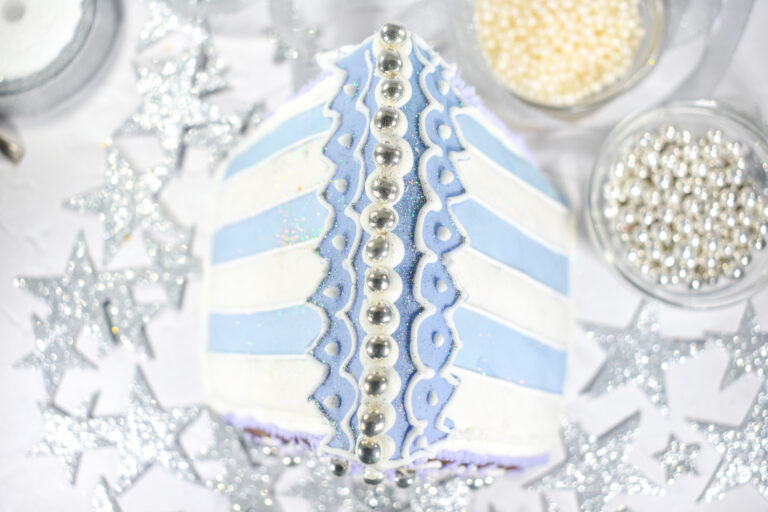
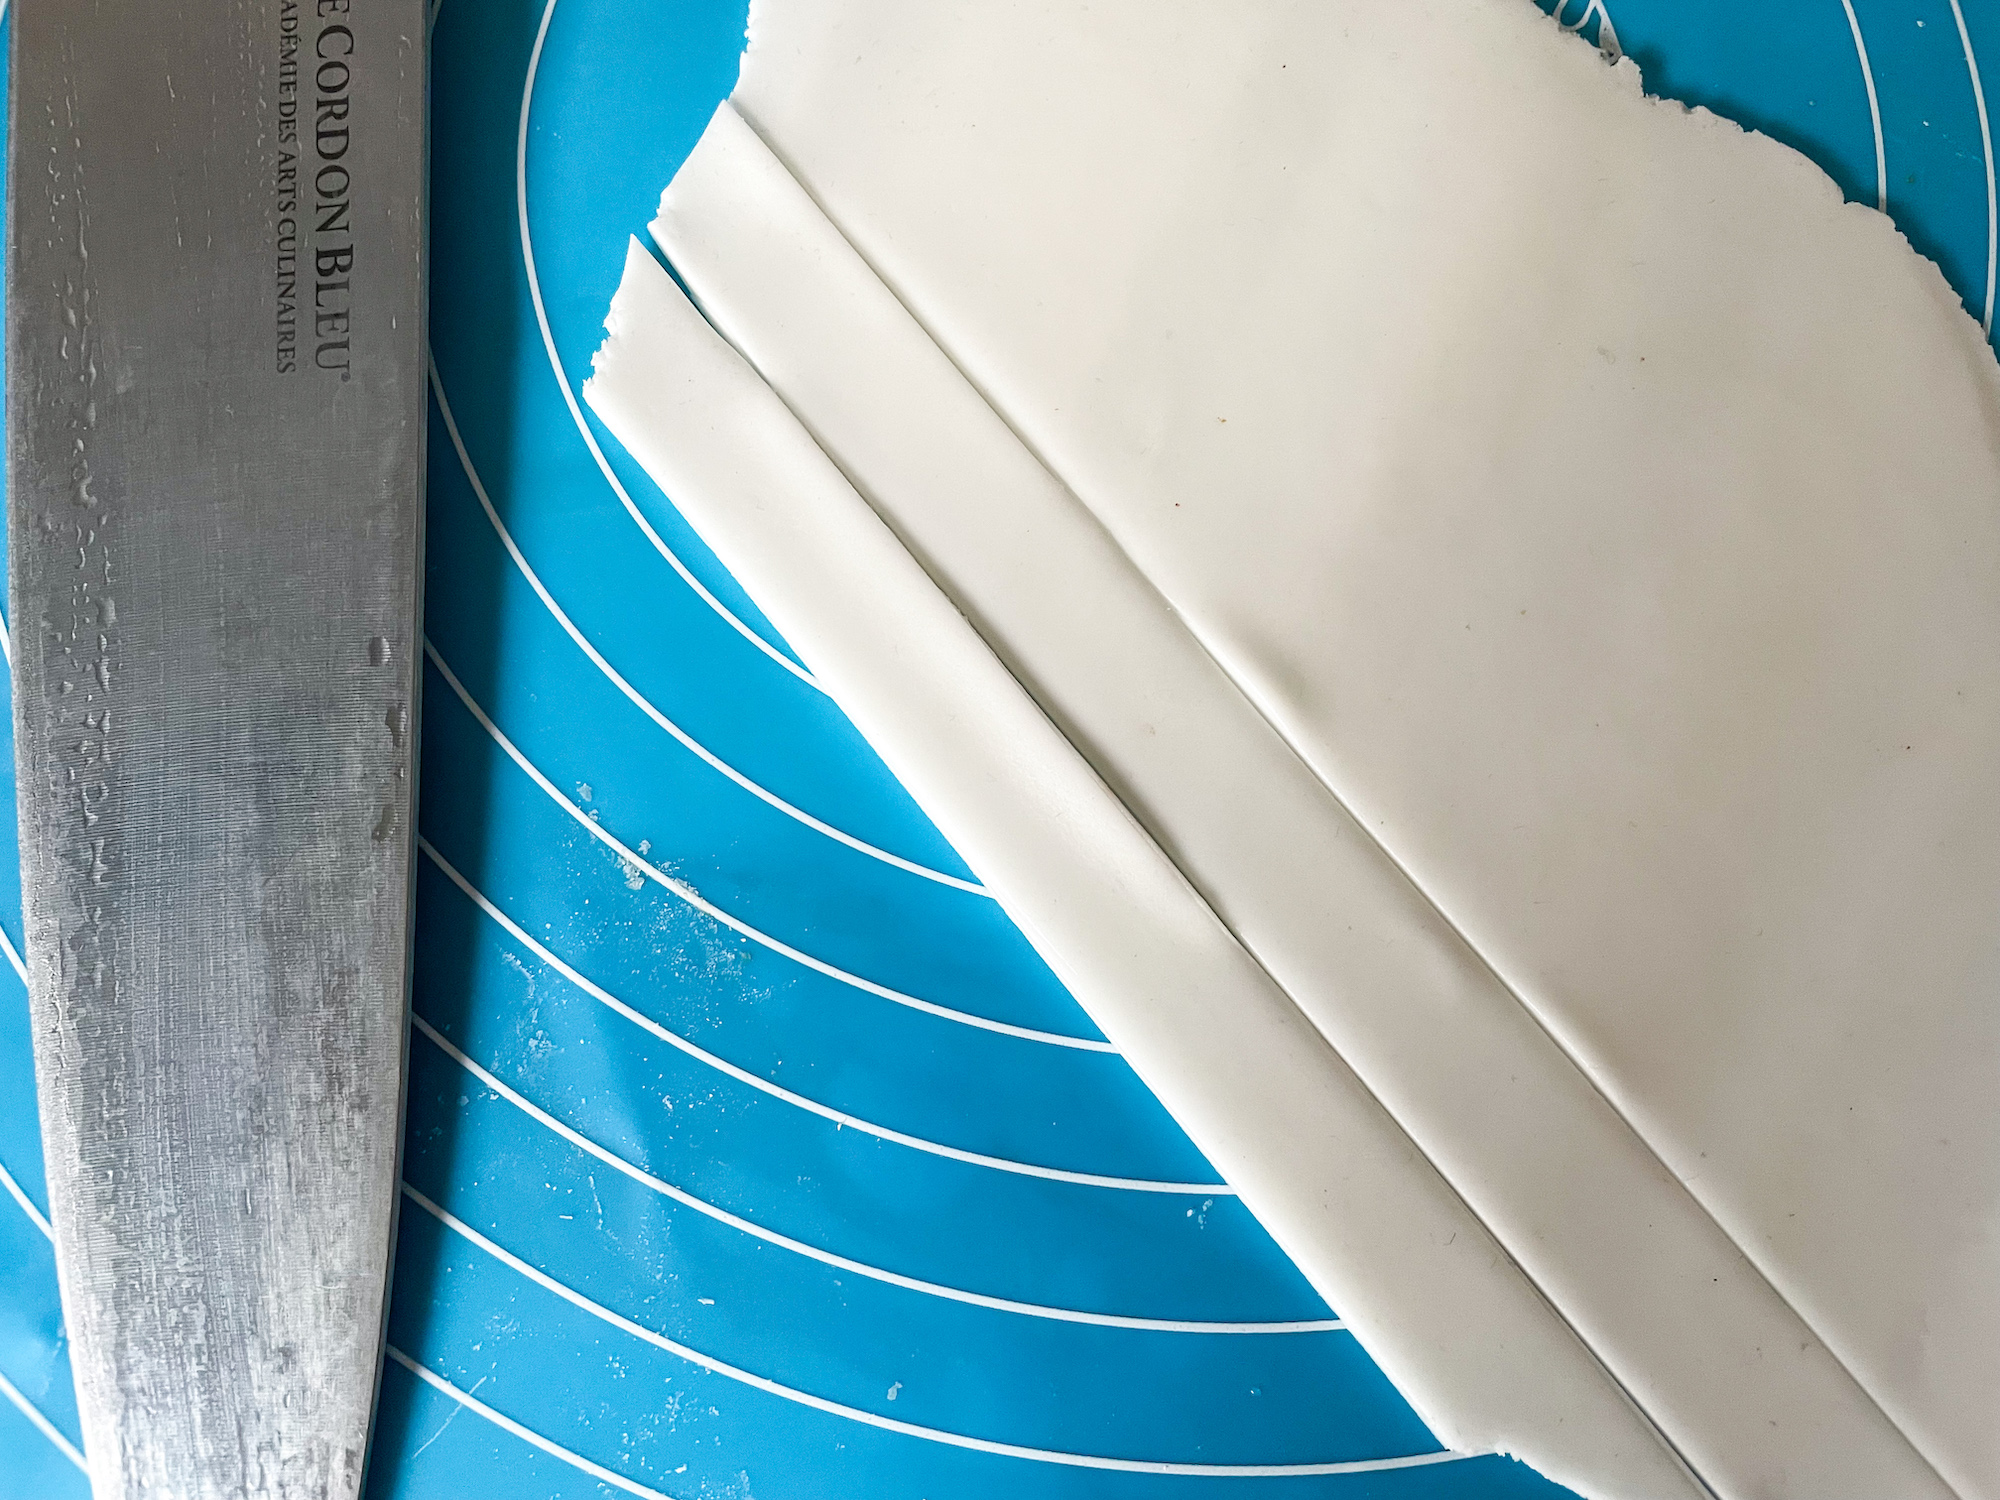
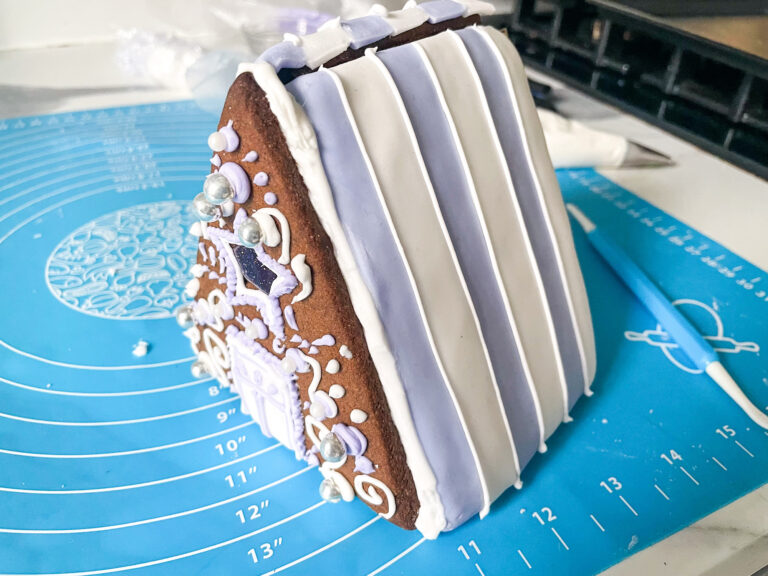
With a sharp knife, cut the fondant into strips, each about 5/8-inch wide and about 5 inches long. (They should be long enough to cover the rectangular gingerbread piece from end-to-end, lengthwise.) I used six strips per roof piece, but you can make them wider or narrower if desired.

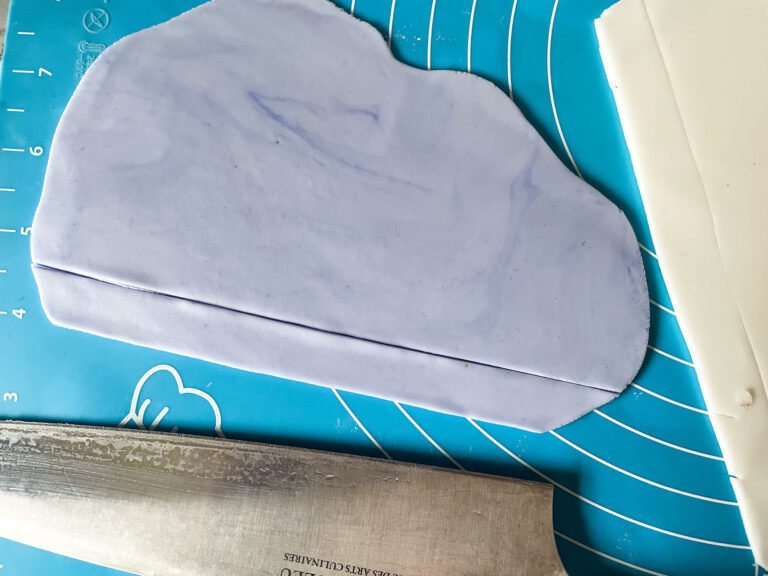
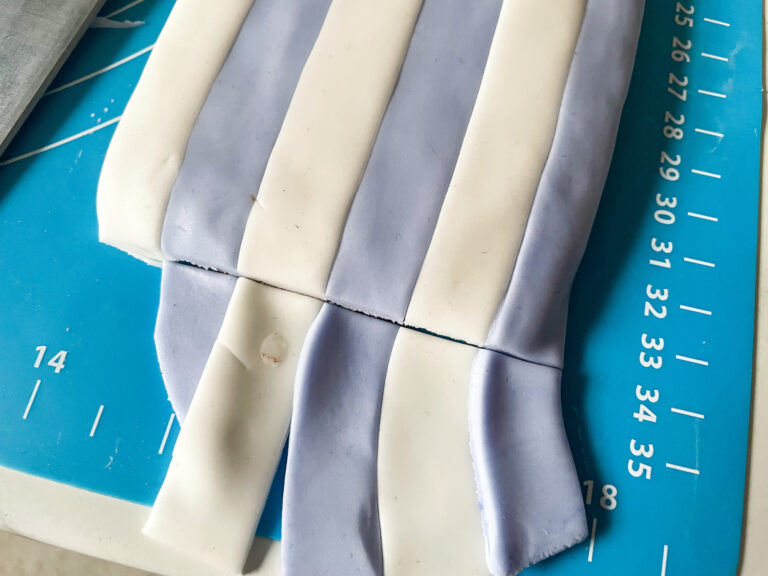
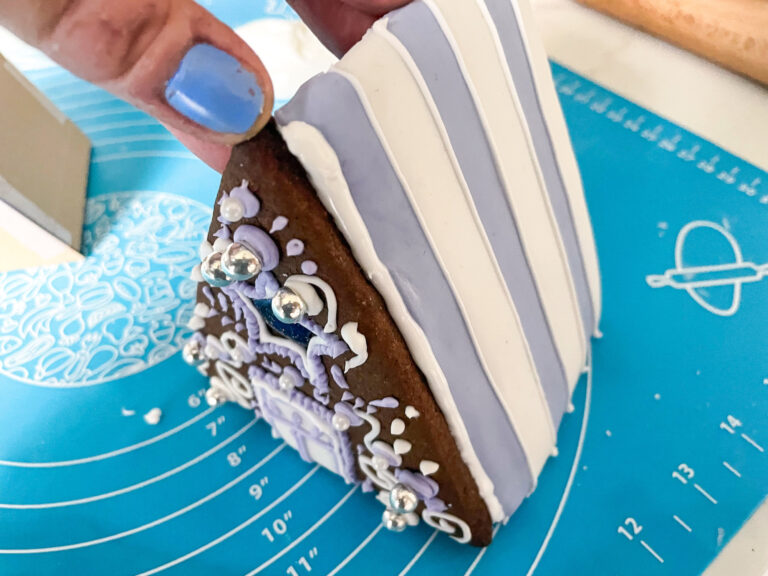
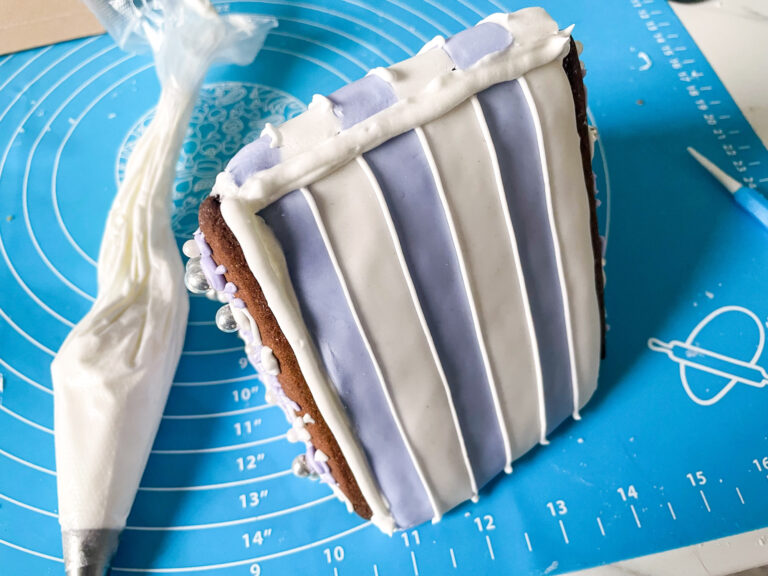
Apply the strips lengthwise to the rectangular pieces, forming a striped pattern. Use your fingertips to “pat down” the fondant to help it adhere to the gingerbread.
With a knife, trim away excess fondant from the edges
Pipe thin lines of royal icing to hide the seams.
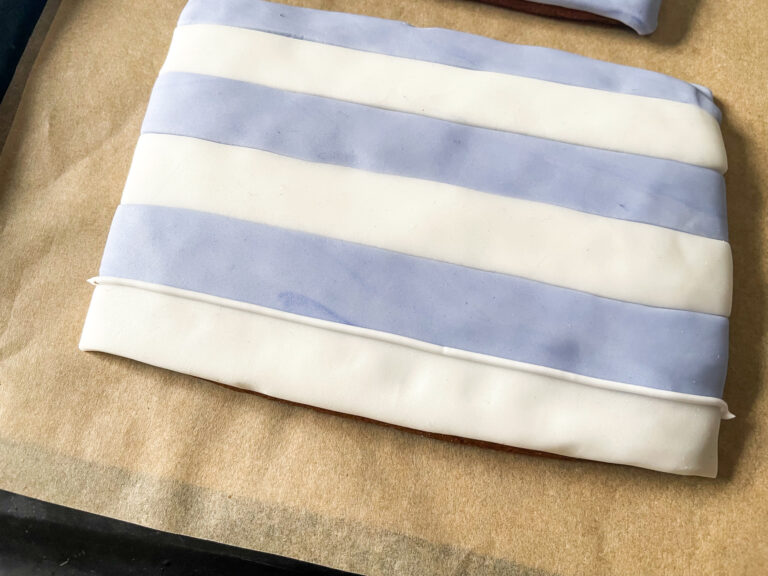
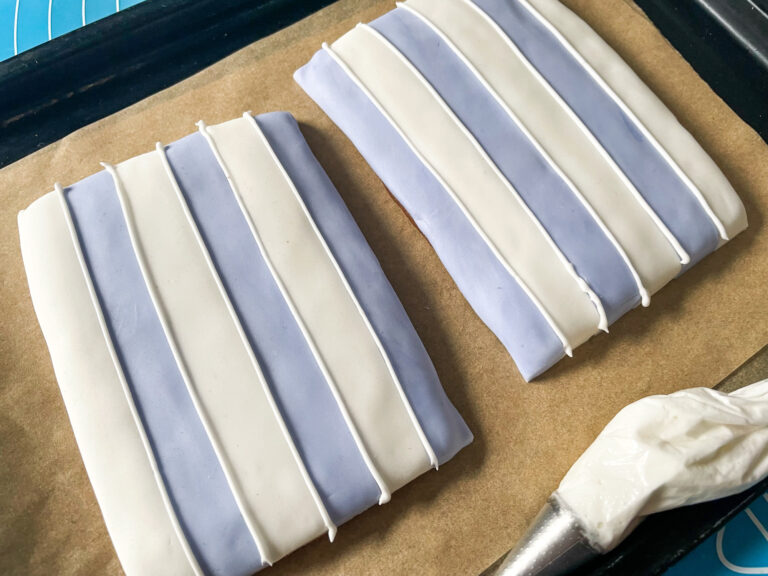
Set roof pieces aside to dry while you decorate the front and back of the house.
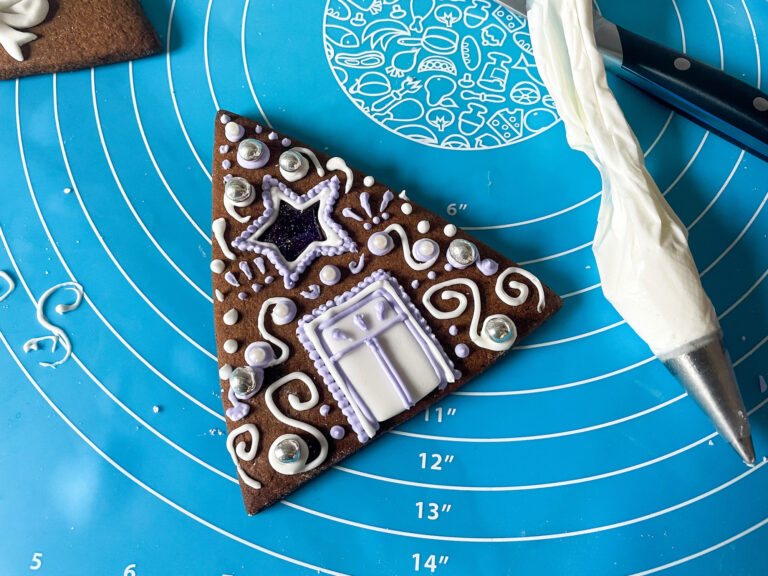
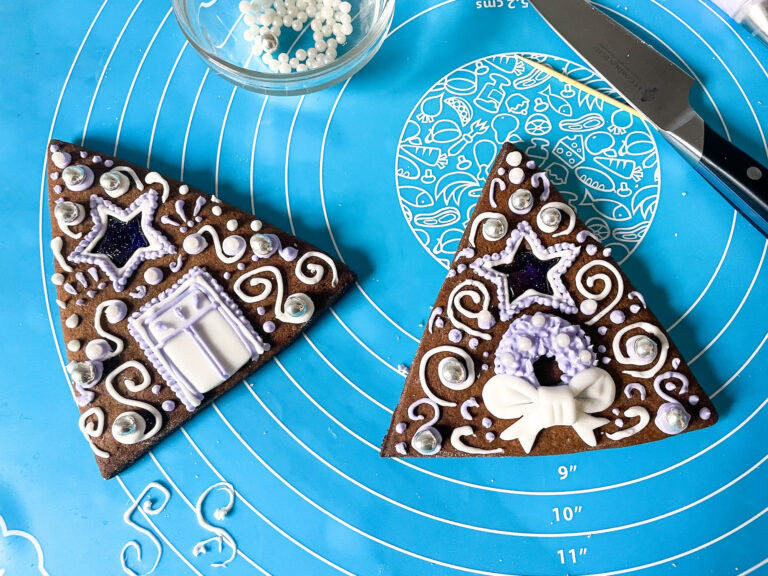
Roll additional 1/8-thick pieces of fondant. With small metal cutters, cut desired decorations. (I created a wreath, bow, and door, but you can make whatever you’d like! Windows, stars, hearts, candy canes—feel free to be creative here.)
Place the fondant shapes on the triangle pieces as desired. Use your fingertips to “pat down” the fondant to adhere it to the gingerbread, then pipe royal icing as desired.
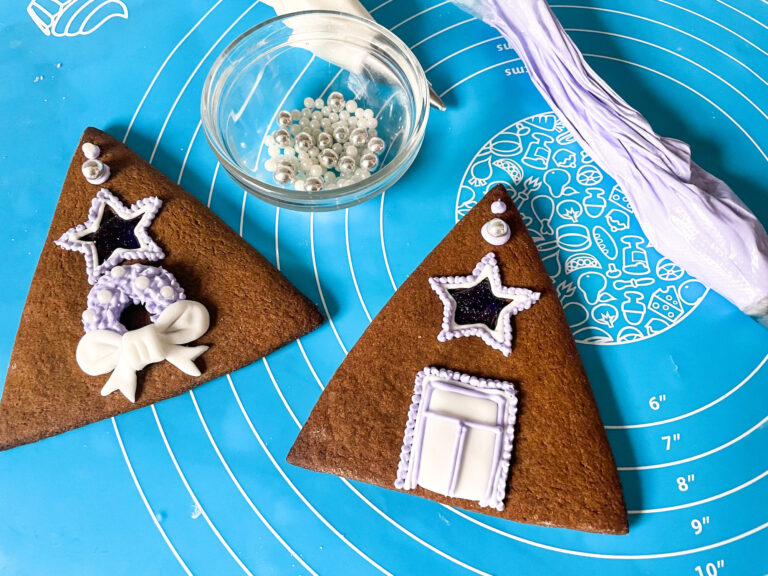
Pipe royal icing on triangular pieces, using any shapes or patterns you’d like. You can also add sprinkles, silver balls, sugar pearls, glitter, lustre dust, foil stars, or other edible decorations.
Allow royal icing to dry before proceeding to assembly. (This will happen quickly, about 10 minutes).
Assembly:
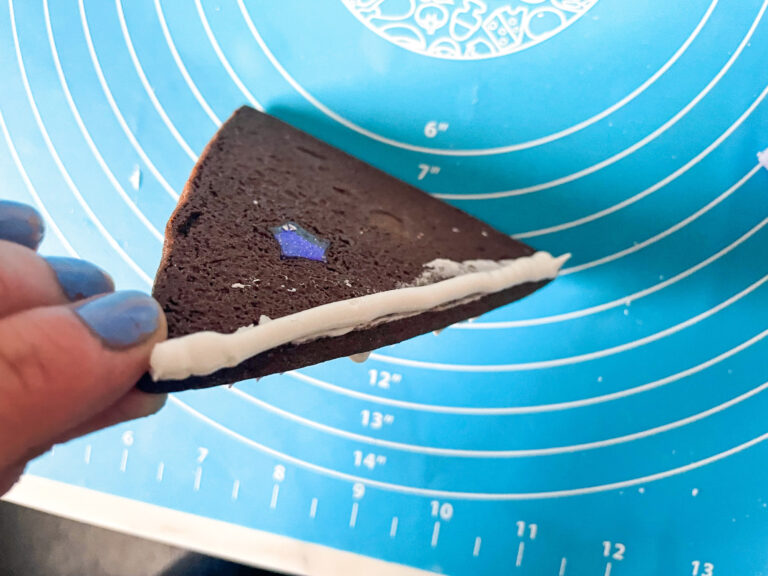
Pipe thick strips of white royal icing on inner edges of one of the triangles. Join it with one of the roof pieces, holding it in place for a few minutes as the icing hardens.
While working, use your cardboard “house” as a guide. I found that the cardboard was also helpful in keeping the pieces upright and in place as I worked.
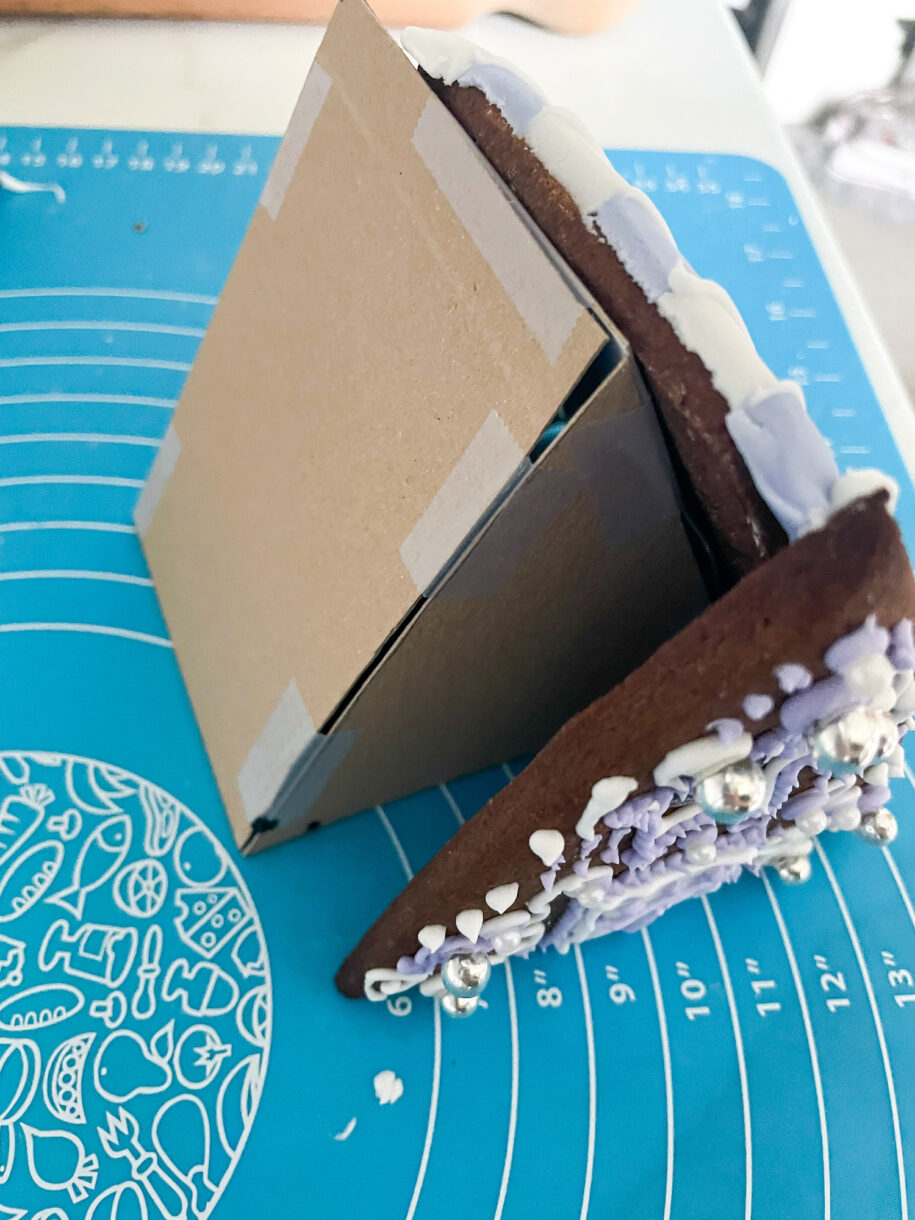
Repeat with remaining pieces, adding more royal icing as needed to hold everything in place.
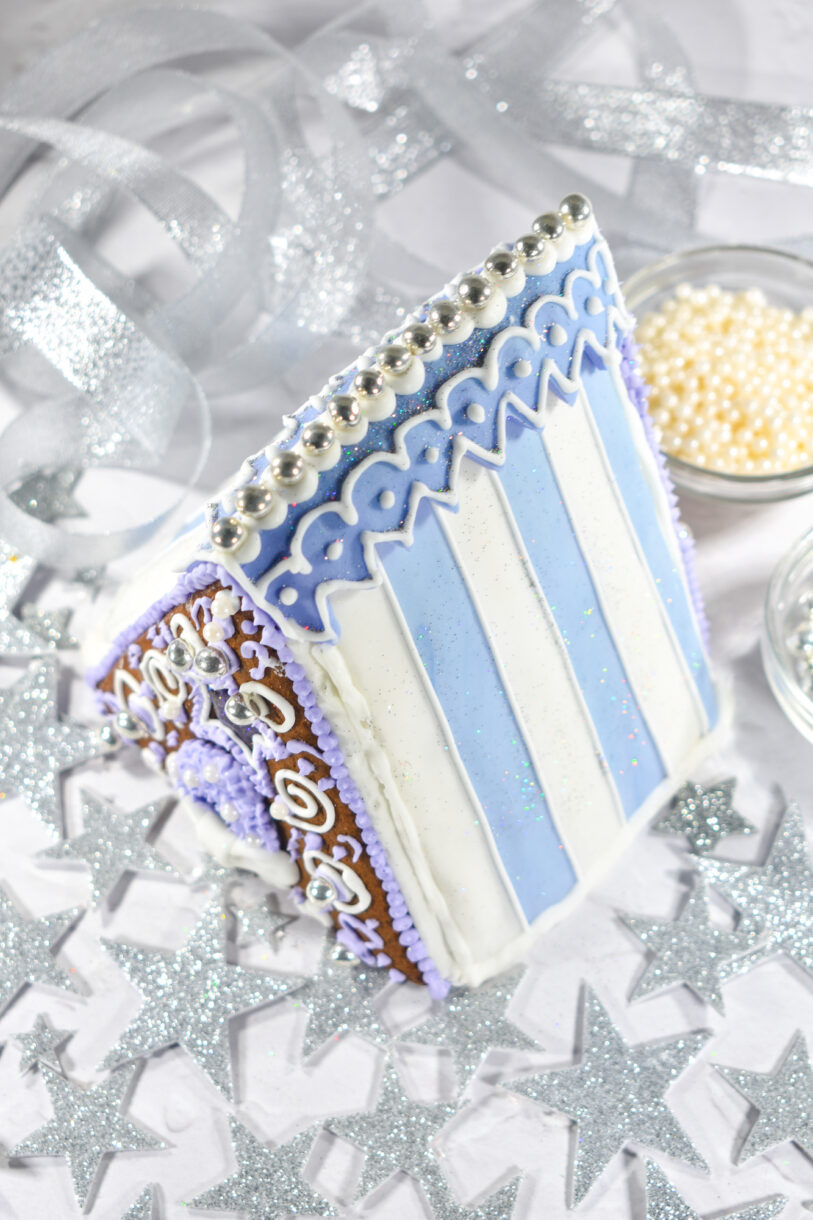
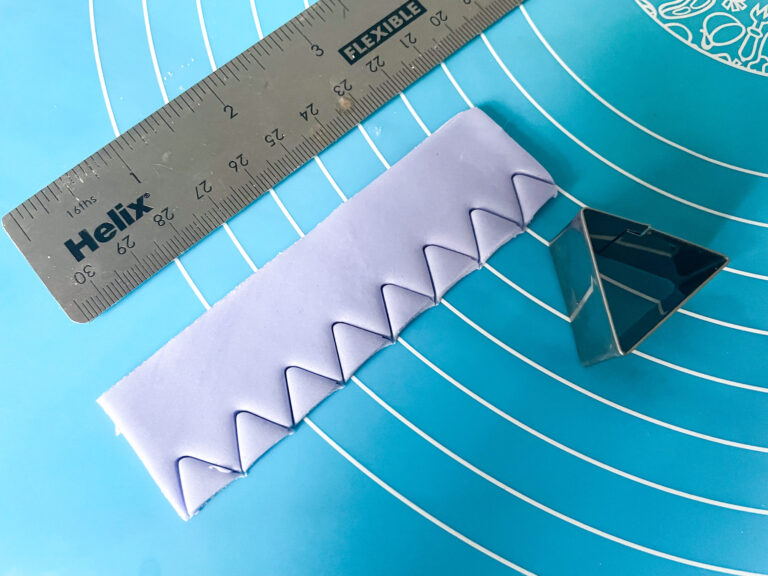
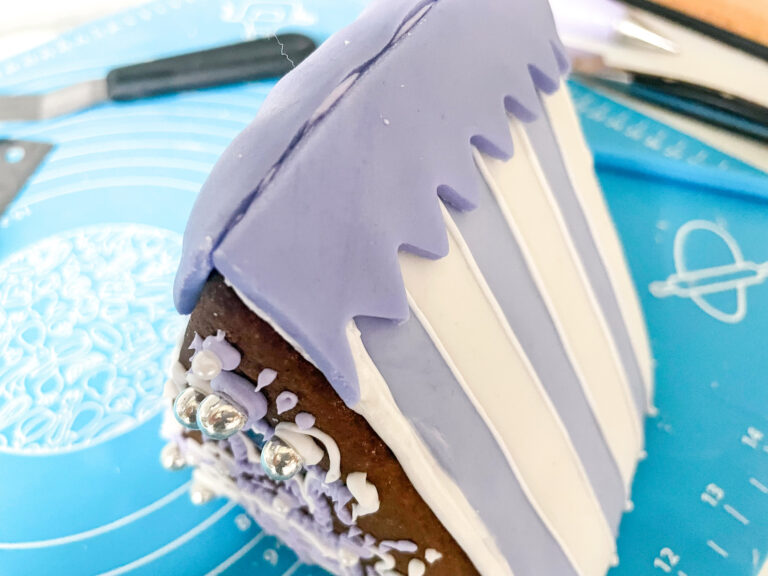
Set house aside to dry. Meanwhile, cut two 1 1/2-inch wide x 4-inch long strips of fondant, then use a triangle or other cutter to create a decorative edge.

Place these fondant pieces on the roof to hide the top seam.
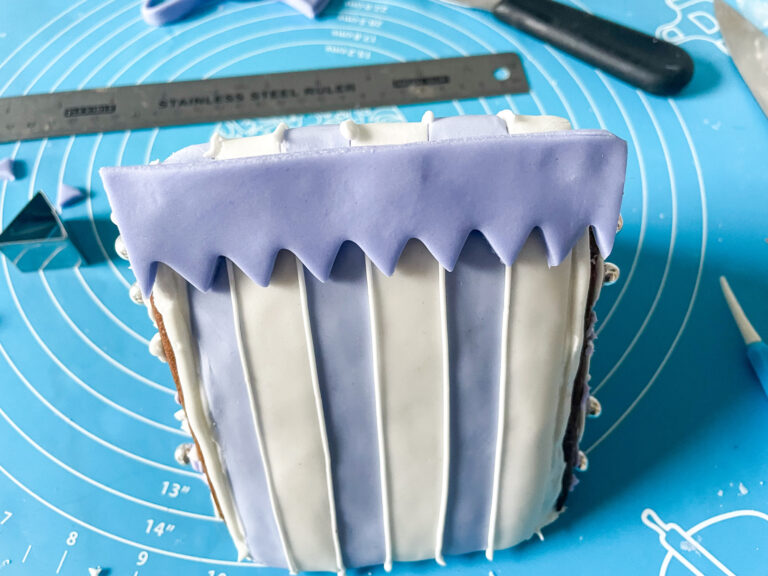
Finish roof with additional royal icing piping or decorations.
You now have a miniature gingerbread house!


- Prep Time: 1 hour, 20 minutes
- Chilling Time: 4 hours (dough) + 30 minutes (cut pieces)
- Cook Time: 15 minutes
- Category: Miscellaneous
- Method: Oven
- Cuisine: Desserts and Sweets