becky
becky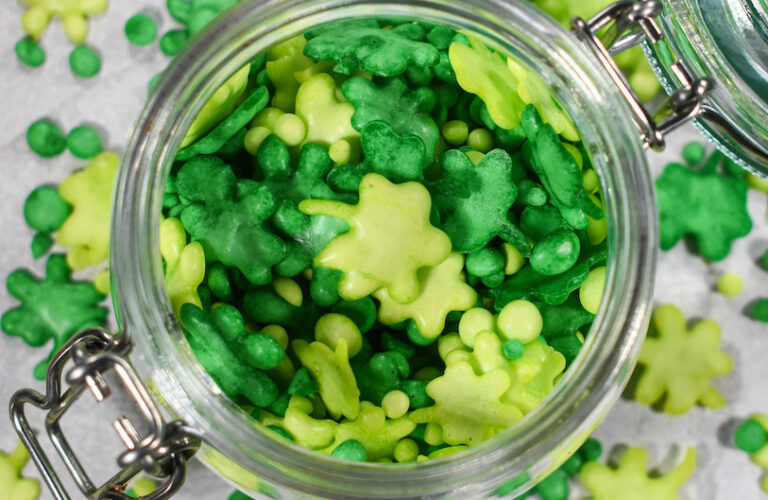
This post may contain affiliate links. Please read the disclosure policy to learn more.
Thank you for supporting this blog!
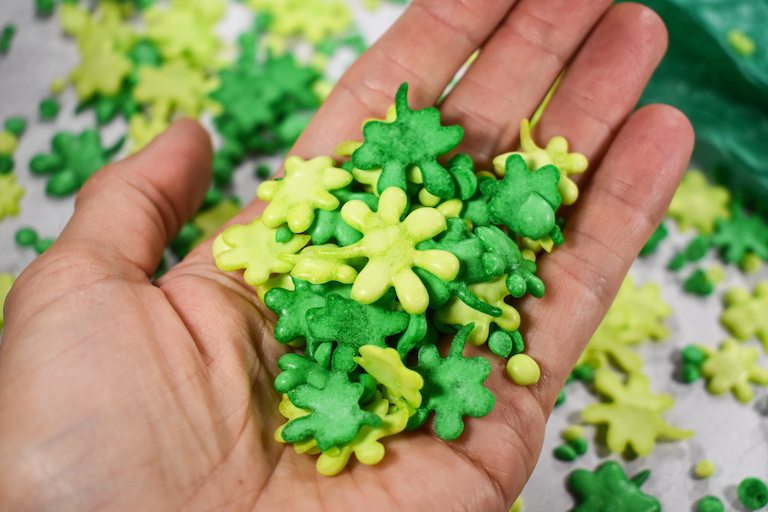
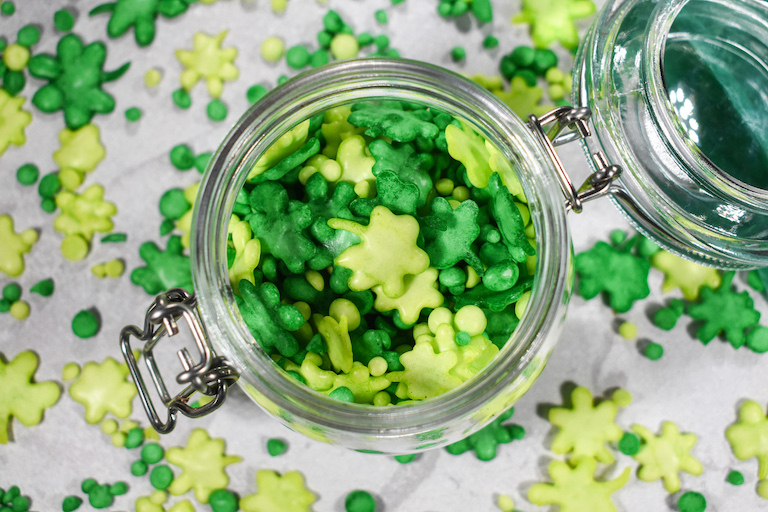
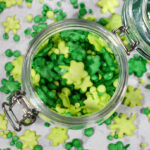
A Saint Patrick’s Day sprinkle recipe! Use these bright green shamrock sprinkles to decorate St. Patrick’s Day cookies, candies, chocolate bark, and homemade shamrock shakes.
Why Make This Saint Patrick’s Day Sprinkle Recipe?
Although you can purchase pre-made Saint Patrick’s Day sprinkles, it’s fun (and surprisingly easy) to make your own. And while hand-piping sprinkles might sound like a lot of work, my version is not difficult to make, and you probably already have most of the ingredients in the kitchen cupboard.
This sprinkle recipe allows you to customize the shapes, sizes, and colors in whatever way you’d like. The finished sprinkles are ideal for decorating Saint Patrick’s Day treats. (Try adding them to leprechaun bark, sprinkling a handful on top of cakes and cupcakes, decorating Guinness truffles and green cake balls, or garnishing a mug of peppermint hot chocolate.) These homemade sprinkles are vegan, gluten-free, and dairy-free, too!
While it doesn’t take long to whip up the icing, you’ll want to allow plenty of time to pipe the shamrock shapes. The piped sprinkles will also take time to dry—anywhere from one to three days, depending on the temperature and humidity in your kitchen, as well as the sprinkle sizes and shapes you’ve chosen to pipe.

Ingredients for Making Shamrock Sprinkles
To make this homemade sprinkle recipe, you’ll need the following ingredients:
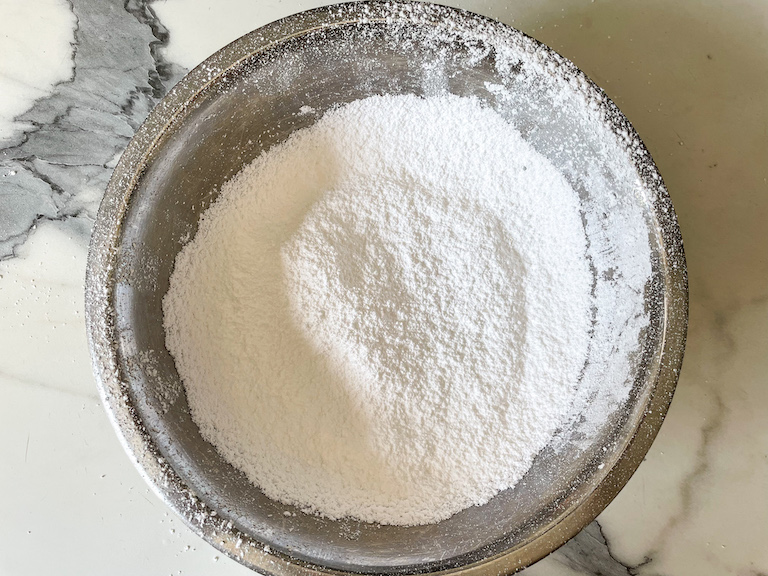
- Confectioner’s Sugar – You’ll need 170 grams (about 1 1/4 cups) of confectioner’s sugar (icing sugar), plus more to adjust the consistency of the sprinkle batter.
- Corn Syrup – You can use corn syrup (I prefer Golden Barrel), light Karo syrup, or liquid glucose.
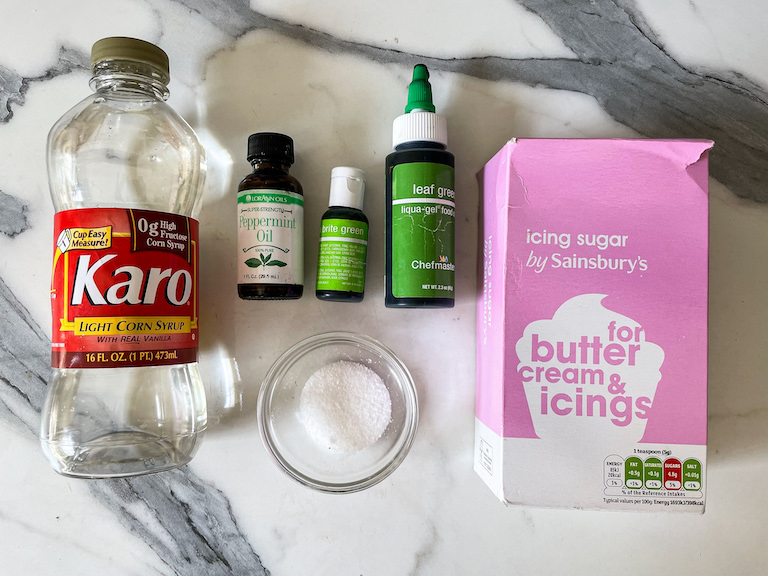
- Peppermint Oil – Add a drop or two of natural peppermint oil for mint-flavored sprinkles ideal for garnishing a peppermint milkshake or mug of peppermint hot chocolate. (Go easy, though—natural peppermint oil is strong!) If you don’t like peppermint, you can flavor your sprinkles with vanilla extract, almond extract, or any other flavoring you’d like.
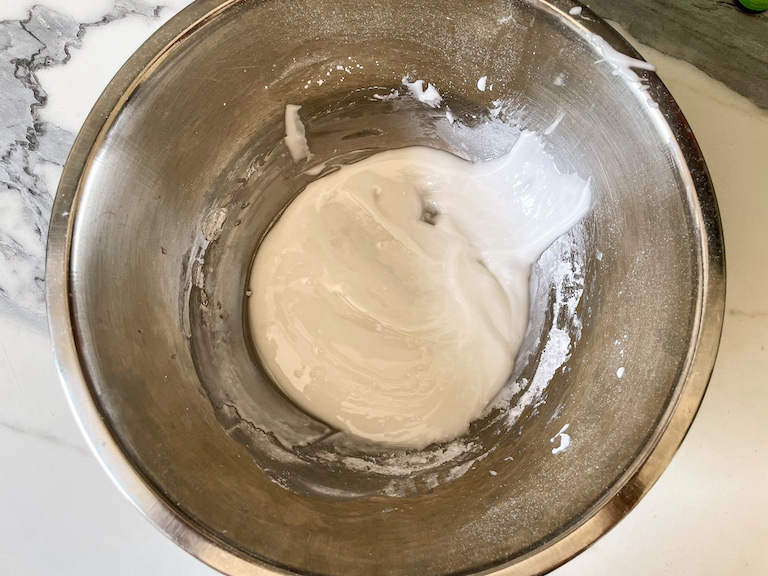
- Green Gel Food Coloring – Be sure to use gel food coloring for this sprinkle recipe, rather than the water-based kind from the grocery store. For this batch, I used Chefmaster’s Leaf Green and Neon Brite Green.
- Salt – A pinch of salt cuts the sweetness of the corn syrup and confectioner’s sugar, and also acts as a preservative.
Special Tools and Equipment
You don’t need much equipment to make homemade shamrock sprinkles, but a few basic tools will help to ease the process:
- Fondant Tools or Toothpicks – To correct small piping mistakes, I like to keep a set of fondant tools nearby. Toothpicks (cocktail sticks) are also great for correcting piping errors.
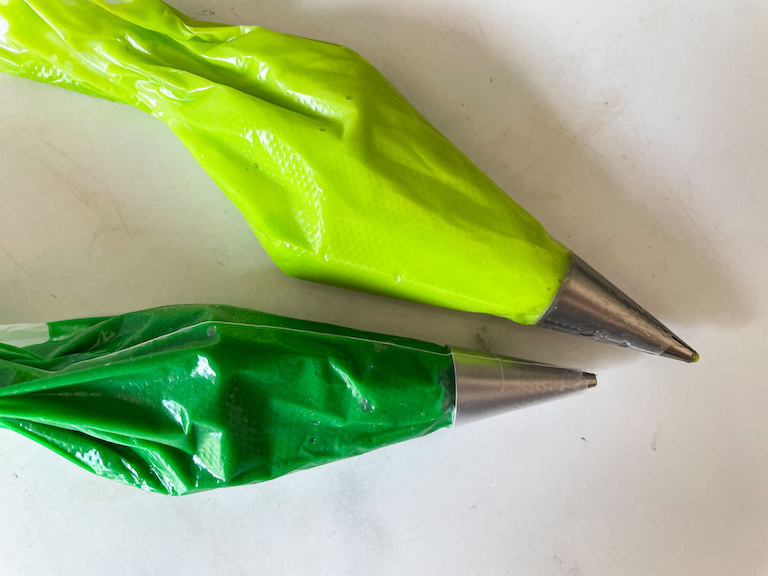
- Piping Bags and Piping Tips – You’ll need one disposable piping bag and piping tip for each color icing. I used 1/8-inch round tips, but you can go slightly bigger or smaller, depending on the shapes you’re planning to pipe.
- Baking Trays – To pipe the sprinkles, you’ll need baking trays lined with parchment, plus masking tape or duct tape to secure it to the tray. When I developed my original instructions for how to make homemade sprinkles, I used a half sheet rimmed baking tray. For this version, I went with several quarter sheet trays. This is really just personal preference, but keep in mind that whichever trays you choose will be out of commission for a few days while the sprinkles dry, so plan your other baking projects accordingly.
- Fine Mesh Sieve – Passing the confectioner’s sugar through a fine mesh sieve ensures that your sprinkle batter stays smooth, without lumps, clumps, or hard bits.
Piping Homemade Sprinkles
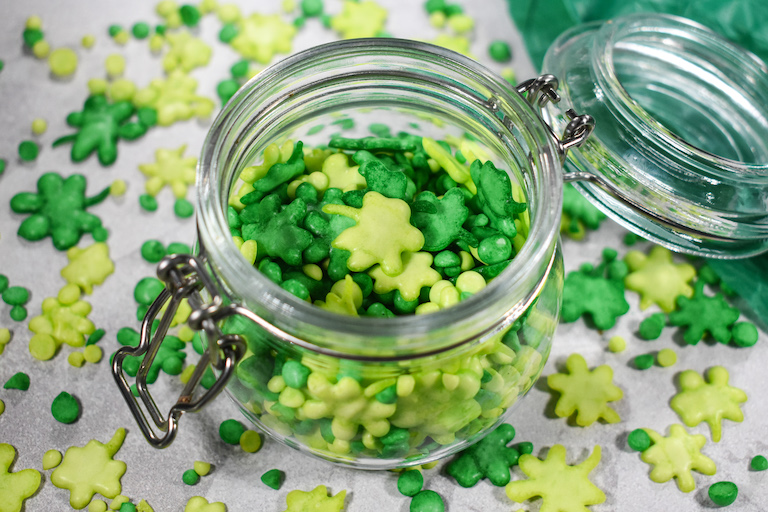
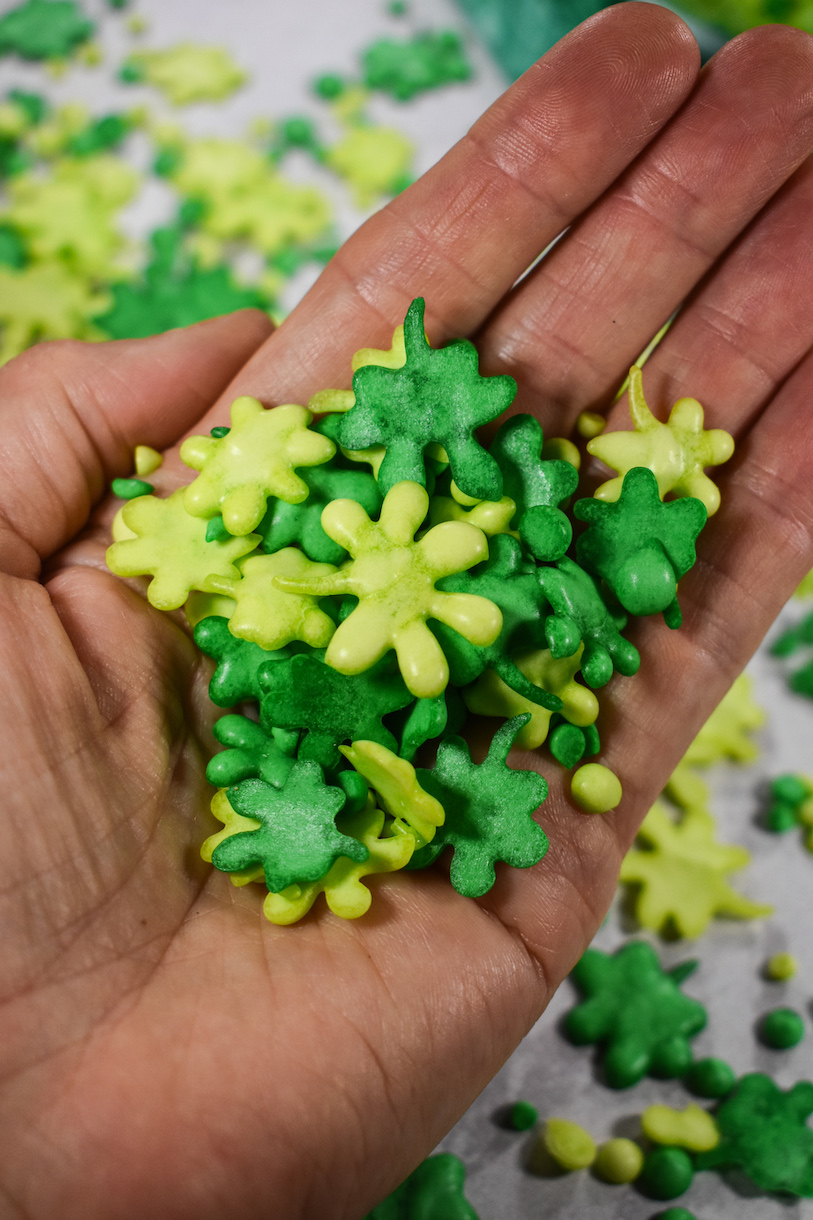
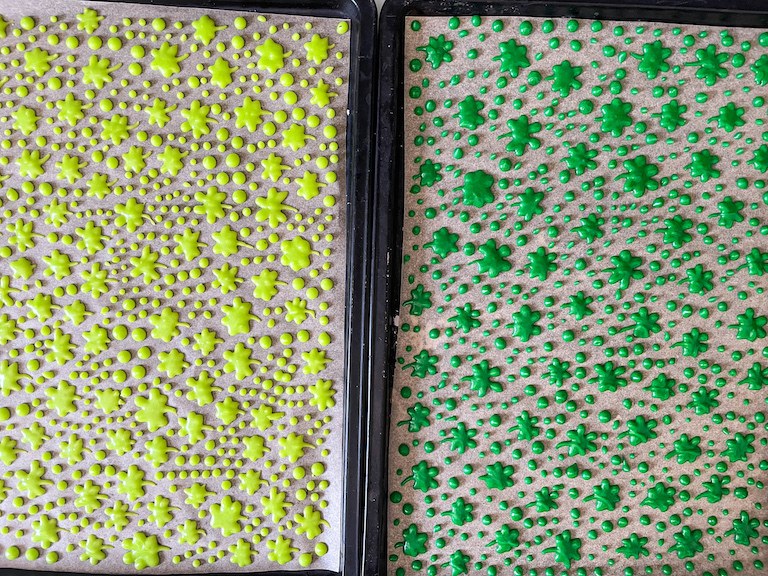
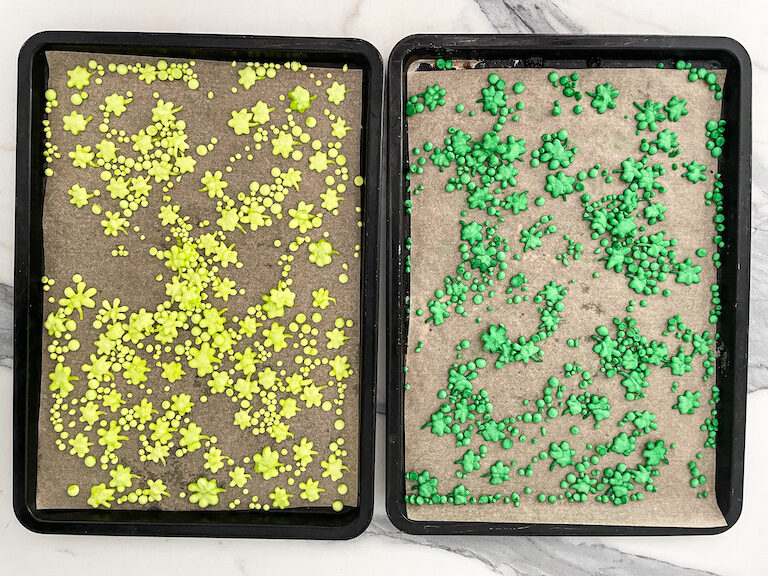
I went with shamrocks and polka dots, but you can also create top hats, gold coins, pots of gold, beer steins, or other Saint Patrick’s Day-themed shapes. Note that if you pipe larger shapes, your sprinkles will take longer to dry.
A piping tip with a round opening around 1/16-inch to 1/8-inch works best. For efficiency, it’s easiest to designate a separate piping bag and tip for each color, rather than washing and reusing the same piping tip.
I recommend adding small tabs of tape to the edges of the parchment to prevent it from moving around as you pipe.
Notes on Drying
Drying homemade sprinkles can take anywhere from a few hours to a few days, depending on the size and thickness of the shapes you’ve piped, as well as the humidity in your kitchen.
You’ll know they’re ready to use when you can shake the tray gently and the sprinkles slide around—if the sprinkles stick to the parchment, they’re not quite ready yet. The icing will also lighten in color and take on a matte appearance. Ready-to-use sprinkles will feel dry to the touch.
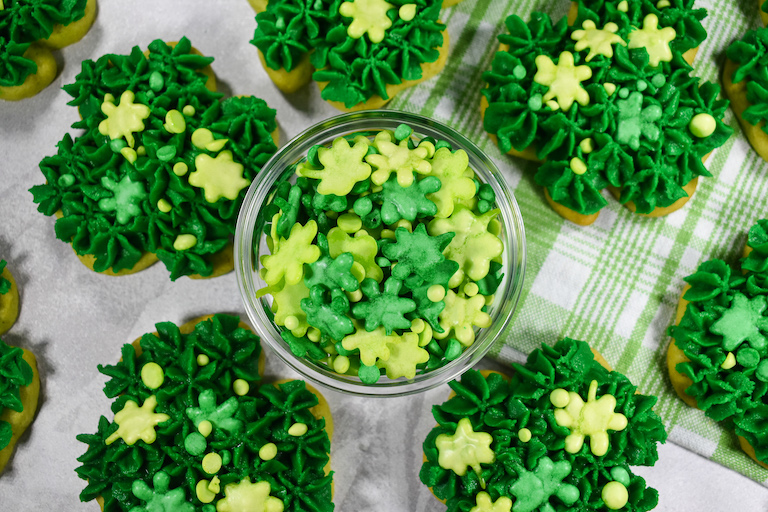
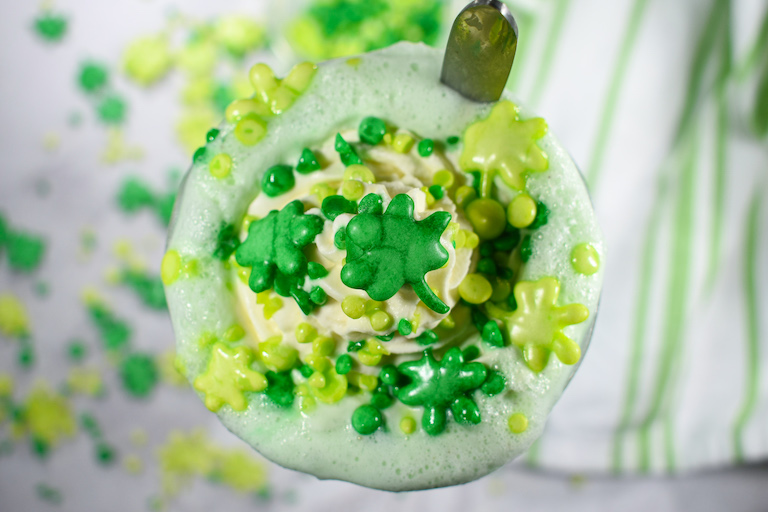
Ways to Use Shamrock Sprinkles
You can use your homemade Saint Patrick’s Day sprinkles to:
- Decorate frosted cupcakes, cookies, buttercream brownies, cake balls, or shamrock Rice Krispie treats.
- Add to a sundae bar for a St. Paddy’s-themed “make your own sundae” party.
- Sprinkle on a slab of green chocolate Lucky Charms bark.
- Mix into a festive green trail mix, along with pistachios, golden raisins, and green M&Ms.
- Use to decorate chocolate-dipped pretzel rods or chocolate-covered pretzels.
- Garnish mugs of peppermint hot chocolate or a homemade shamrock shake.
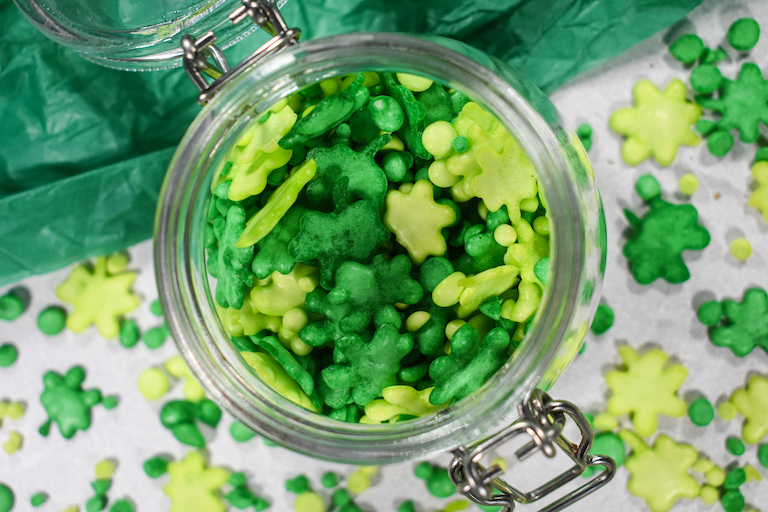
Make-Ahead and Storage Suggestions
Store homemade sprinkles in an airtight container at room temperature for up to one month.
Other Saint Patrick’s Day recipes you might enjoy:
Shamrock Rice Krispie Treats
Lucky Charms Bark
Dark Chocolate Irish Cream Pudding
Peppermint Marshmallows
And if you do make these, or any of my recipes, don’t forget to tag me @bastecutfold or use the hashtag #bastecutfold on Instagram. I always love to see what you’re making!
Saint Patrick’s Day Sprinkle Recipe
Homemade shamrock sprinkles for decorating St. Patrick’s Day cookies, candies, chocolate bark, and homemade shamrock shakes.
- Prep Time: 2 hours
- Drying Time: 1-3 days
- Total Time: 0 hours
- Yield: Approximately 100 - 125 grams (3/4 - 1 cup homemade sprinkles) 1x
- Category: Miscellaneous
- Method: No Bake
Ingredients
170 grams confectioner’s sugar (1 1/4 cups), plus more to adjust consistency
20 milliliters cold water (1 1/2 tablespoons), plus more to adjust consistency
10 grams liquid glucose or corn syrup (2 teaspoons)
1–2 drops peppermint oil, or to taste
Pinch salt
Green gel food coloring (I used Leaf Green and Neon Brite Green)
Instructions
Line a large baking tray, or 2-3 smaller trays, with parchment. If necessary, add tabs of tape at the corners to prevent the parchment from slipping as you pipe.
Fit a piping bag with a 1/8-inch round tip. You’ll need to prepare a separate piping bag for each sprinkle color you plan to make.
With a mesh sieve, sift the confectioner’s sugar to remove any lumps or clumps.
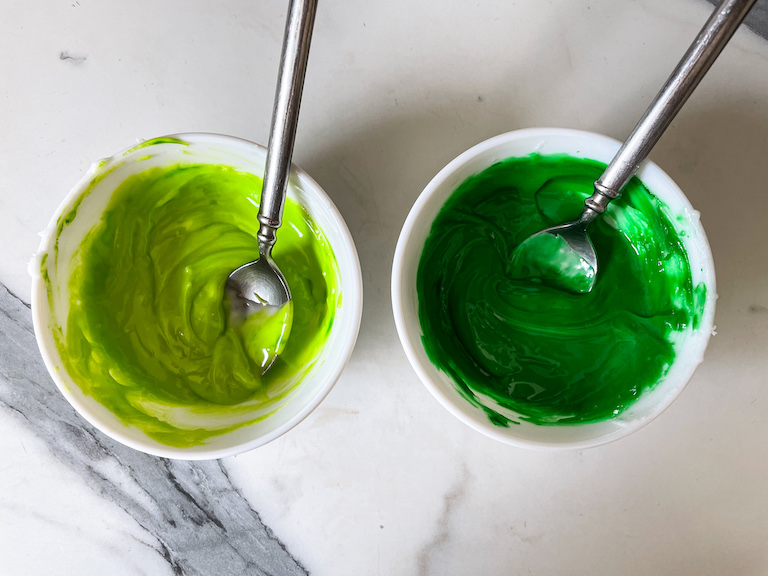
In a large bowl or the bowl of a stand mixer, combine the confectioner’s sugar, water, liquid glucose, and salt. Mix on medium-high speed until well combined. Mix in the peppermint oil, and adjust to taste.

If necessary, add more sugar or water to adjust the consistency. The icing should be easily pipeable, but thick enough to hold its shape.
Divide the mixture into bowls, with a separate bowl for each color you plan on making. (I made two shades of green.)
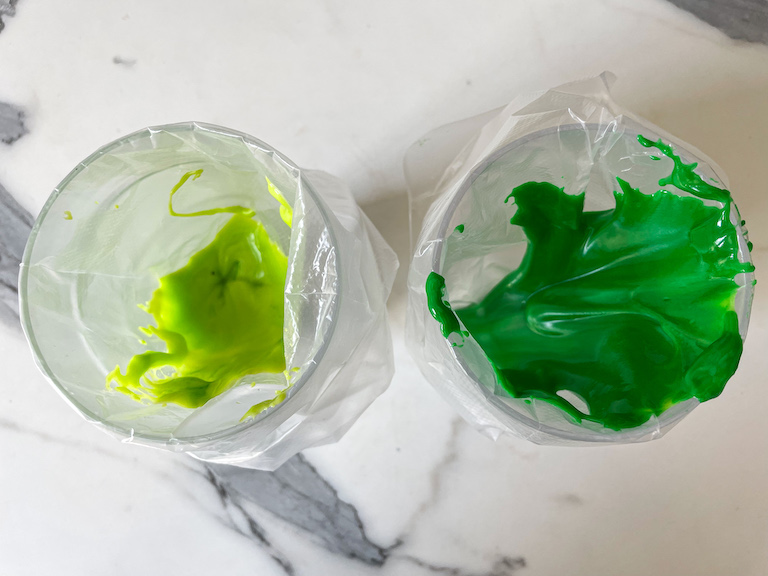
Scoop into prepared piping bags.
On prepared tray, pipe the mixture into shamrocks, or other shapes as desired. (I piped a mix of shamrocks and dots, in a variety of sizes.)

Set aside and allow to dry, uncovered, until lighter in color and dry to the touch. This can take anywhere from 1 – 3 days, depending on the size of the sprinkles you’ve piped and the humidity levels in your home. (For more on drying times and techniques, see my notes in the post above.)
Store homemade sprinkles in an airtight container at room temperature for up to one month.