Nutella Wreath Hand Pies for Christmas
This post may contain affiliate links. Please read the disclosure policy to learn more.
Thank you for supporting this blog!
Stuffed with Nutella and decorated with green glaze (plus lots of sprinkles and sparkles!) these Christmas-inspired Nutella wreath hand pies will add a dose of festive cheer to any party or holiday brunch.

Key Ingredients
- Nutella – Nutella is a jarred spread made from chocolate and hazelnut. The brand-name and store brand versions will both work (I think they taste pretty much the same!) I’m a big Nutella fan, but it does contain nuts. For those with nut allergies, I suggest filling the wreaths with something like cookie butter or Biscoff spread instead. And if you have some Nutella left over, save it to make a Nutella puff pastry pizza or a pan of my Nutella brownies.
- Shortcrust Pastry – I used store-bought shortcrust pastry (pie crust, in the US) for a convenient shortcut. If starting from frozen, remember to allow time for the pastry to thaw according to the manufacturer’s instructions. You can make these hand pies with homemade shortcrust pastry—it’s great for using up scraps from pie-making or other recipes.
- Colors and Flavors – I tinted my glaze with Chefmaster’s Leaf Green gel coloring. (Use gel food coloring rather than water-based to tint your glaze; you’ll achieve a much more vibrant shade of green, without adding too much liquid.) For flavor I added a tiny bit of orange oil, which provides a really nice contrast to the chocolatey Nutella. If desired, you can choose another oil or extract, like lemon or peppermint, or go for a pure vanilla flavor instead.
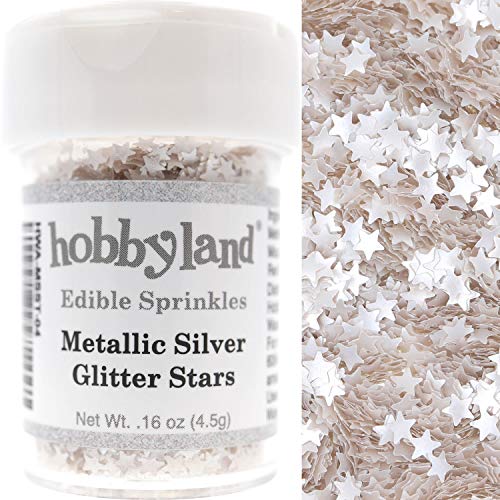
- Festive Decorations – Christmas M&Ms, cinnamon red hot candies, Christmas sprinkles (or homemade sprinkles!), silver cake decorating balls, edible glitter, or edible foil stars will all make your wreath pastries sparkle and shine. And if you have some leftover decorations, save them to mix into a batch of Christmas Chex mix.

Tips and Tricks
- Vary the cutter size. You have some flexibility with the size of your round cutters. I used a 3.75-inch cutter for the wreath, and a 1.25-inch cutter for the hole, but slightly smaller or larger cutters will also work. Do not go too small, though, or you won’t have enough room to pipe the Nutella.
- Briefly soften the pastry. Although it’s important for your shortcrust pastry to stay cold, allowing to sit at room temperature for 5-10 minutes prior to unrolling will help to prevent the pastry from cracking or breaking.
- Choose a thin pastry brush. A smaller brush (1/2-inch or so) will allow you to apply the egg wash neatly, without it mixing with the Nutella and causing a mess. For precision, I prefer natural-bristled brushes rather than silicone.
- Use a fondant tool. A fondant tool (usually used for cake decorating) can help with sealing the inner edges of the wreaths, and will also allow you to create a fun scalloped pattern around the outer edges. Fondant tools are inexpensive and easily purchased in a set of assorted shapes and sizes.
- Crimp, then brush. Crimp and seal the edges of the pastries first, and then apply the egg wash. Egg-washing first will cause your fork or fondant tool to stick to the pastry.
- Save for dessert. Because these hand pies run on the sweeter side, they’re best reserved for dessert or a mid-afternoon snack. They also look delightful on a pastry tray at a holiday party, open house, or cookie swap!

Making and Applying the Glaze
It will take some adjustment to achieve the perfect piping consistency, so keep a little bit of extra milk and confectioner’s sugar nearby. Before piping the glaze onto your wreaths, I suggest doing a test on a sheet of parchment:

If the glaze seems runny or spreads very quickly, whisk in a bit more confectioner’s sugar; if too thick, add more milk. When adjusting the consistency, use a teaspoon to add the milk and sugar in small increments. Do not pour directly from the bag or container, or you run the risk of ruining the batch.
The glaze should be mostly (but not completely) set before you apply the decorations. If it is still too wet, the larger decorations will not stay in place; if you wait until it sets completely, it will crack when you add the candies.


Christmas Wreath Nutella Hand Pies
- Total Time2 hours 20 minutes
- Yield10-11 3-inch round wreaths 1x
Wreath-shaped Nutella hand pies decorated with green-tinted glaze, plus assorted sprinkles and sparkles!
Ingredients
Hand Pies:
2 sheets store-bought shortcrust pastry or pie crust, each trimmed to 10 x 14 inches
1 egg, lightly beaten
6 – 7 tablespoons Nutella
Glaze:
150 grams (1 1/4 cups) confectioner’s sugar, plus more to adjust consistency
5 teaspoons whole milk, plus more to adjust consistency
1-2 drops orange oil or other flavoring of choice
Green gel food coloring
To Decorate:
Cinnamon Imperials, M&Ms, or other candies
Christmas sprinkles, edible glitter, edible stars, or other decorations
Instructions
Preheat oven to 400° F (205° C). Line 2 half sheet rimmed baking trays with parchment or silicone mats.
On a rolling mat or lightly floured countertop, unroll 1 sheet of shortcrust pastry. With a 3 1/2 – 4-inch round cutter, cut the pastry into discs.


With a 1 – 1 1/4-inch round cutter, cut a hole in the center of each disc to form an open wreath shape.

Repeat with the second sheet of pastry, then use a rolling pin to re-roll the scraps and cut the remaining discs.

Arrange half of the wreath shapes on prepared tray.

Scoop Nutella into a piping bag fitted with a 1/2-inch round tip.

Pipe a ring of Nutella in the center of each wreath shape, allowing a 1/2-inch border on both the inner and outer edge of the ring.


With a pastry brush, lightly brush beaten egg around the inner and outer borders.

Top each wreath with a second wreath shape, slightly stretching the pastry to fit over the Nutella.

Use your fingers to gently seal the edges of each wreath, sealing the inner edge first, then use a fork to crimp the edges of each disc. (If desired, you can also use a fondant tool to create a scalloped edge.)


With a pastry brush, brush the tops of the wreaths with beaten egg.


Bake in preheated oven for 20 minutes, or until deeply golden brown.

Allow to cool on tray for 5 minutes, then transfer to a wire rack to cool completely, about 30 minutes.

Glaze:
Add the confectioner’s sugar to a small bowl.

Whisk in the milk and orange oil. Mixture will be extremely thick.


Whisk in the green gel coloring.


Add milk, 1/4 teaspoon at a time, until glaze is just thin enough to pipe. (It should still seem very thick, and will stick to the whisk when lifted from the bowl. If glaze drips rapidly from the whisk, it is too thin. If this happens, add additional confectioner’s sugar by the teaspoonful to adjust consistency.)


Scoop into a piping bag fitted with a 1/2-inch round tip.

Pipe a thing ring of green glaze around the top of each wreath. Use a light hand when piping; the glaze will spread.


Allow to set for 1-2 minutes. Decorate with red hots, M&Ms, sprinkles, or other toppings.


Serve Nutella wreath hand pies at room temperature.

Store leftovers in an airtight container at room temperature for up to 3 days.


- Prep Time: 90 minutes
- Cooling Time: 30 minutes
- Cook Time: 20 minutes
- Category: Turnovers and Hand Pies
- Method: Oven

Make-Ahead and Storage Suggestions
Do not attempt to make the glaze in advance. It’s important to prepare it just prior to glazing the pastries, otherwise it will begin to set and crack in the bowl.
To freeze: Layer baked, unglazed pies in an airtight container between sheets of parchment and freeze for up to three months. Defrost and glaze just prior to serving. I don’t recommend freezing glazed and decorated hand pies—moisture can cause the icing to turn sticky, and/or colors from the decorations to bleed as the pies thaw.
Other Christmas Recipes You Might Enjoy
Traditional Pennsylvania Dutch Sand Tarts
White Chocolate Peppermint Bark
Italian Rainbow Brownies
Festive Cranberry Jelly Candies
Chocolate Cornflake Wreaths
Peppermint Cake Roll
Christmas Tree Brownies
Cornflake Holly Leaf Cookies
And if you do make these, or any of my recipes, don’t forget to tag me @bastecutfold, or use the hashtag #bastecutfold on Instagram. I always love to see what you’re making!